Thermaltake Level 10 GT Full Tower PC Case Review
Inside the Level 10 GT
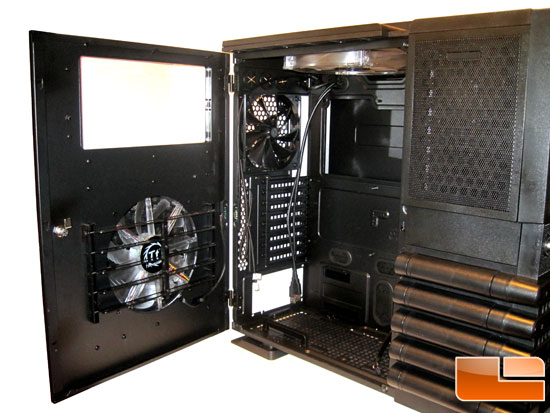
The side panel swings open to the rear and can be removed to give full access to the motherboard and power supply area without the door in your way or flopping around on your workbench.
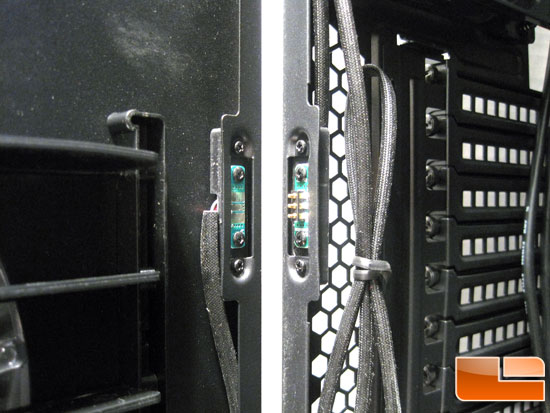
To help with wire routing and keep the case tidy, power to the side panel fan is provided by a pair of PCBs that touch when the case is closed up. The case side of the connection is already pre-run for you to the case fan controller.
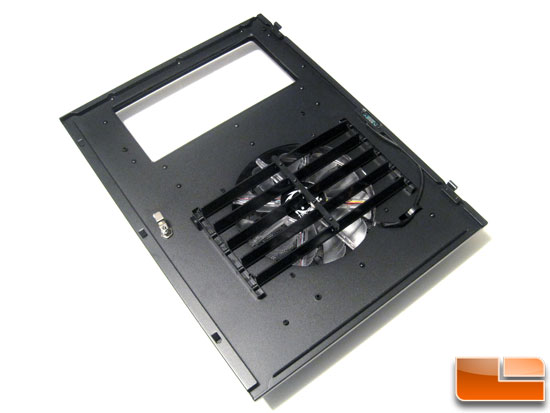
On the inside of the door is a set of louvers. These will allow you to direct the air flow coming from the fan into the case.
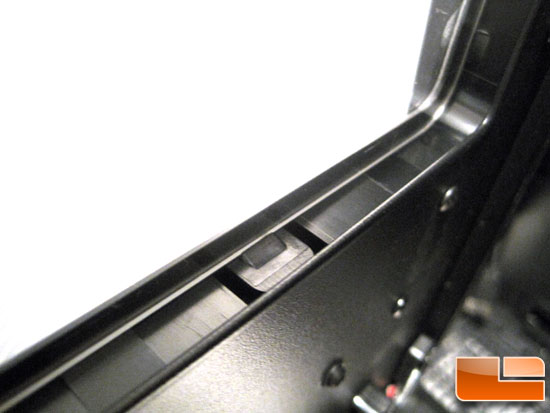
While working on the review I almost knocked over the case; in the process of catching it I managed to push the side panel window out. After I stopped swearing, I looked closer at the window area. The side panel window is held in with some clips. What is nice about this is if you wanted to replace the window with a different color plastic, or even etch the stock window piece, it can be removed and put back in.
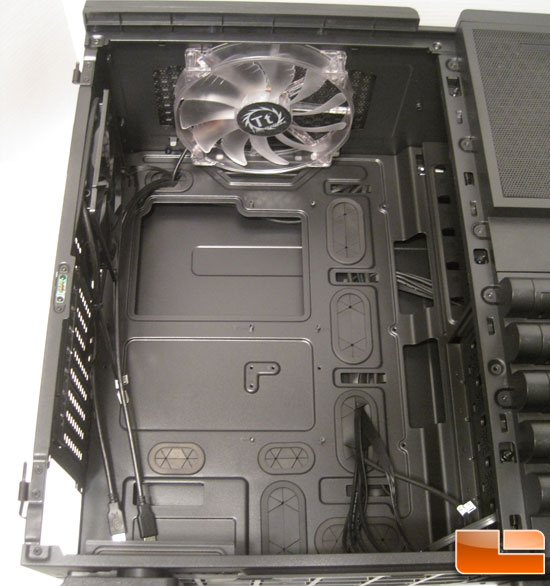
With the side panel out of the way we have a good look inside. The motherboard tray has plenty of cable management holes, as well as a rather large CPU cut out. All the case wiring for the fans has been sleeved for a nice clean look.
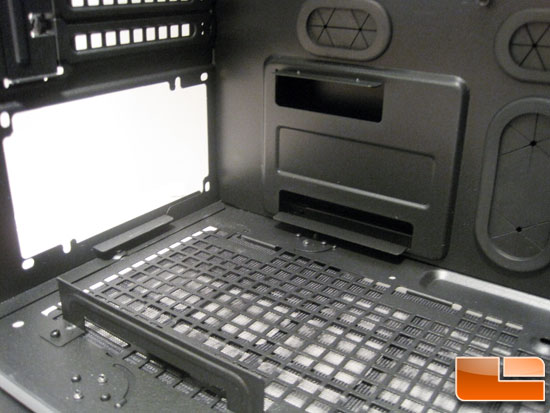
The power supply area has small tabs on the sides and rear that raises the PSU about 1/4″ off the bottom of the case. There is also an upper tab on the motherboard side. That tab could make things interesting for those with long body power supplies, as the PSU will need to be set in front of that tab and slid into place. With the hard drive cages not being removable things could get a little tight. Standard body PSUs shouldn’t have any issues.
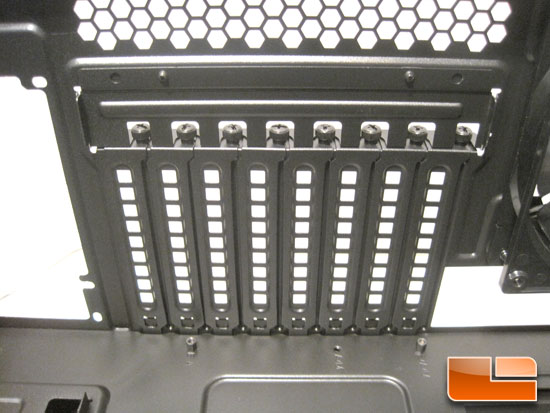
Here we have the expansion slots. There are 8 slots in all, and all the slot covers are vented. What is a little different than most full tower cases is the hold-down screws are located outside of the case. I have seen this on small form factor cases, but not on a case of this size.
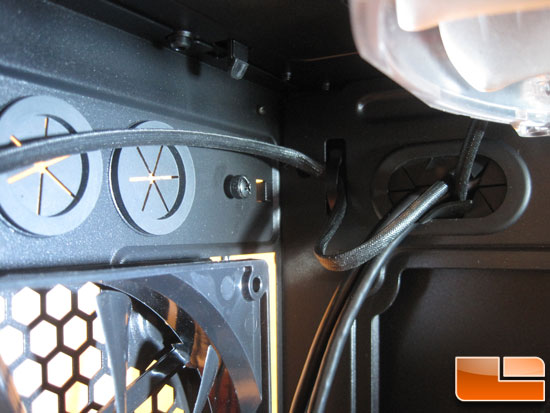
In the top back corner we can see the thumbscrew for the cable locking tab on the back of the case. This could be interesting to reach if you have a radiator or a large CPU cooler like the Noctua NH-D14. I understand why it is on the inside, but buried to the back of the case could make using it difficult for folks with large hands.
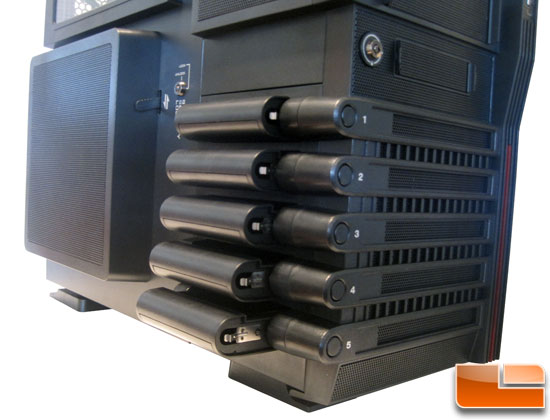
To get the hard drive trays out you first unlock the drive bays, then on each bay press the button next to the number; this releases the bay from the drive cage.
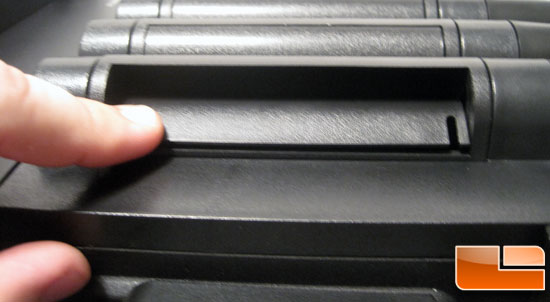
To hide the pull handle, and keep the rounded end look, the drive tray has a spring loaded door that is pushed in to reveal the tray’s pull handle.
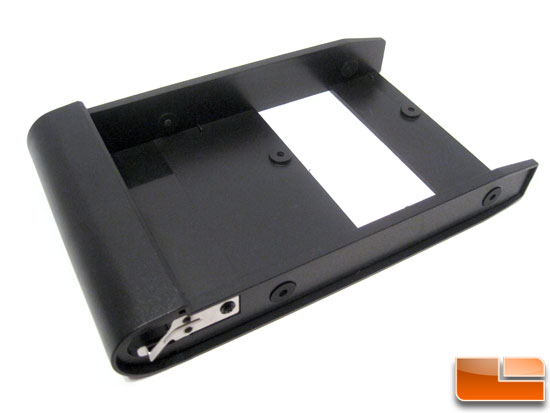
Each drive tray is set up for mounting either a 2.5 or 3.5 hard drive. In the front edge is a small spring clip. This is what latches the tray into the drive cage.

Comments are closed.