Gigabyte X58A-UD7 Motherboard Review
X58A-UD7 Board and Box
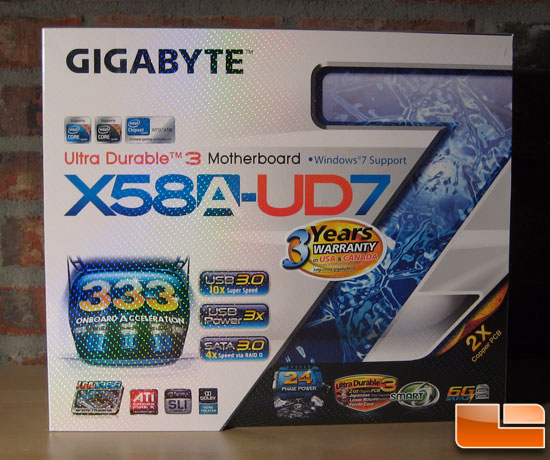
From the start Gigabyte makes sure you know that the board features USB 3.0 and Sata 6Gb/s support. I’ve mentioned it before but it is worth repeating; Gigabyte’s box art has gradually evolved into something interesting in my opinion.
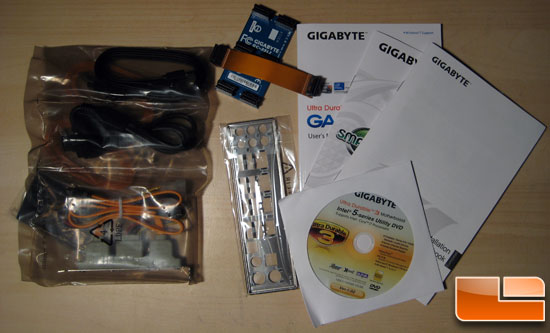
The peripheral bundle for the X58A-UD7 is quite replete with a variety of connectors to fully utilize everything onboard. Most notable are the 2-way and 3-way SLI connectors. Otherwise you have you normal variety pack with SATA, PATA, and eSATA cables.
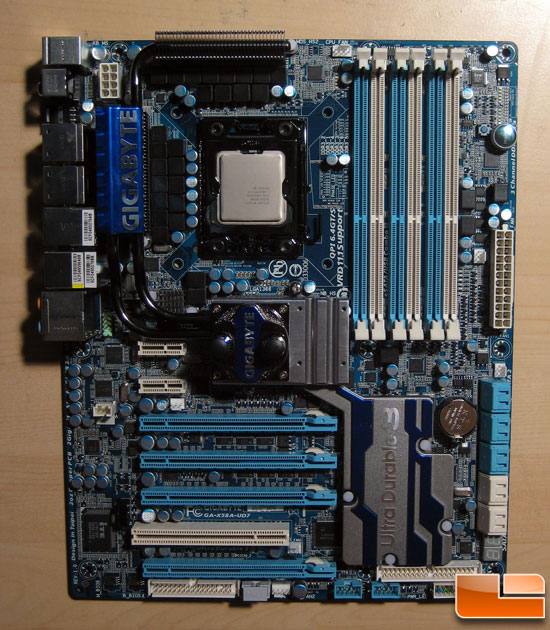
From the top down you have to admit the Gigabyte PCB stands out compared to everyone else. Some love it, some hate it, but that blue with the light blue connectors and white contrasts sure does pop. Without going into too much detail I’d give the layout an overall thumbs up. I’m so glad they at least stuffed those pesky PATA/FDD connectors at the bottom edge of the board, maybe they’ll break off and float away with the next revision.
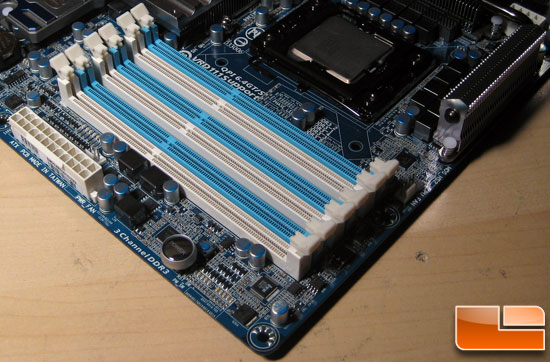
The X58A-UD7 supports up to 24GB of DDR3 with supported speeds of DDR3-800, 1033, 1333, 1600, 1866, and 2133. Here is a list of the officially supported memory modules. Besides the memory slots we have the power and reset buttons and the 24 pin ATX connector. I like the large power button but I’d love an equally large reset button. There are also a variety of LED arrays on this area of the board. In the bottom right corner are the overclock LEDs which indicate the level of overclock. Next to them are the phase LEDs which indicate the CPU load. With the Dynamic Energy Saver enabled this will also give you an idea of the amount of phases that are running. Near the ATX connector are the NB and DDR3 phase LEDs that indicate the load on these sub-systems and the number of phases that are operational.
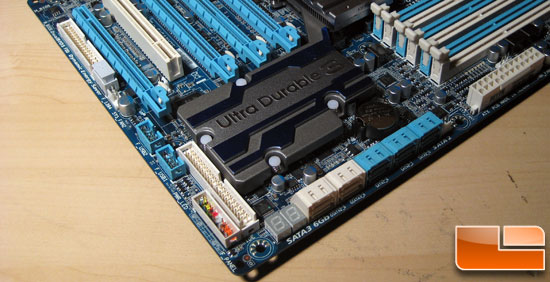
The bottom right corner of the board is dominated by the heatsink covering the ICH10R southbridge and associated SATA 3rd party chips. What you can see are the 10 SATA ports available, the LED POST output, the pin panel for the power and reset switches, the IDE connector, and two USB connectors providing an additional 4 USB 2.0 ports.
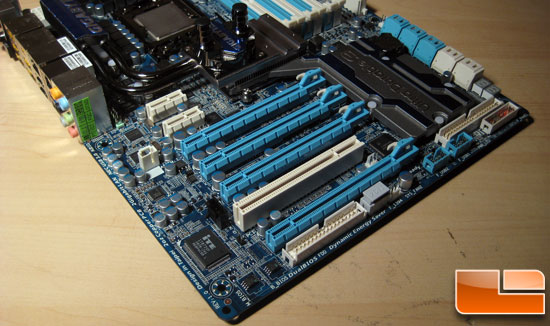
Overall I approve of how the PCIe slots are arranged on the X58A-UD7. I do like having 4 physical x16 slots even if they are only x8 electrical. However, in reality you only have 3 usable x16 slots due to the high-performance cards utilizing dual-slot heatsinks and the spacing of the PCIe slots. Instead of that unusable PCIe x8 slot I’d have preferred a PCIe x8 slot where the 2nd PCIe x1 slot is. This way you could at least run 3 dual-slot cards and a single slot Physx GPU. This might come off as a bit silly, I won’t deny that, but it would have been a nice option. One little thing to point out are the dual BIOS chips located in the bottom left corner of the board. If your main BIOS chip is trashed or corrupted the board will auto recover to prevent you from bricking the board.
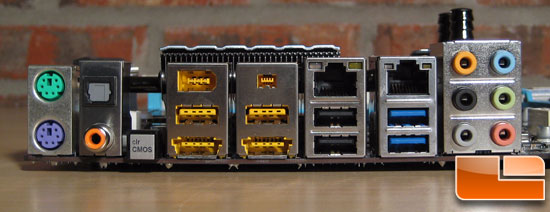
The I/O panel on the X58A-UD7 is packed full of ports. The blue USB ports are the USB 3.0 ports while the black and yellow ports are USB 2.0. The bottom two yellow ports are dual USB and eSATA ports, a rather novel idea that I’ve seen among a few new boards. Audio output ranges from the 6 audio jacks to the optical and coaxial audio outputs. Still hanging on like those PATA pins are a set of PS/2 ports. Conveniently placed is a clear CMOS button which made me realize there isn’t a clear CMOS button on the actual PCB. This is a nice step forward, usually they are placed in an inconvenient place especially when running multi-GPU systems in a case.
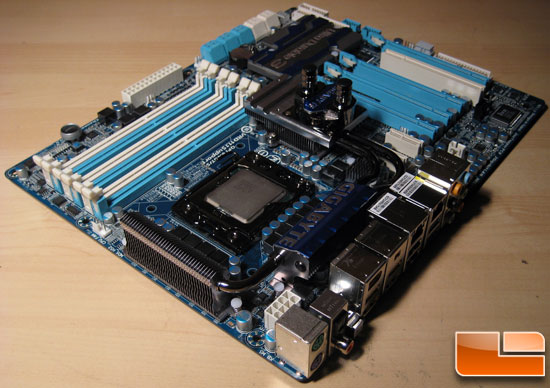
Last up is the CPU socket and associated PWM. The central controlling chip is an Intersil ISL6336a 6 interleaved phase controller with 12 Intersil ISL6611a phase doublers to provide a total of 24 phases. I am not a PWM designer but if I understand correctly it is through tie ISL6611a chips that Gigabyte is able to dynamically shut off various PWM phases. This also gives the ISL6336a controller the ability to blend the various phases together in order to reduce the ripple currents and thereby the amount of bulk capacitors needed. In short though Gigabyte has over engineered this PWM with a general application of excess. Besides the 24 phase CPU PWM there is also a 4 phase PWM for the vtt/vQPI to power the CPUs memory controller. This uses an Intersil ISL6312 4 phase controller.
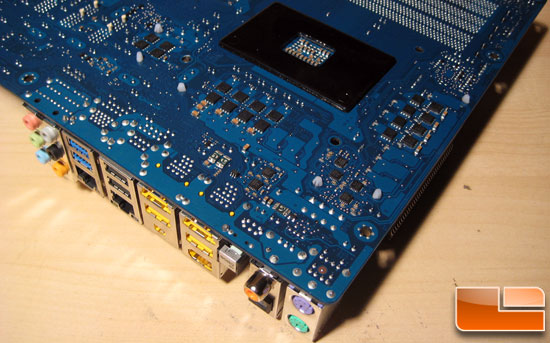
The backside of the socket contains an additional 10 mosfet pairs, 8 for the CPU and 2 for the IMC. You’ll notice there are no heatsinks on these mosfets. I haven’t got any hard data on this but I’m confident they receive enough cooling through the PCB which is connected to the mosfets on the top of the board through which the heat will travel to the heatsinks. Add in the fact that there are 24 phases with each phase dissipating a minuscule amount of waste heat and it all adds up.
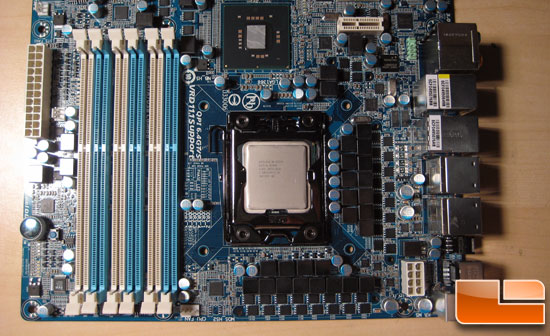
Popping the heatsink off gives us a better view of the PWM with all the mosfets clearly visible.
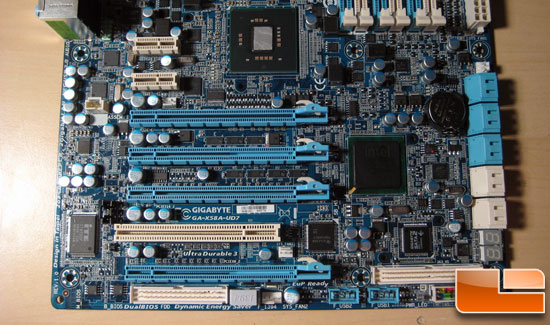
Hiding underneath that massive heatsink was the ICH10R southbridge, the Marvel 9128 SATA 6Gb/s controller, the Gigabyte SATA2 SATA 3Gb/s controller, and the Texas Instruments TSB43AB23 FireWire controller.
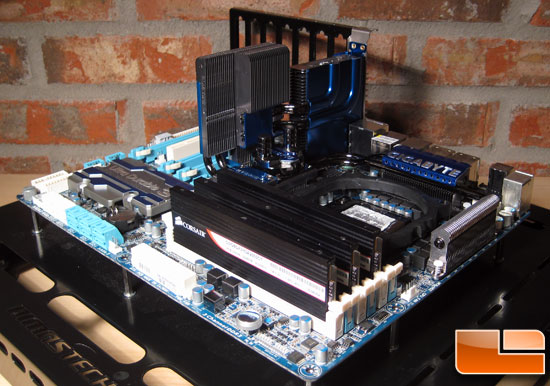
The last picture I have to share is of the hybrid heatsink provided with the X58A-UD7. This combination of a waterblock(with 3/8″ fittings) and heatpipe connected heatsink first showed up with the EP45T-Extreme years ago and it has become a standard peripheral with Gigabyte’s flagship boards since. Back in the day when the memory controller was on the northbridge I sort of understood the purpose of such a heatsink. Now though it seems it is either a relic or a great idea for running the system passive. Think about it, run water on the CPU and add this gigantic heatsink to help dissipate the heat from the mosfets since they’ll be getting little or no airflow. However there is one problem.
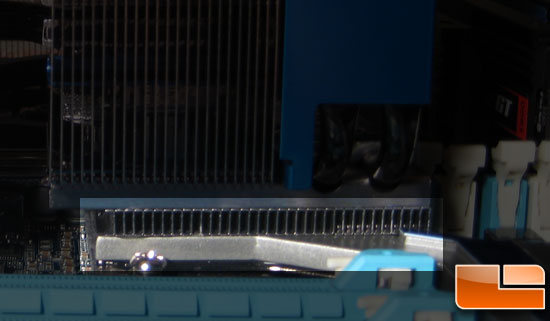
You can see in the visible area that the main heatsink has a layer of concealed fins between the X58/ICH10R heatsink and the heatpipe assembly connecting the mosfets and the hybrid heatsink. I’m not trained at all in heat transfer theory but common sense would dictate that having this be solid rather than composed of thin fins would assist in heat transfer. I’m not saying it doesn’t work, the heatsink system does the job, there just is room for improvement.

Comments are closed.