Case Labs MAGNUM M8 Case Review
By
Building inside the MAGNUM M8
This case is obviously targeted at the higher end of the enthusiast market with a focus on maximum options. The trade off for this modularity is that the build will take a bit longer and requires a screwdriver. We gladly will give up the more common tool free designs to gain the optional features the Case Labs MAGNUM M8 provides.
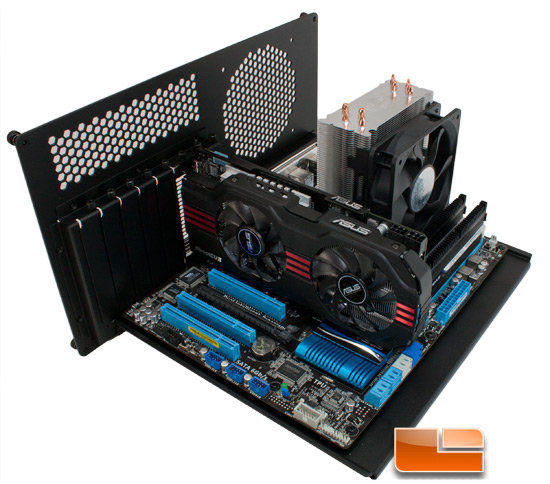
Installing the motherboard, processor, cooler, and GPU could not be any easier since you simply assemble all this on the removable tray and slide it back into the case.
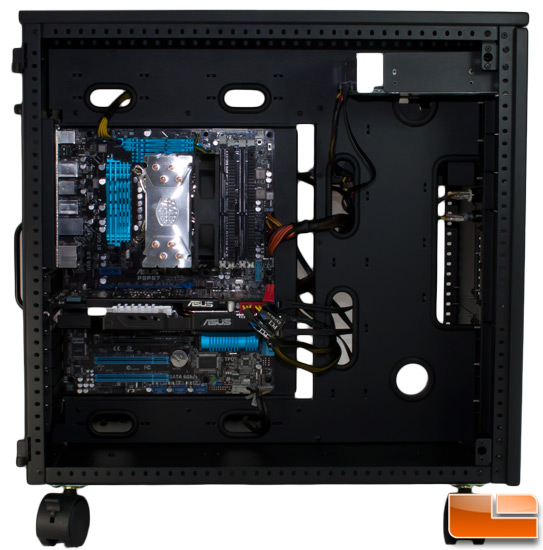
This is a full ATX motherboard but you can see how the M8 makes it look like a micro board. This case has plenty of room for the majority of enthusiasts today. We installed two of the included brackets on our DVD drive and using the thumb screws attached it to the top 5.25″ slot of our MAGNUM M8.
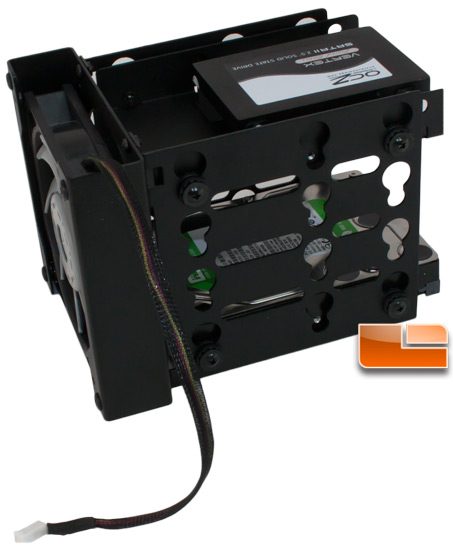
Next we mounted our SSD in the SSD tray and installed both that and our 2TB drive in the rubber isolation mounts. Then we installed the entire cage on the PSU side of the case.
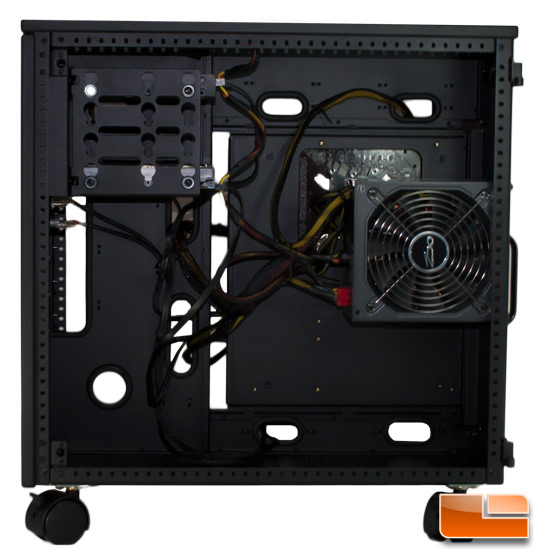
The final step in our Case Labs MAGNUM M8 install was to mount the PSU with another four thumb screws through the thick back of the case. Jim said the aluminum is more than thick enough to support the weight of even the larges PSU’s on the market today but he is not sure about the strength of the threads in the side of the PSU. If you are concerned about the weight and strength of your PSU threads there is yet another option, a PSU Support Bracket ($10.95).
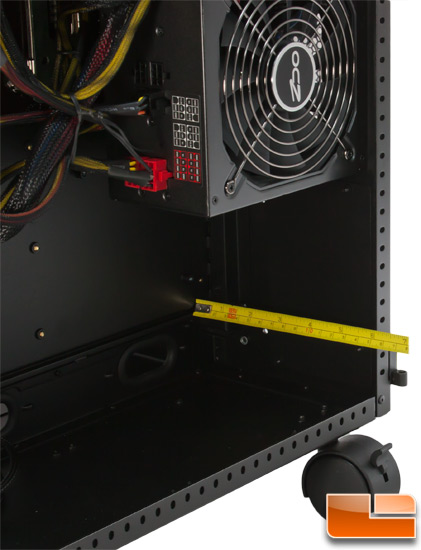
Unlike most cases that provide 1/2″ to 2″ of space behind the motherboard, the M8 gives you just a hair more than 6″ (155mm).
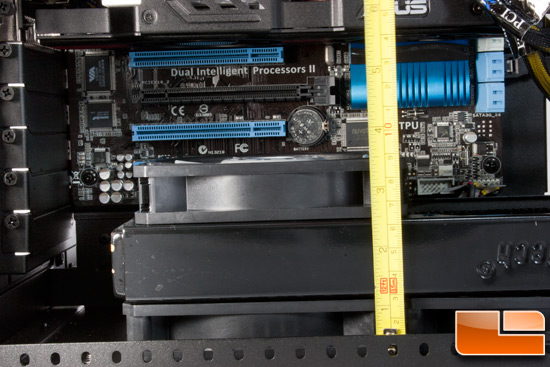
This case is a breeze to install in with TONS of room. While we did not have the time in our schedule to do a full water cooling installation in this case we did use a spare Swiftech MCR320-QP radiator we had laying around to explore a few options. Between the floor and edge of the motherboard is about 3″ (80mm). This radiator is 34mm high with two 25mm AP-15 fans for push pull and you can see we are just about 25mm above the bottom of the motherboard.
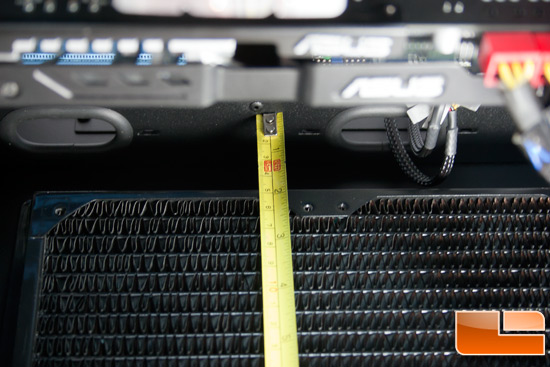
While that sounds bad, we still had 1 3/4″ (45mm) between the motherboard and the edge of the radiator. If you wanted to place this radiator / fan combination in front of the bottom edge you could pull it off. Or with the casters on you could simply place the bottom fans on the outside of the case assuming you are not on carpet.
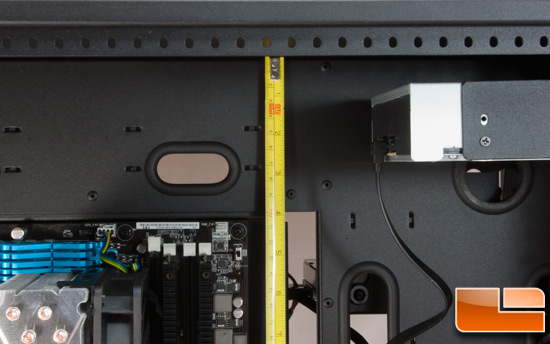
The top has just shy of 4″ (100mm) of space which gives you plenty of room for either push or pull configuration if you are planning a thick radiator such as the XSPC RX360 or push / pull with something like the Swiftech pictured. If you use both top 360mm ports and both bottom 360mm ports along with the optional side horizontal 360mm radiator mount this case can hold a whopping five 360mm radiators and keep them all internal for 1800mm worth of cooling surface.
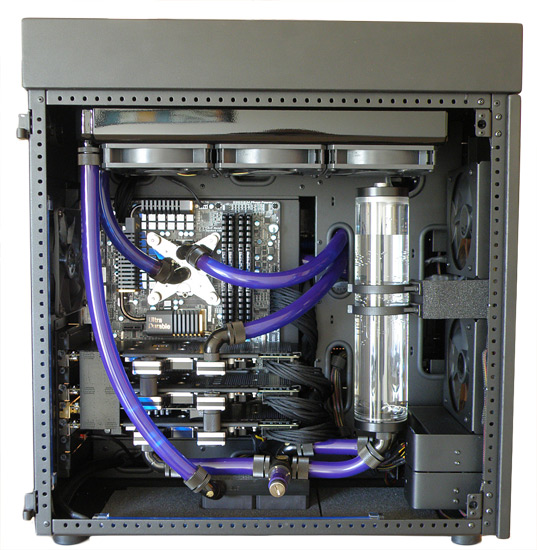
Tri-SLI GTX580’s, i7-2600k, and dual pumps and radiators.
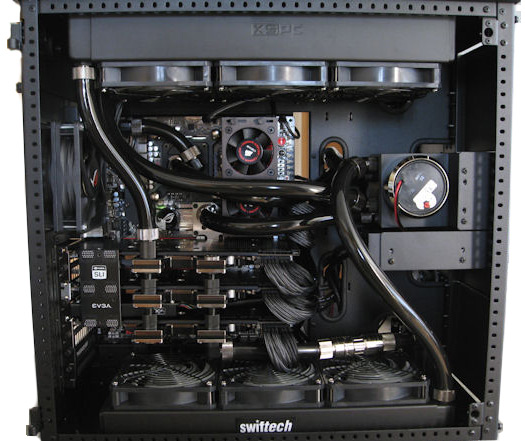
Tri-SLI GTX580’s, i7-2600k, and dual pumps and quad radiators.
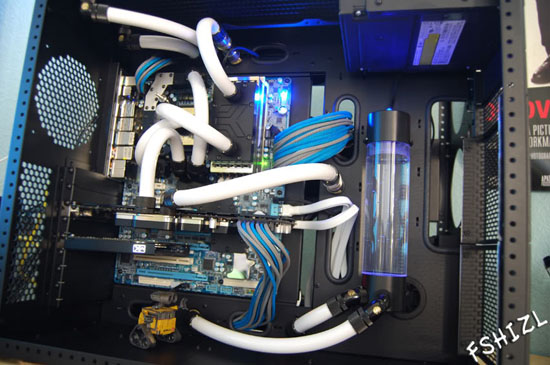
To show you the real potential of what can be done with this amazing case given enough time we grabbed a few community build pictures from OverClock.net. The top MAGNUM M8 has the extended top while the other two images are standard M8 cases.

Comments are closed.