Coolink GFXChilla VGA Cooler – Cooling The Radeon HD 4850
Installing the GFXChilla

Installing the Coolink GFXChilla VGA cooler was very simple and took under ten minutes to change the reference heat sink on a Sapphire Radeon HD 4850 to the GFXChilla. We figured out what mounting holes to use by placing the card over the holes and visually seeing how things lined up. We then screwed in the four mounting screws into the base and placed some washers on the card to insulate the cooler from the PCB.
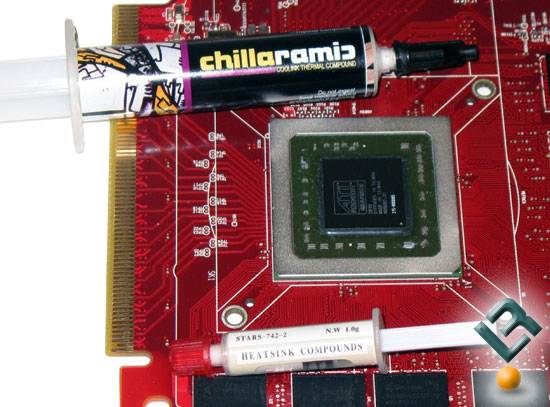
With the heat sink ready to be attached we applied the thermal compound to the GPU after we removed the original compound. The GFXChilla comes with a 1 gram tube of Stars 742-2 heatsink compound, but we passed on using it since Coolink sent out a tube of their recently released Chillaramic thermal compound. Since Coolink has their own thermal compound we were shocked they don’t include a sample with their GPU coolers, but maybe they will down the road.
After the Coolink Chillaramic thermal compound was applied we placed the cooler onto the card and tightened the four screws with spring nuts and washers while alternating screws to make sure the pressure was even across the GPU core. That was it for installation and it was completed in well under ten minutes! The screws are pretty big and stick out the back of the card a good distance.
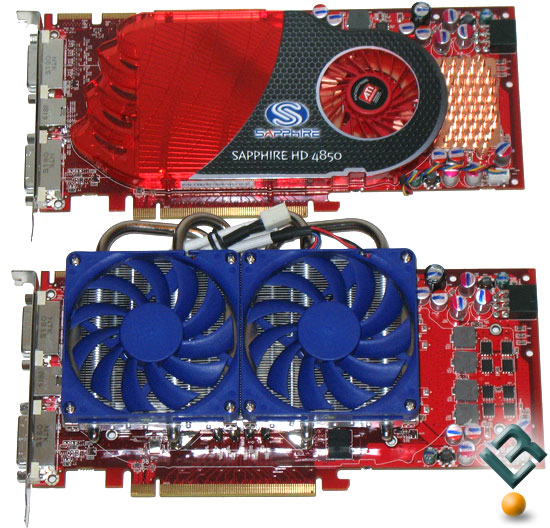
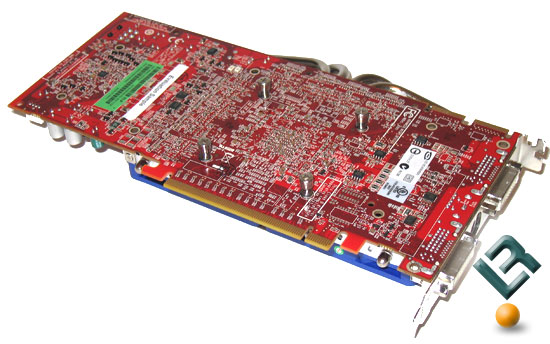
With the Coolink GFXChilla installed we placed it next to another Sapphire Radeon HD 4850 to show what it looks like compared to a stock card. The original Sapphire Radeon HD 4850 has no heat pipes and a single smaller cooling fan, so the GFXChilla should perform much better! The Coolink GFXChilla comes with RAM heatsinks that should be used on the memory and voltage regulators. Since this was not going to be the final installation for the GFXChilla we passed on using any of the individual heat sinks. IT should be noted that two memory IC’s are right under the heat pipes on the GFXChilla and there isn’t enough room to install the RAM heatsinks anyway. You can see how the heat pipes sit right above the chipsets in the image below.
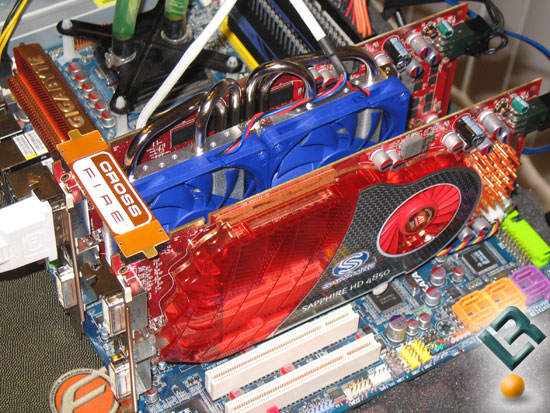
One heat pipe is blocks the ATI CrossFire interconnect, but it shouldn’t be an issue as the other interconnect is clear of obstructions and you only need one to run CrossFire. If you plan on running CrossFireX with three or four Radeon HD 4850 graphics cards then you’ll need longer CrossFire interconnects or you’ll be unable to use both interconnects on the middle card(s). The image above shows the Coolink GFXChilla installed and still being able to run CrossFire on a pair of Radeon HD 4850 graphics cards.
Comments are closed.