Zalman Z11 Neo Mid Tower Case Review
ZALMAN Z11 Neo Build Experience
For this build, we went with a Z97 Sabertooth motherboard and a typical load out of hardware you would find a gaming machine or basic enthusiast system. A DVD drive from Plextor was used to test ODD functionality and see how the ODD door would behave after repeated use. During the build phase, we didn’t note any problems and everything went very smoothly, with a couple of exceptions I will bring up in a moment.
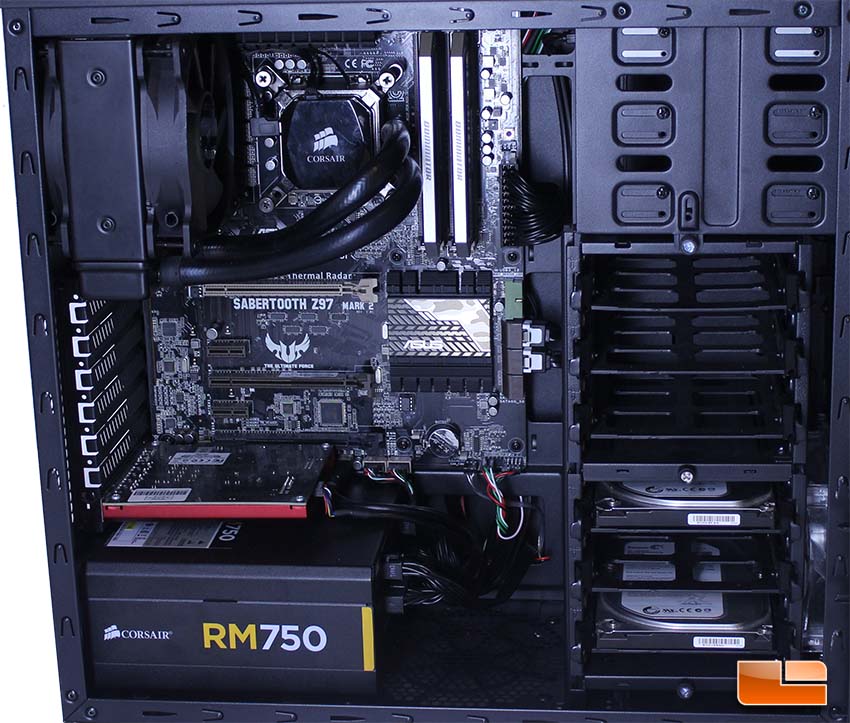
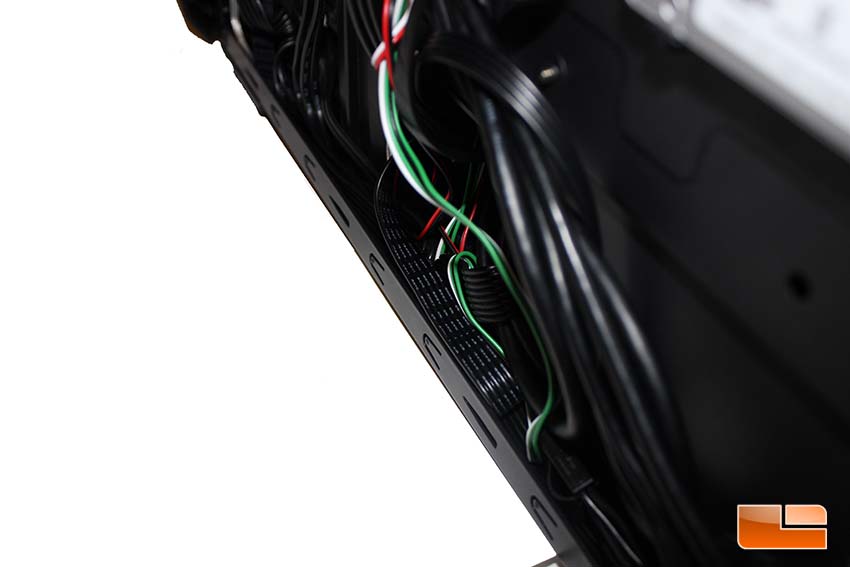
Unfortunately, an otherwise clean build is hampered by Zalman’s decision to not use rubber grommets on the cable routing holes and go with multicolored front panel connectors. The screw holes for expansion cards line up directly with the outer metal bracket of the case, so if you use long screwdrivers, you have to screw in at an angle. This is a bit bothersome when installing expansion cards and GPU’s, as you have to go in at an angle. Had Zalman used rubber grommets and gone with mono-colored connectors, the overall looks of the build would be improved quite a bit. These are small issues, as it is still very easy to build a nice looking system in the Z11 Neo with minimal time spent. Users who want to make the connectors uniform can use electrical tape to help shore up the look of their build.
 The motherboard IO shield snapped into place and the motherboard lined up perfectly with the standoffs after sliding the ports into the IO shield. In general, installation was a breeze.
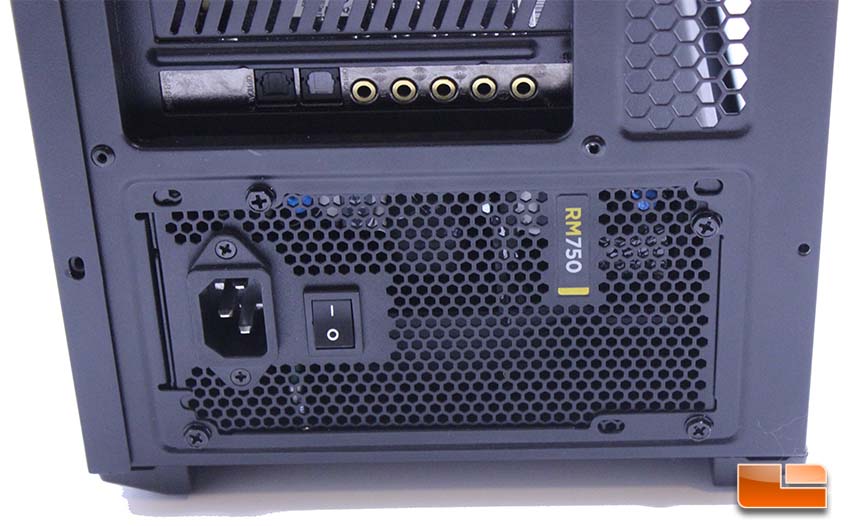 Our test PSU lined up perfectly with the holes on the rear of the case and sat on top of the anti-vibration PSU pads without any interference with the bottom fan.
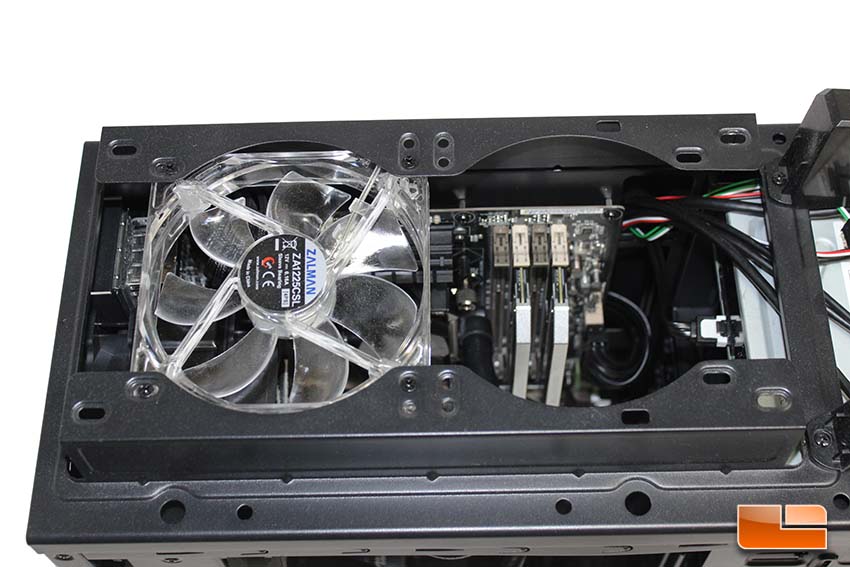 The upper radiator mount location is well thought out by Zalman, as it is isolated and easy to access. Those of you with AIO coolers such as Corsair’s H100/H110 will find installation in the Z11 Neo case to very simplified due to this isolated radiator area design. The upper radiator design will allow for use of 2x 140MM fans.
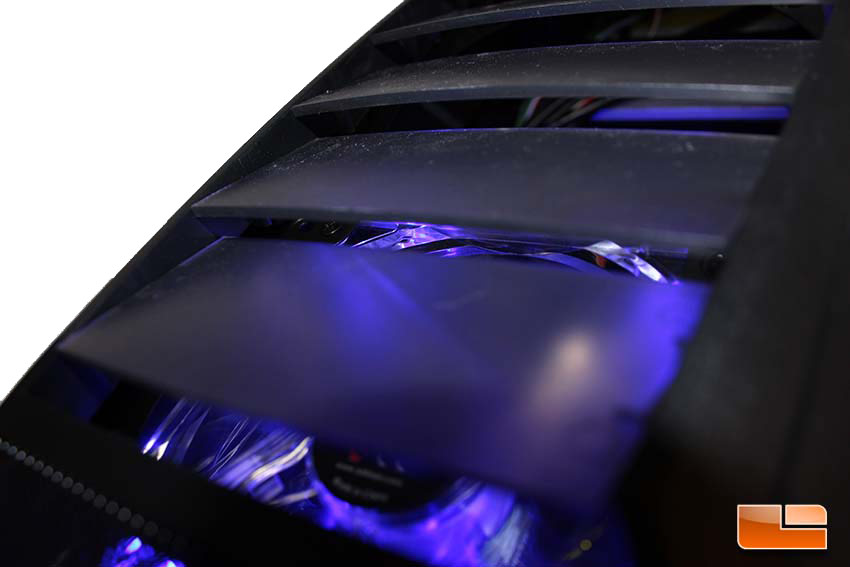 These fins are more than wide enough to allow adequate airflow and not impede cooling, while still looking very stylish and reflecting the blue LED of the top fan very nicely. We’ve seen designs like this before where the fins were not spaced properly, so kudos to Zalman for thinking this design out and allowing for proper airflow. There is a hum produced if you listen closely, but it likely won’t be noticeable by most end users.
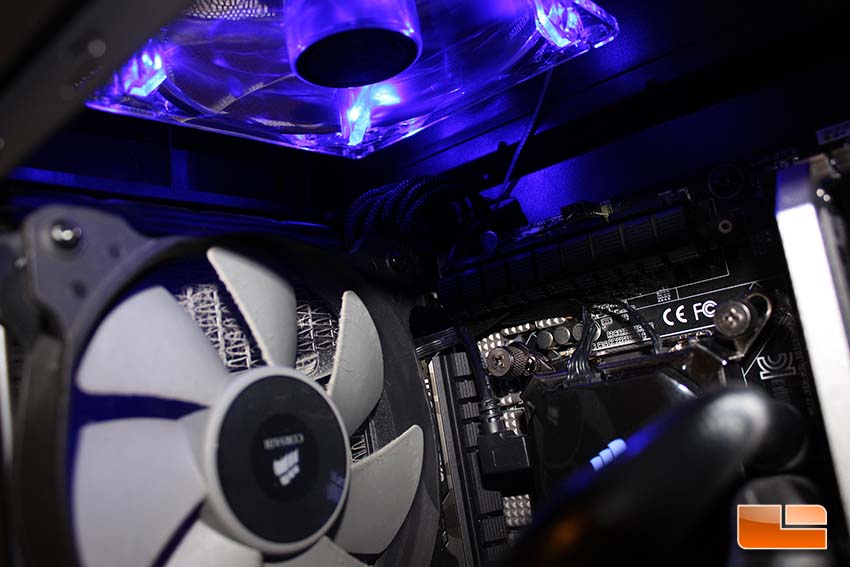 The Corsair H80I AIO cooler installed into the rear 120MM fan mount area without issue and there is adequate clearance between the fan exhaust and the other components. There is also a nice amount of clearance between the 120MM fan mount and the top fan mounts, so the H80I is able to be installed with a top fan in place, which has been a problem with some cases, such as the Corsair 300R. The Zalman Z11 Neo definitely is well equipped for AIO coolers to be installed in the top fan location. We chose the rear mount location for our H80I, but it could easily be installed in a top fan location to allow use of the rear 120MM fan, still.
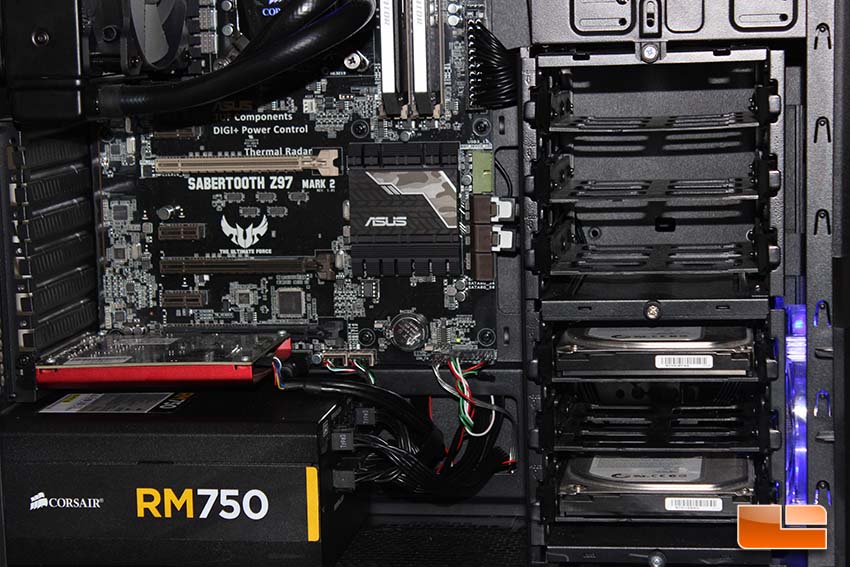
Those of you who are wondering about the lack of a GPU in the build system, have no fear, the Z11 Neo can handle 400MM of GPU if you remove the top 3.5″ bays. Unfortunately, our build GPU suffered an untimely death before the review.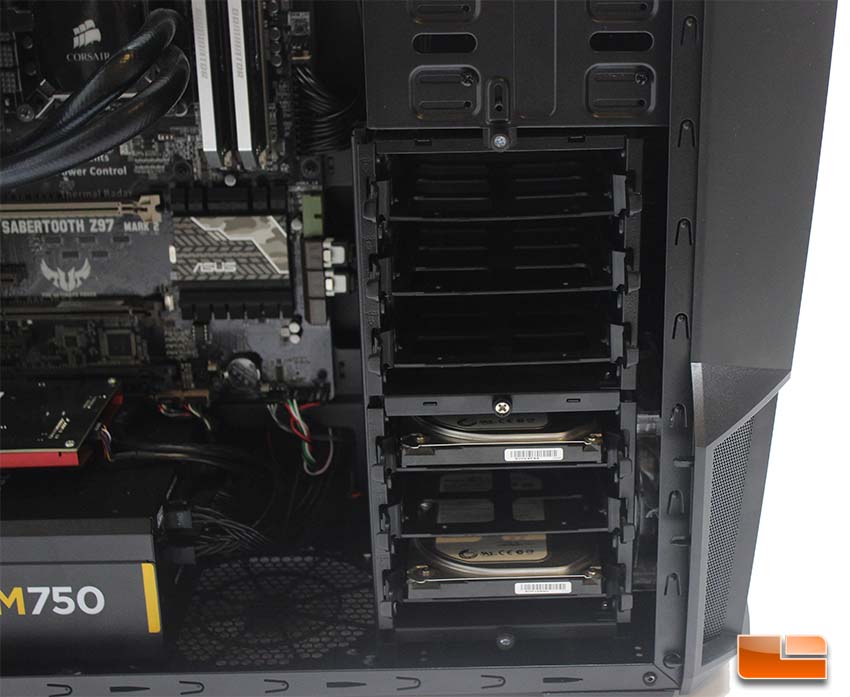 Hard Drive and SSD installation is a breeze on the Zalman Z11 Neo. You simply remove the bracket from the HDD cage by squeezing on the two side handles and pulling. Once removed, you install your HDD into the bracket by aligning the pegs with the screw holes of the HDD and snapping the HDD into place. SSD’s must be screwed into the bracket and they sit in the middle of the bracket, which can cause issues with certain SATA power connectors. This is the typical tool-free HDD mechanism we’ve seen for the past few years and it works great here and the HDD cages are very quiet. The mechanism works fine and they slide in without issue.
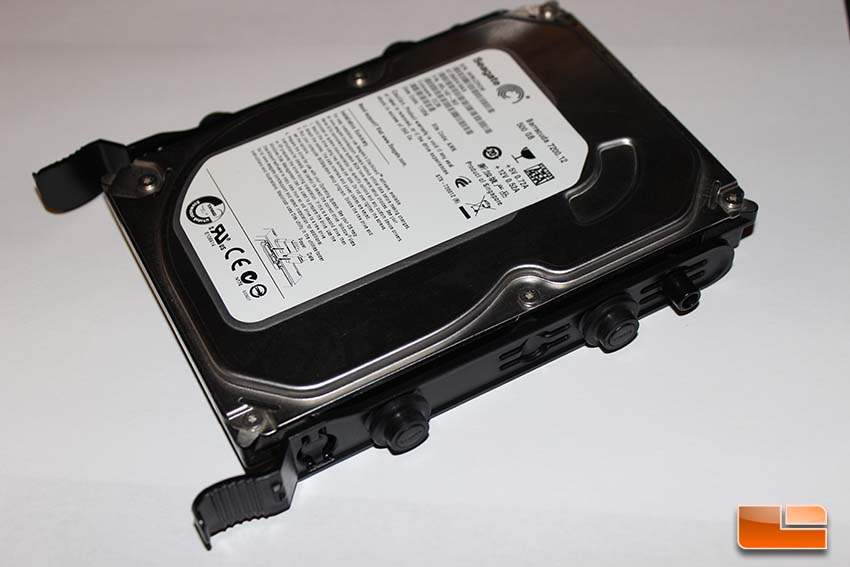 Of note, these HDD brackets are very flexible and feel somewhat flimsy, but they didn’t have any functionality problems or feel like they would break, even through multiple uses.
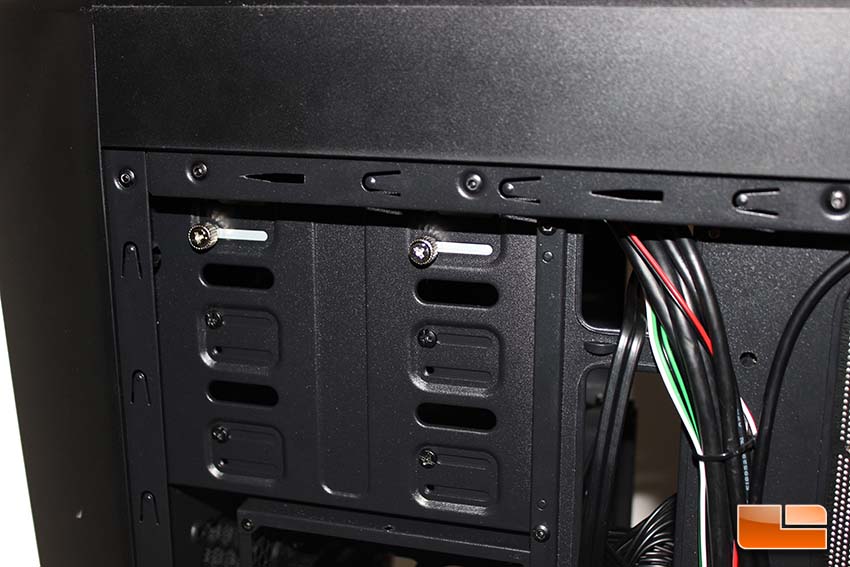 Zalman ships the Z11 Neo with thumbscrews that can be used to install the ODD without a screwdriver. I had no issues installing the optical drive in the Z11 Neo, but I would have preferred a tool-less clip like most manufacturers are using.
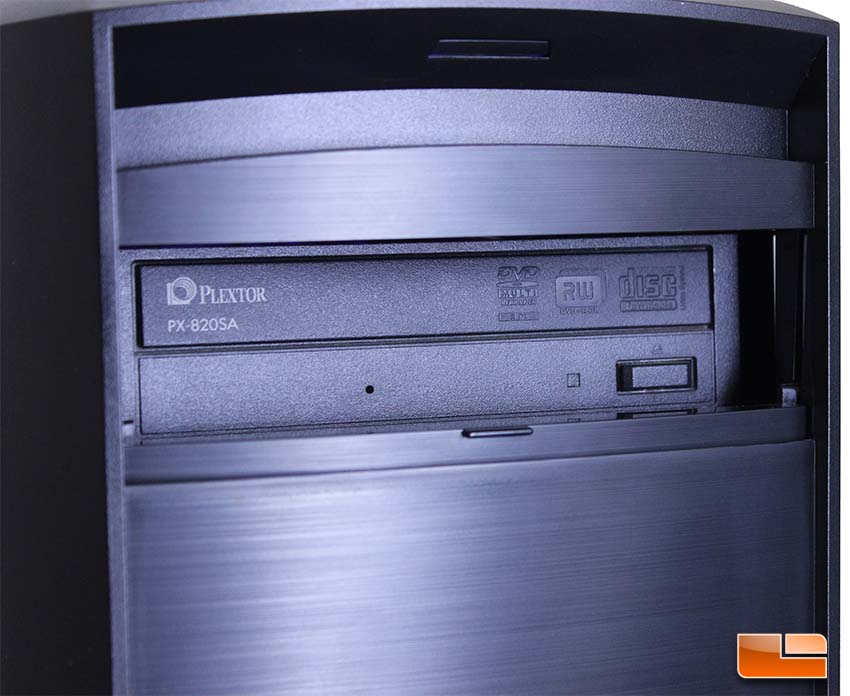 The single external 5 1/4″ bay offered by the Z11 Neo can be accessed by pushing down a cover on the front fascia. Unfortunately, optical drives don’t sit flush with anything in particular and thus, it looks pretty ugly when you’ve got the drive door open. Given how little your average user is going to access optical drives these days, this isn’t a big deal. Above the DVD door, there is a red HDD activity light.

 The amount of space behind the motherboard is acceptable and didn’t pose any issues with being able to close the side panel once the cables were ran, even without spending much time or using many zip ties. Our Corsair RM750 PSU was able to install in just minutes.
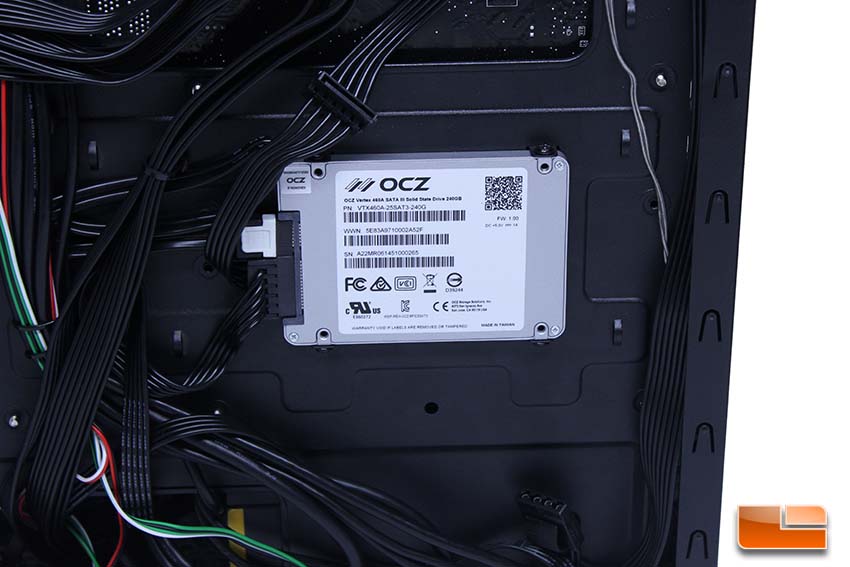 The rear motherboard tray allows for an SSD installation. I did find that placing the SSD label up forced the power cable to be pushed on more, whereas installing it label down meant that you can’t easily access the SATA cable release tab. Perhaps Zalman can address this by placing a larger indentation on the motherboard back tray, or even putting a cut out there?
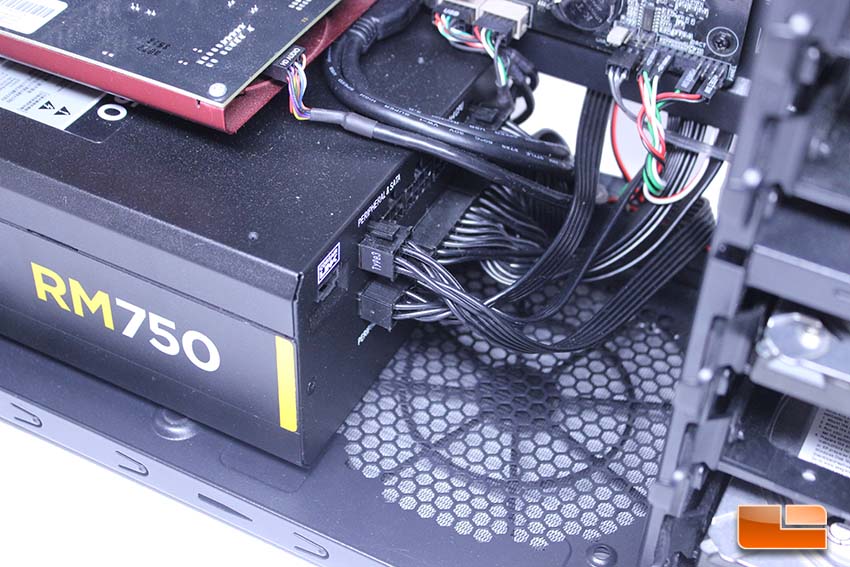 The use of longer PSU’s will render the bottom fan input useless, as the PSU extends over the mounting holes for both the 120MM and 140MM fans. We found this issue with both our Corsair RM750 and PC Power and Cooling Silencer 910 units.
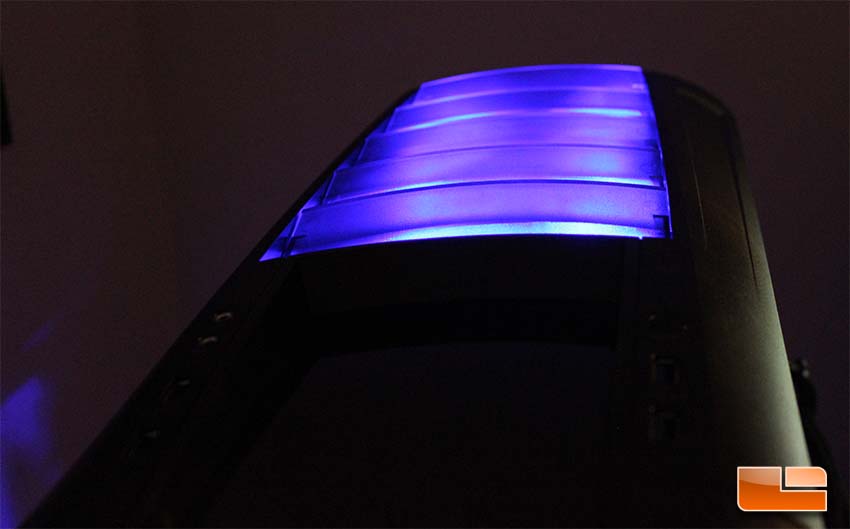 The system emits a quiet blue glow from the top panel when powered on. These top fins are spaced nicely to allow proper airflow and they reflect LED fans quite nicely. This is a very nice touch that allows the Z11 Neo to stand out in a visual sense.
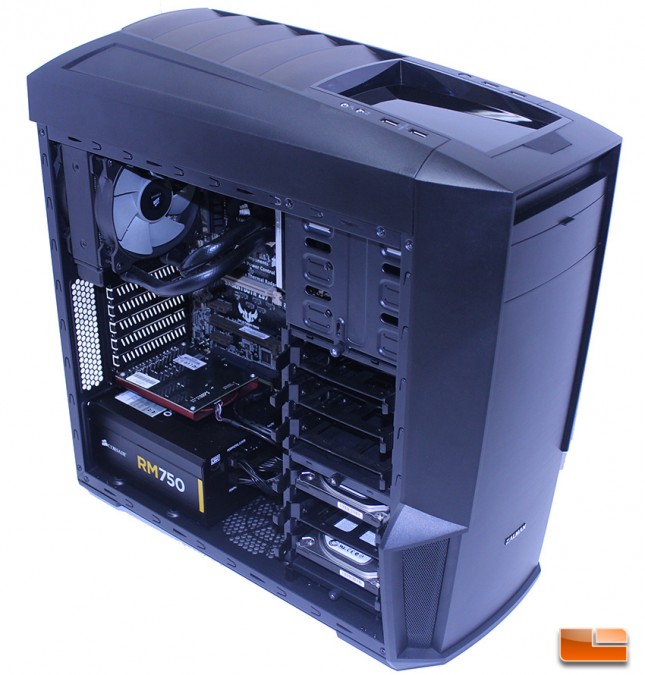 The build process was simple, with the few small issues noted. The bottom mounted fan location not being able to be used with two different, albeit somewhat long, test PSU’s was unfortunate, as the case is already somewhat limited by the dual 120MM front intake fan setup. Also, having to screw in PCI-E slot screws at an angle is a bit annoying, but I see this issue on cases all of the time and have gotten used to it by this point.
Overall, I found the Z11 Neo to be a joy to work with. I prefer cases with built-in motherboard stand offs and rubber grommets, so those omissions were annoyances. The case is fairly spacious and HDD/SSD installation is really simple. The blue effect was subtle and I liked it quite a bit, but this is a matter of personal taste. The rear motherboard SSD mount can really help clean up the looks of your system. The anti-vibration pads for the PSU are a nice touch, though I did have an issue with them lifting off after swapping PSU’s a couple of times, so take note. It would be easy for even a novice to build a nice looking system in the Z11 Neo. I definitely could see it as being a popular choice for system builders trying to sell an aggressive, stylish looking gaming system that offers functionality, like the four top USB ports and the storage tray, along with stylish blue lighting.