Thermaltake Matrix VX All Aluminum Case Review
Interior
Once inside the case there is plenty of room to install what you need. Also, with the tool-free installation for all the drive bays and add-on cards, it?s easy to get everything installed.
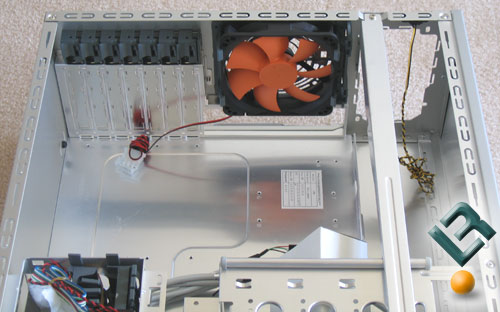
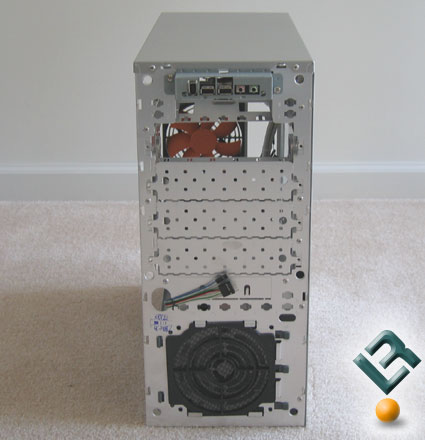
The most noticeable feature is the huge 120mm exhaust fan. In combination with the 120mm intake fan, you can be sure that you?ll always have a constant air flow over all your components. The tool-less PCI card retention tabs used by Thermaltake on the Matrix VX are pretty nice. To use the tabs lift up on the locking tab on the slot you desire to use, this unlocks the tab and allows the user to slide it to the left releasing tension on the slot blank and allowing easy removal. Next remove the aluminum blank and insert your PCI card in the slot that was vacated and simply reverse the procedure detailed above for unlocking the retention tab.
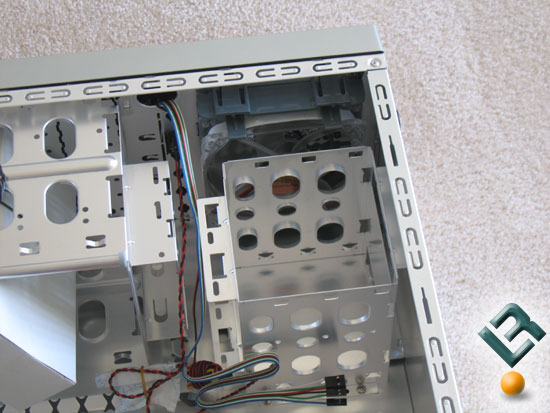
The hard drive mounting tray is located at the bottom of the case and has enough room for three hard drives. The drives slide in from the front of the case and are secured using the supplied drive rails. If you happen to own a Western Digital RaptorX hard drive you won’t be able to see your hdd window since the case is designed this way.

The motherboard was easy to install and I had plenty of room to tighten down the screws and route the cables. The biggest issue I had was with the cable to connect the front I/O audio & microphone connectors. For the cable to reach my audio ports on my motherboard the cables would have to run across my motherboard to the lower back side and it still would have been a stretch. Since I do not like cables running across my motherboard I left them disconnected. I would prefer another 6 inches added to them so I could connect them but still have enough to route the cables in some way to conceal them.
Comments are closed.