Thermaltake Armor+ MX Midtower ATX Computer Case
Installing Parts Into the Armor+ MX
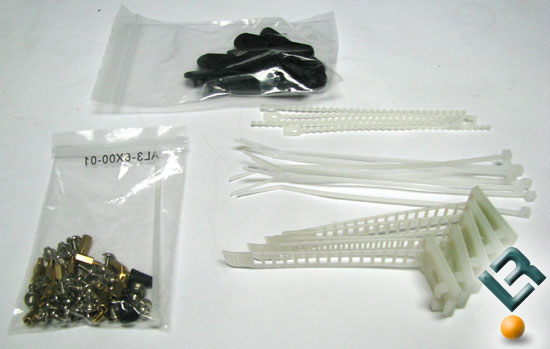
Before we install parts in to the Armor+ MX lets take a quick look inside the accessories box. At first look it seems a little sparse, but it actually has everything need plus a little extra. You have the mother board standoffs and screws, drive screws (which you dont need but its good to have spares), small zip ties, and wire management ties.
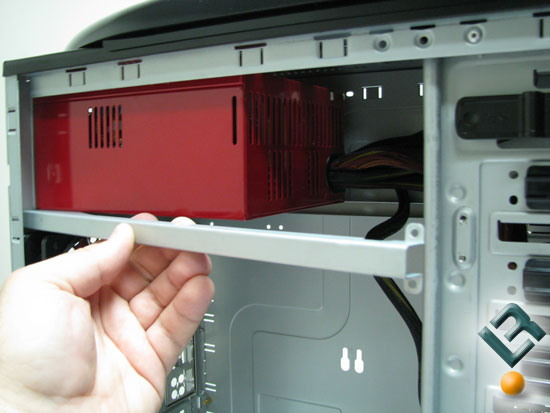
I like to start with the power supply as I dont use a modular PSU I like to get it in and the wires I know I dont need tucked out of the way. To help get the PSU into the case Thermaltake has made the support rail removable. If it wasnt you would have one tough time getting it into the case as the space is very snug to the PSU. The rail in held in with 4 case screws.
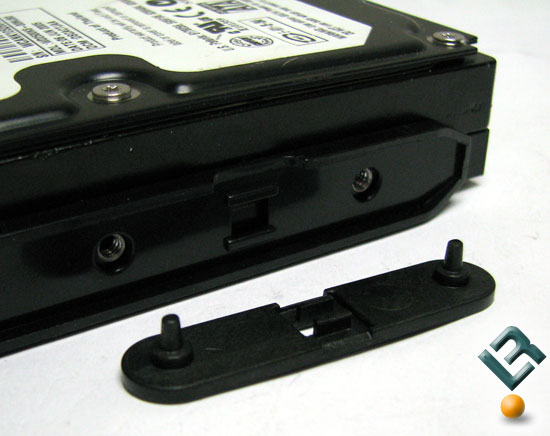
Installing the hard drive is tool-less and easy. With the drive in the tray all you have to do is insert a clip. The clip has posts that match up to the screw holes in the drive and it snaps into the drive tray, and if you dont want the clips you can use screws.
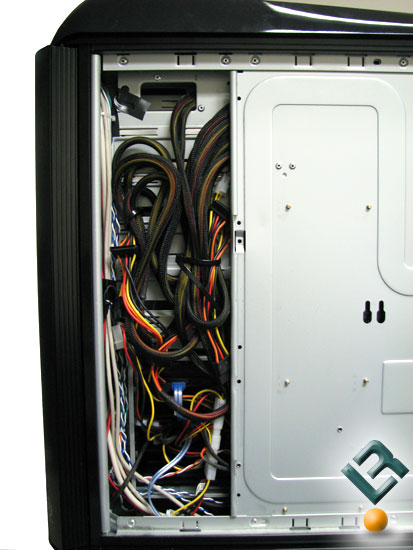
With the hard drive in and the PSU cables I know Im not going to use tucked away, I noticed two things. First I need a modular PSU. This case is tight, so the option to remove the cables Im not using would be a nice option. Second thing I noticed is the SATA cable for the hard drive sticking out into the mess of cables. Im using a straight connector; a 90 degree connector would be a little safer and put less stress on the drive connection.
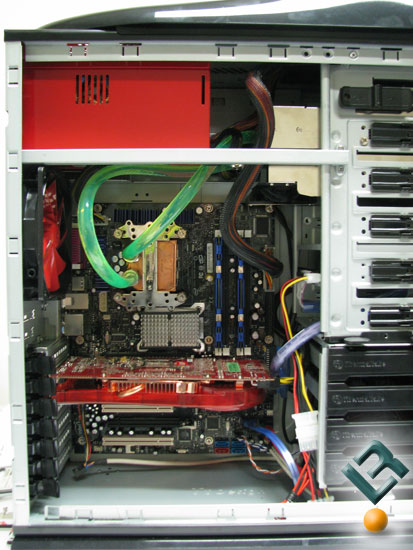
With the rest of the components in the case we can start to get a feel for just how sung the space is in the Armor+ MX. Since one of the features of the Armor+ MX was the trap door for Thermaltakes water kits, I installed our 760i kit into the case. The shallow depth of the case made the pump of the 760i very close to the PSU, any closer and I would have needed a 45* fitting on the pump outlet for the tubing to clear the PSU body.
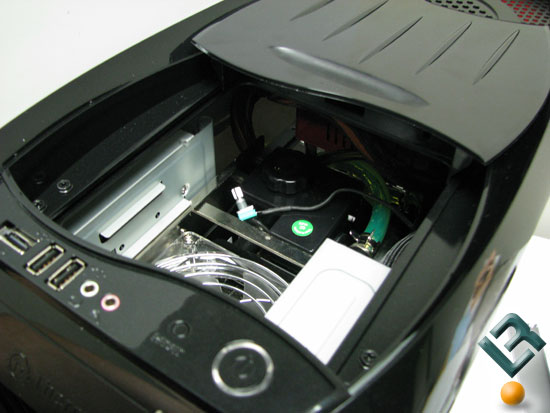
Looking through the top we can see the reservoir, and speed control for the Bigwater 760i. It did make it a little easier to adjust the speed of the fan, but I found my self still topping of the reservoir from the side.

Looking at the vent holes in the top of the case we can see how much of it is blocked by the PSU. This may allow the PSU heat out but blocks the rest of the system heat from getting out as well.
Comments are closed.