Phanteks Enthoo Luxe Full-Tower Case Review
Enthoo Luxe Internal Impressions

Removing the side panels is accomplished by removing two thumbscrews at the back and swinging the back edge of the panel outwards. It is a very simple design, and is one of my favorite designs for side panels. On the motherboard tray, there are four small cable management holes (two at the bottom, and two at the top), and three large ones; each of which has a rubber grommet installed to help keep things looking great; there is also a large un-protected hole at the top of the tray; in addition, the power supply cover has an additional cable management hole. Finally, a large hole in the motherboard tray should provide plenty of access to the back of the motherboard for installing CPU coolers.
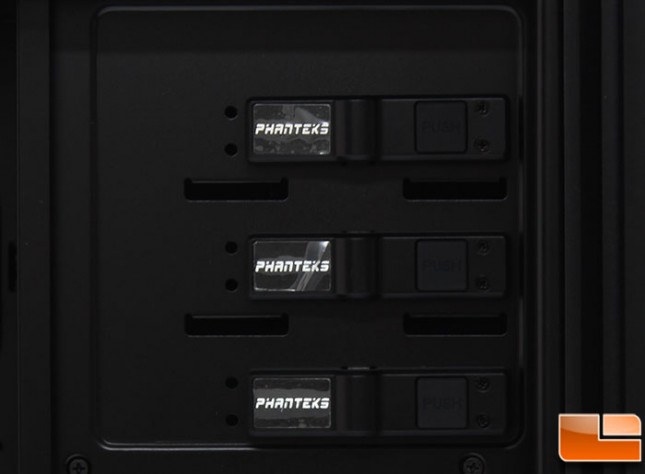
The three 5.25″ device bays have a tool-less installation using a simple, but effective, clip design that you press a spot to release the locks.
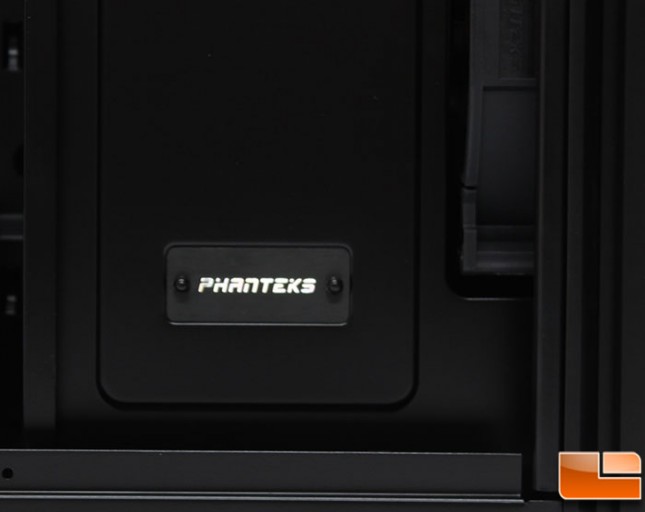
In the lower right corner, we usually find hard drives installed here. Phanteks has gone the stealth approach to hard drives, they are all located behind this solid plate. Here Phanteks has installed a simple name badge that can be removed by two small bolt caps.
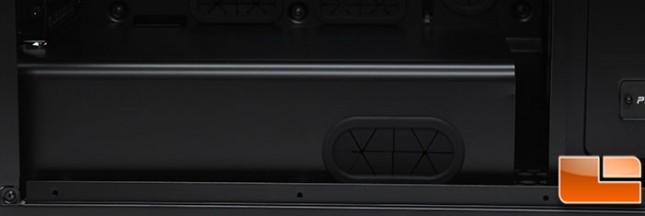
At the bottom, we find a large cover for the power supply. There is one large hole on the side which has a cable management rubber guard installed. Otherwise, the back side is open along with the end near the hard drives.
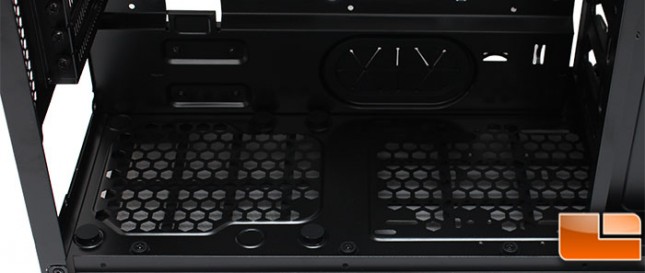
The power supply cover is removed by three thumbscrews on the back panel, after the thumbscrews are removed, the PSU cover lifts out. There are three anti-vibration washers that the PSU cover sits on to keep it from vibrating against the bottom panel. With it out, we can see the bottom of the case. For the power supply area, there are four rubber feet to reduce the amount of vibration from the fan. In the review sample, one of the feet was in the wrong location, so before installing the power supply, it was moved. We are also able to see the large cable management hole that is hidden by the power supply cover.
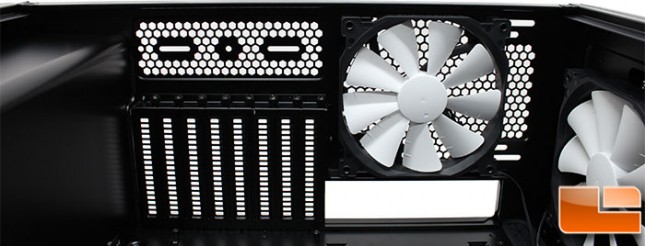
The back panel has the features we expected it to after looking at the case from the outside. The eight PCI expansion slot covers are held in place with thumbscrews and each of the covers is vented to assist with airflow. Phanteks has installed a 140mm fan; a PH-F140SP. It is rated for 1200RPM, pushing 82.1CFM with a noise level of 19dBA. This same fan is also available in four other models with LEDs. If the included 140mm fan isnt the preferred fan, it can be swapped out with either a 120mm or up to a 140mm liquid cooling radiator.
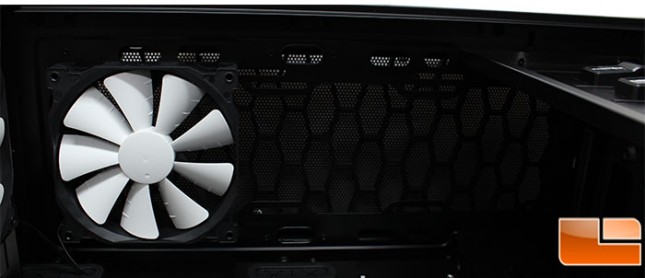
On the top panel, Phanteks has installed a 140mm fan; a PH-F140SP. It is rated for 1200RPM, pushing 82.1CFM with a noise level of 19dBA. Two other 140mm fans can be installed, for a total of three 140mm fans. The 140mm fans can be swapped for 120mm fans, or even one 200mm fan. For liquid cooling, removing the fan would allow for 420mm radiator to be installed! That’s a lot of cooling potential.
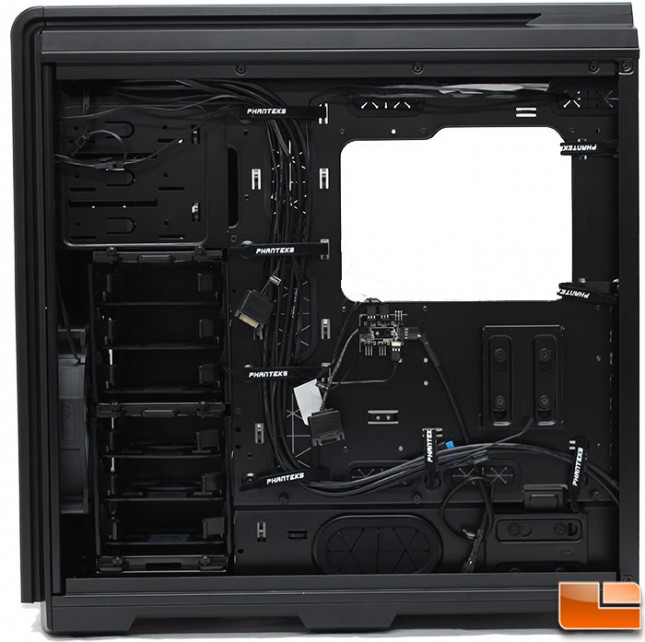
With the back side panel removed, the back of the motherboard tray is visible. Here we can see that Phanteks has utilized the pre-installed velcro straps to secure the various cables. Eight of the Phanteks velcro straps are pre-installed, with the additional two, that gives a total of ten velcro straps. Other than the velcro straps if necessary, there are an additional eight spots to use traditional cable ties. The power supply cover is held on by three thumbscrews, instead of screws used on the Enthoo Pro. There are two 3.5″ hard drive cages which can be removed with a few thumbscrews. Each 3.5″ hard drive cage supports three hard drives, for a total of six hard drives.
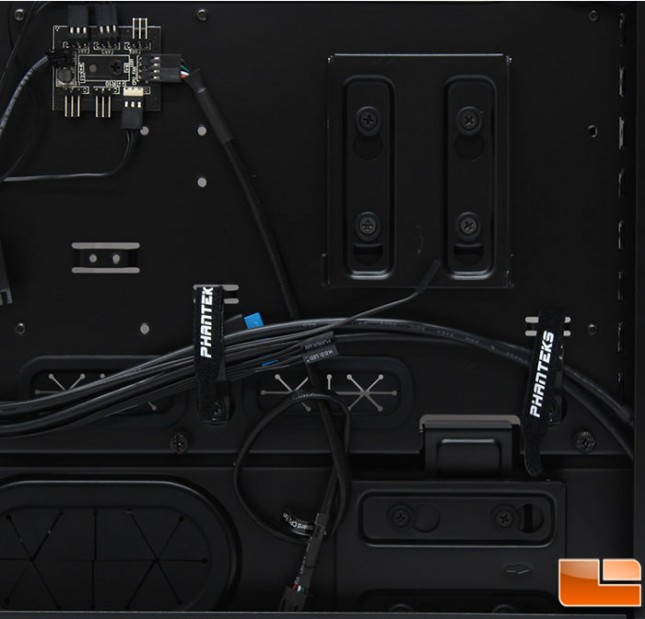
Phanteks has installed a couple of extra items on the Enthoo Luxe, the first is a PWM Fan Hub by default it will support five fans and the CPU fan. If you pick up the optional Y cable, that can increase to ten fans plus the CPU fan. Connecting the main hub cable to the CPU fan header on the motherboard will allow all the fans connected to be controlled as if they were one. There are two included SSD brackets, we have seen these previously on the Enthoo Pro and were found to be very effective, however you have to use screws to secure the SSD to the bracket. Once the SSD is secured to the bracket, they easily slide onto the anti-vibration washers to be secured to the chassis.
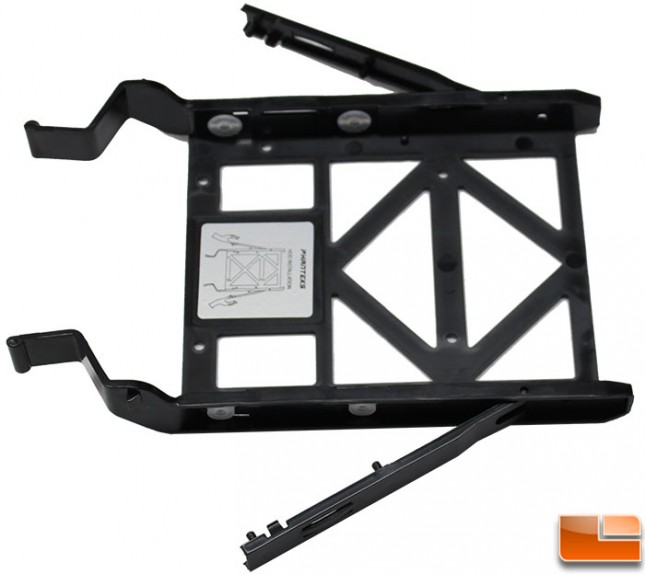
There are a total of six trays for hard drives, while they are designed for tool-less 3.5 drive installation, 2.5 drives can also be installed with four screws. To install a 3.5 drive, there are clips on the side the swing out, then the drive is put into place with two guides to make sure its in the perfect spot, then snap the clips closed.