NZXT H440 Mid-Tower Case Review – 5.25-inch Drive Bays Are Gone!
NZXT H440 Interior Impressions
Interior functionality is always very important to me, and it is definitely extremely important to the enthusiast. Lets pop off the side panels and see what unique features lie inside!
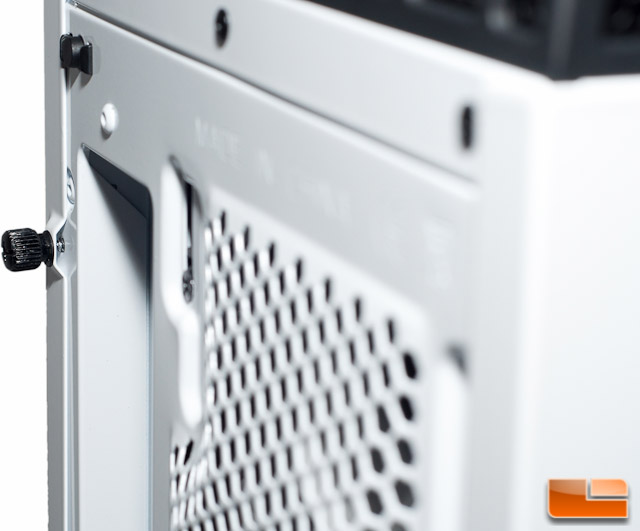
Both side panels remove via thumb screws on the rear of the case. Removing these side panels with the thumb screws was made very easy, plus the thumb screws are meant to stay put on the side panel, helping ensure that you wont lose them.
Looking closer at the panel, there is another strip of foam on the surface next to the window to help reduce noise. Even with the window cutout, this side panel feels very heavy duty and the steel is nice and thick! No worrying about panels that are tough to put back on because they flex all over the place.
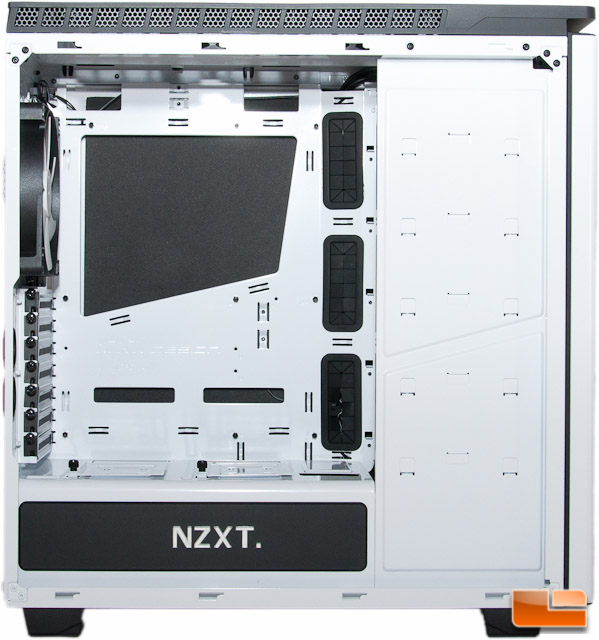
One of the first things that you cant help but notice are the 3.5 bays and the fact that theyre turned around. You wont be able to access these bays from this side. This does help give the case a nice clean appearance.
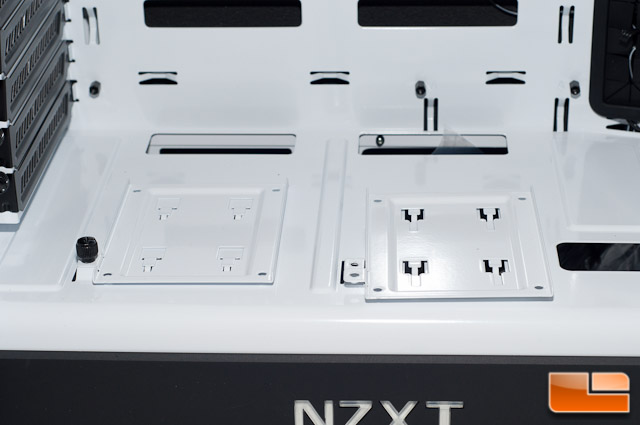
Another item thats tough to miss and is out of the ordinary is where the PSU is located. There is a shroud covering it, and this metal is not removable. Sitting on top of this shroud are two little trays to mount a 2.5 drive to, so this is a great location to drop a pair of SSDs. Any wiring will go in the holes behind the trays.
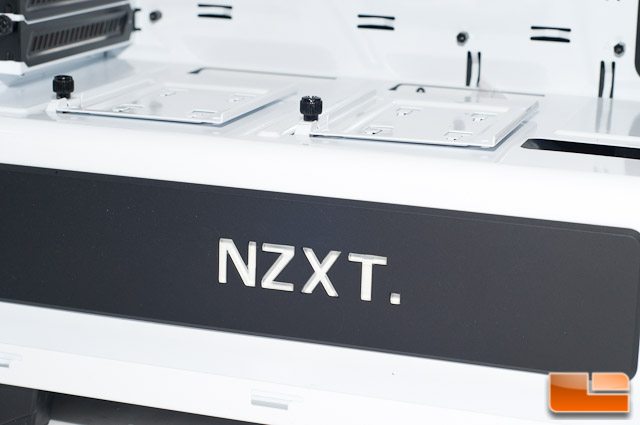
These drive trays come out by removing the single thumb screw and pull forward. I found this extremely easy to work with. One thing that would make these bays perfect is if they were a hot swap bay, making cable management that much sleeker and the user experience easier.
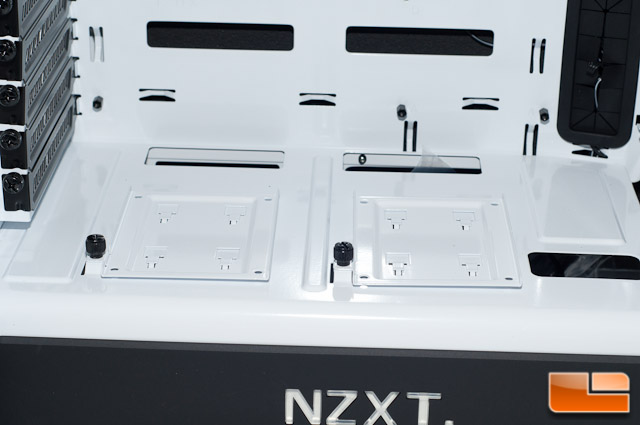
Whats that hole to the right of the 2.5 drive trays? Thats actually a pass-thru for PSU wires, namely for your video card. Well see how this functions and cleans up the look of your case in the next section. I would have liked to see a rubber grommet in his hole to clean it up even more.
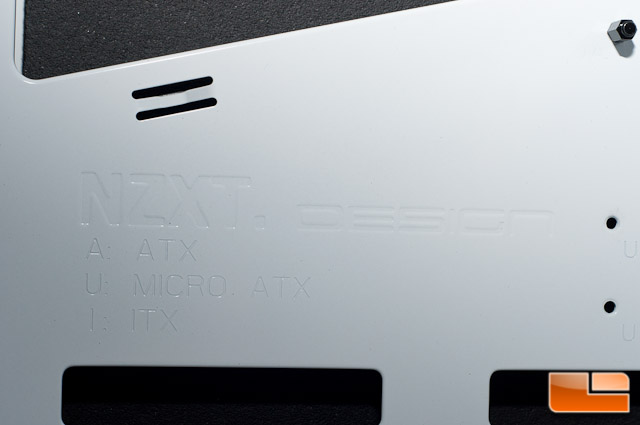
The H440 supports ATX, MicroATX, and ITX sized boards. It does come with the standoffs preinstalled for a full ATX board which was nice.
There is also a giant cutout on the motherboard tray for easy access to the rear of your board, since after all this case is designed for water cooling it would be silly to not have this.
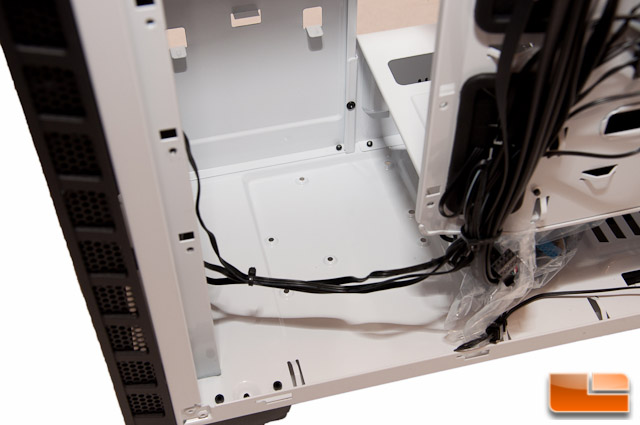
Right next to the tray cutout are three wire pass-thru holes with rubber grommets. These are nice and large and should function well. Theyre also angled, rather than flat, as the HDD trays attach right behind this. These rubber grommets are quite flimsy, so youll have to be careful pushing wires through.
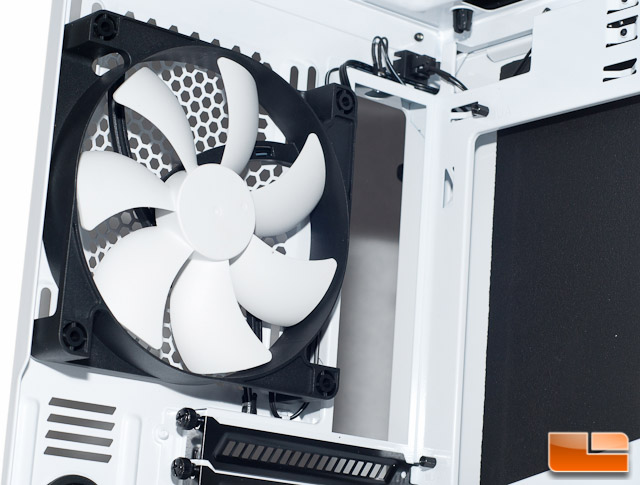
At the top rear is where a 140mm exhaust fan is located. This fan is a NZXT FN V2, in case youre wondering.
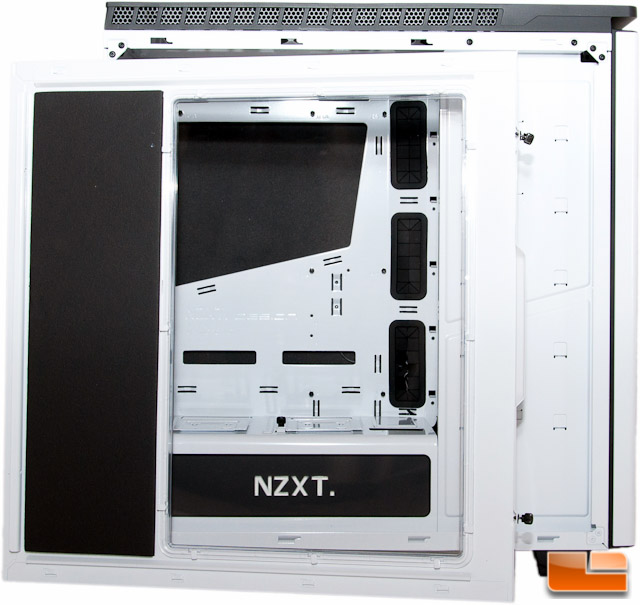
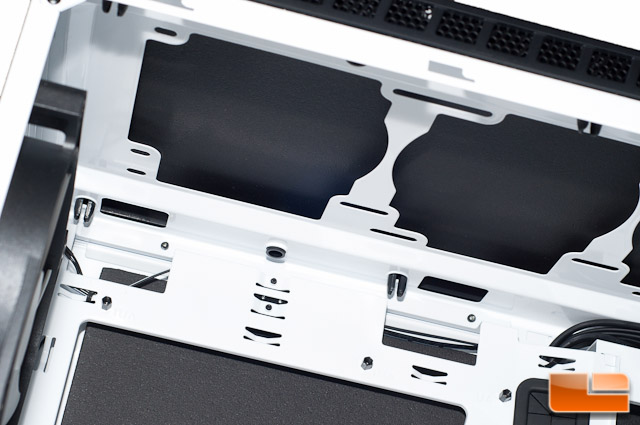
Glancing at the top from the inside we can see how much clearance you should have with the top mount fans or radiator. This case looks perfect for NZXTs coolers, such as the x40 and x60, but not the extreme and thick radiators.
Thats about all there is to the main side of the case, so lets move over to the right side and see how cable management is and whatever other options you may have.
After taking off the right side panel, I immediately noticed impressions in the sound deadening foam from the cables that were included. This has me highly concerned that there isnt a lot of space behind here for cable routing. Just think of that giant ATX power connector and how youll have to scrunch that in.
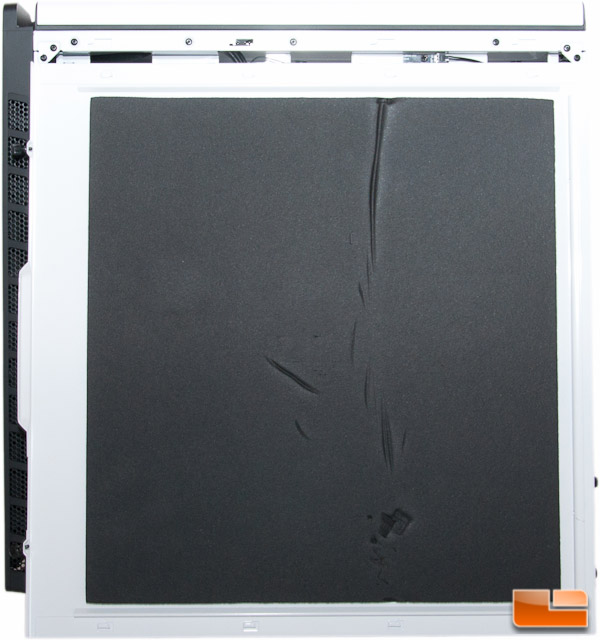
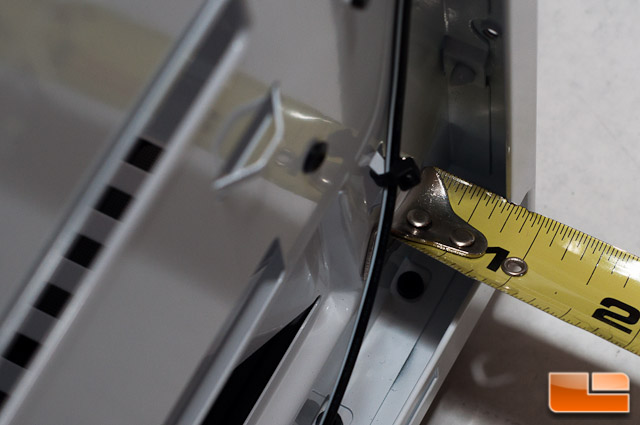
Measuring the space behind the motherboard tray, we find 5/8, but take note that the foam on the side panel measure 1/4, making this an extremely tight 3/8 fit! The foam will likely have to give a little to allow us to close up the side panel.
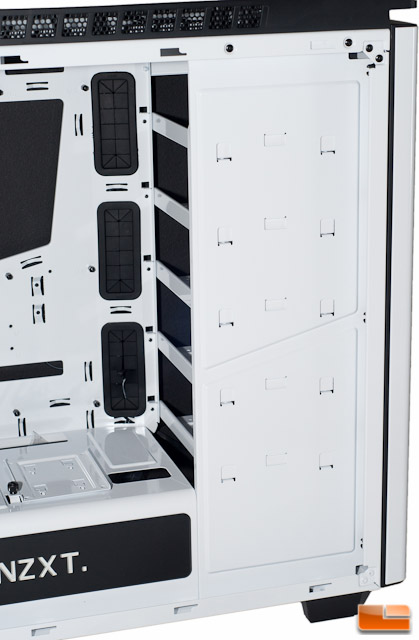
Heres a full view of the right side without the door in place. Lets break it down and see what weve got.
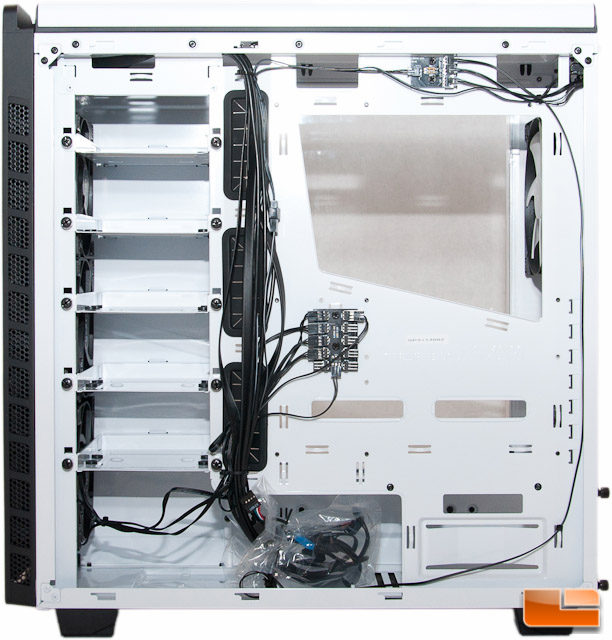
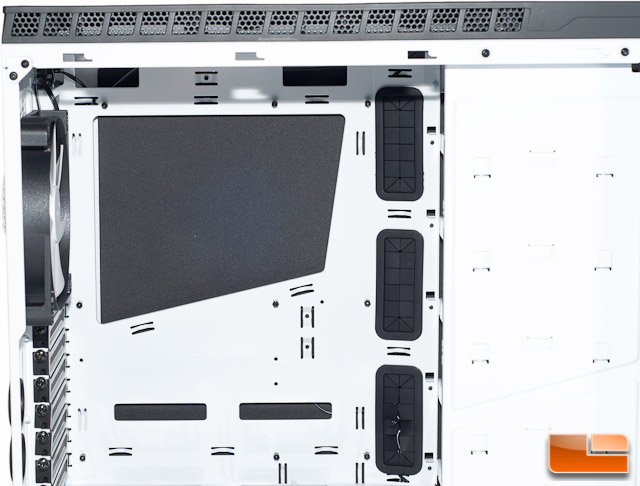
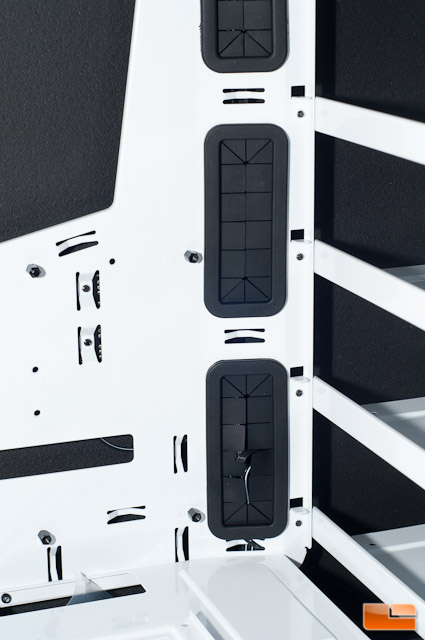
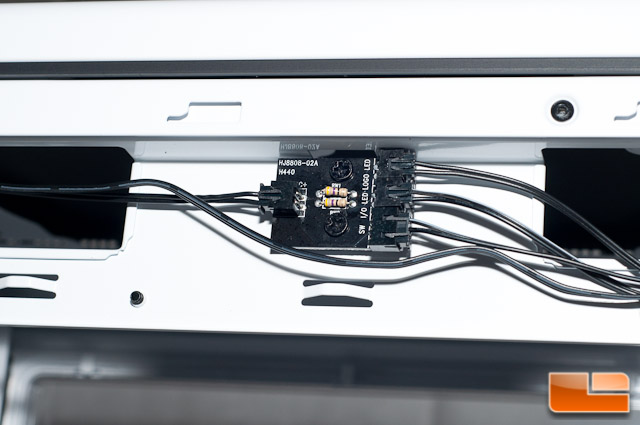
The things that stuck out to me first were the boards attached to the case. The one in the middle is a hub for the fans that are included and can support up to 10 total fans.
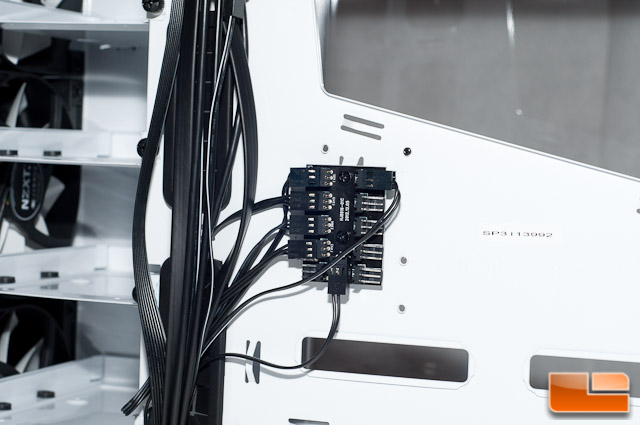
The one on the top is for the LED light system, but you will not be able to fit any more lights to this.
On the left hand side youll find five 3.5 drive bays that can accommodate both 3.5 and 2.5 drives. Each tray is held in with two thumb screws, making removing them not a huge task. For the 3.5 drives, you will find rubber rings in place to assist with vibration reduction. My caution to you is, be careful sliding your 3.5 drives around as I did knock one rubber ring off. These rubber rings are just stuck on like a sticker, making accidental removal very possible.
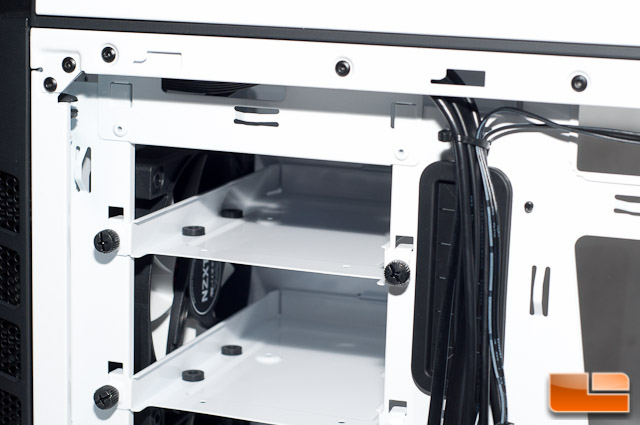
If you remember from the exterior shots, on the very bottom is where you can mount the 6th drive. This is that location looking from the inside. Its kind of a pain since you need to screw in your drive from the bottom of the case, but its there nonetheless.
Should you choose to remove all of the 3.5 drive trays, you will gain a fair amount of extra clearance for larger video cards. This will shift from the standard 294mm to 406mm of room, which even the 294mm of room should be more than enough for your powerhouse video cards. For reference, cards like the GTX Titan, 780, and 770 all measure in at 267mm long, while AMDs R9 280X and 290X both measure in at 275mm. Of course if you go with a card with extreme cooling on it, itll be longer than chances are youll have to remove a drive bay or two, but you may not even have to remove the trays to use the system as-is.
Thats all there is to the inside of this case, so lets take a look and see how installing hardware is.