NZXT H230 Silent Mid-Tower Case Review
H230 Internal Impressions
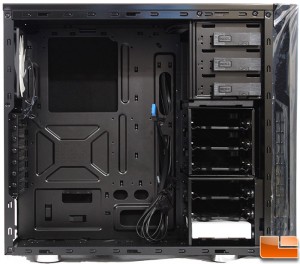
The side panels are removed by two thumbscrews in the back. With the panel off, we can see the interior is painted to match the exterior. The difference is a matte paint was used instead of the high gloss black like the exterior. The 5.25″ bays are tool-less, with the clips pre-installed, below the 5.25″ bays are the two 3.5″ bays. There are three oversize cable management holes, and two smaller ones below the motherboard. The edges are rolled to avoid any cuts, and there are no rubber grommets in place.
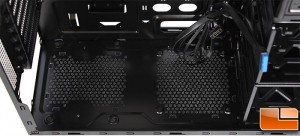
It used to be common for the power supply to be at the top of the case. Things have changed and the power supply is more commonly found at the bottom. The H230 follows this new trend, the power supply is at the bottom of the case. There are four tiny feet that have a little rubber anti-vibration spot. At the bottom is also an area for another 120mm fan.
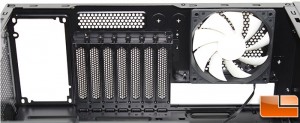
A quick look at the back panel, shows what we would expect from a mid-tower case. On the left (also known as the bottom) is the power supply outlet. Then there are seven expansion slots, which have easily removed covers that are secured with thumbscrews. Above the expansion slots there is a small vent for additional airflow, and two water tube ports that are covered. Finally, the 120mm exhaust fan, and the motherboard I/O port key. It would appear that a 120mm water cooling radiator would fit here, however since I don’t have one to try out I can’t guarantee it.
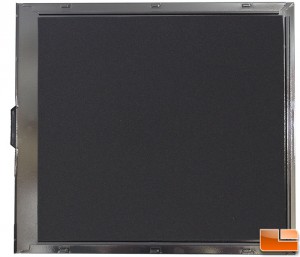
As mentioned before, the NZXT H230 is designed for silent running; both of the side panels have some foam sound insulation on them. This soundproofing material is only on the side panels, and not on the top portion of the case. In trying to make the case as silent as possible, I would think you would want to cover as much surface area on the case as possible. The side panels are an obvious starting point, as there are no fans on the top panel. This would be another good place for some additional sound insulation.
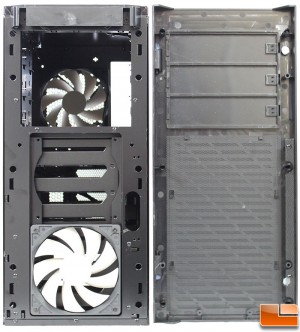
Removing the front bezel is pretty straight forward, pull from the bottom and it will come off. Initially it required more force to remove it that I am used to, however that’s not a bad thing. Behind the bezel, the 5.25″ drive bays are ready for use, no metal plates need to be removed. Below the 5.25″ bays, is an area for two 120mm fans, NZXT includes one on the H230. While NZXT provides the option for an additional 120mm fan, they did not include long screws to install a fan here. Looking through the manual it shows four screws should have been with the accessories, however they were not in the review sample. On the backside of the bezel there is a wire mesh filter to help keep dust out of the case. This is not easily removed for cleaning, you will need to use a can of air in order to clean the dust.
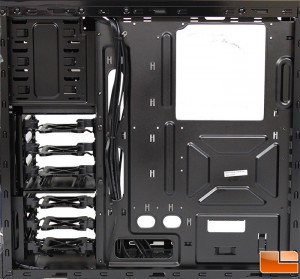
The back of the motherboard tray is fairly plain, there are no additional 2.5″ drive mounts back here. Directly below the CPU cutout looks to be an area where NZXT could implement a single 2.5″ drive mount, however it’s not a requirement. There are a large number of cable tie points, which should help keep the cabled tucked away neatly and out of sight. Downside is that NZXT only included three cable ties with the H230.
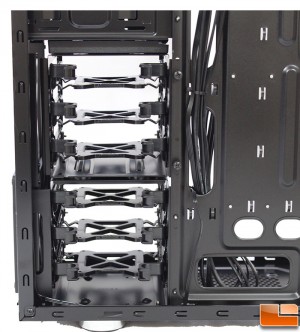
Usually hard drives are installed from the left side panel; however, the H230 has the drives being installed from the right side panel (the panel facing the back side of the motherboard). This is a personal preference as to whether or not this is a good direction, usually I have four or five drives installed, so I have to remove the back panel anyways to disconnect the cables. However, in a system with only a couple of drives, this might be annoying. Keep in mind that most of those “smaller” systems probably don’t change hard drives on a semi-regular basis anyways.
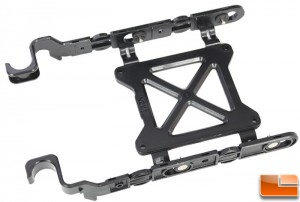
NZXT has implemented a hard drive tray system for the H230. These trays are designed to support both 2.5″ and 3.5″ hard drives. As is fairly common, the 3.5″ drive installation is tool-less, where the 2.5″ drives require the use of screws.
