How To Build A Sonoma Notebook
Installing the Memory & Processor
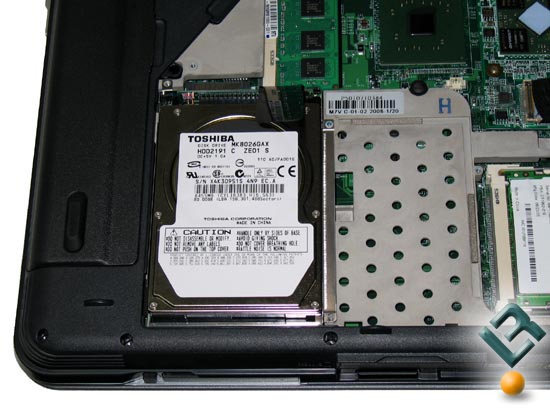
Once you take the notebook out of the box, it needs to be disassembled to allow the hardware you bought to be installed. You’ll begin this process by removing the two screws on the 2.5? hard drive (HDD) bay and remove the hard drive tray by removing the two screws that hold it down. With the tray removed select either the IDE or SATA interface connector that is provided (you can use either notebook IDE or SATA drives on the ASUS Z71V) and then mount the hard drive to the mounting tray using the four screw holes on the bottom of the tray. Once the HDD and mounting tray are assembled you can then slide the drive back into the chassis rear-end first and then press the HDD connector to the connector on the motherboard and push them together gently. Make sure you re-install the hard drive hold down bracket otherwise the hard drive may become loose from the motherboard when shifted from one location to another.
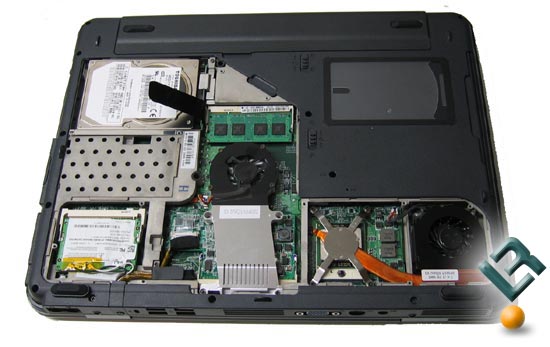
The next step is installing the notebook memory. To accomplish this, we’ll need to remove both the keyboard and back cover. With the notebook still flipped over you will see two screw holes labeled ?K? for keyboard. Remove these screws and the nine additional screws that are holding down the elevated back plate. Once the screws are removed you will gain access to the inside of the case.
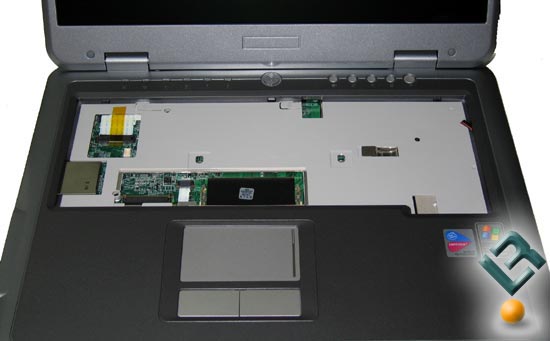
The keyboard must be removed to install the primary memory module. With the back removed, carefully flip over the notebook and open the unit to gain access to the keyboard. After the two screws labeled ?K? have been removed from the bottom of the chassis the only thing holding the keyboard are three small tabs that lock the keyboard into place. These tabs are located above the keyboard right above the F1, F8, and Ins (Insert) keys. Using a thin screw driver or the corner of a credit card carefully push the tabs towards the monitor until the keyboard becomes free. LR has found it best to do this starting from one side to the other and gently lifting on the keyboard at the same time. Once the keyboard is no longer attached to the chassis it may be lifted back for the memory to be installed. Please note you do not have to fully remove the keyboard ribbon like the image below.
If you are installing a single memory module (DDR2 Single Channel) it should be installed under the keyboard as it is the primary SO-DIMM slot. Install the memory by lining up the notch in the module to the memory slot and plug in the module at a 30-degree angle. Push it down towards the board until the latches on both sides snap into place. Once the module has been snapped into place, press the keyboard back into the chassis and ensure all three tabs have been locked into place then flip the notebook over. We also suggest replacing the two screws labeled ?K? as they are no longer needed for the build. If using a pair of memory modules for dual channel performance insert the other module in the secondary SO-DIMM slot on the back side.
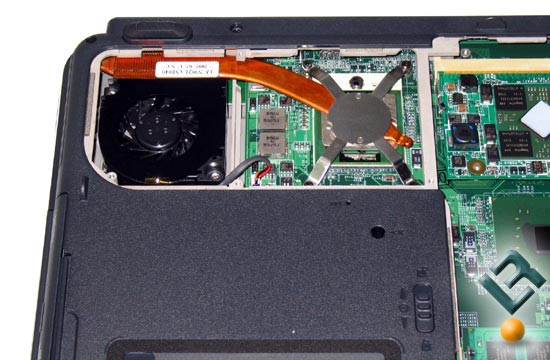
Now that the hard drive and memory has been installed, we’ll move onto the processor. The notebook comes with the processor heat sink installed, so remove the heat-pipe assembly and make sure the CPU socket is unlocked by using a flat head screwdriver and turning the lock to the unlocked position. Place the Intel Pentium M Processor into the socket and lock it into place by turning to the locked position (clockwise). Carefully angle the heat-pipe cooler back into place over the processor, making sure the screw holes line up with the heat-pipe and the notebook. With the heat-pipe in place carefully tighten the screws like you would for a car wheel in a cross pattern to avoid cracking the processor. The arms on the retaining bracket are labeled one to four and the screws should be tightened a few turns at a time until they are tight in this order.
Comments are closed.