ECS PN1 SLI2 Extreme Motherboard Review
Board Layout
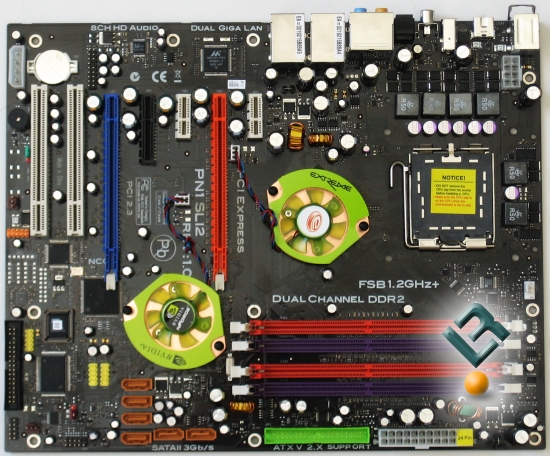
As you take your first overall view of the board, you can see that it has a nice clean feel to it. There are no glaring faults to the layout of the board at all. in fact, I would have to say that this is one of the better layouts I have seen in awhile. Let’s look at it a little closer, and see what we find.
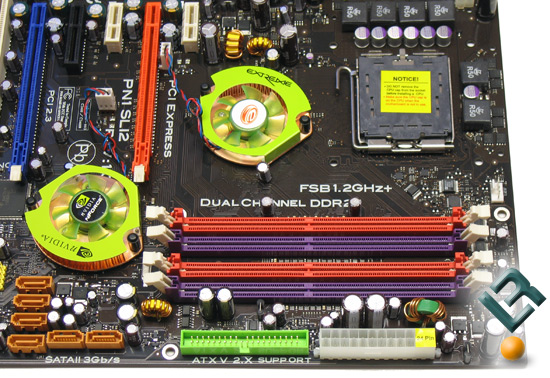
The top right of the board is where we will find our DIMM slots. This board supports DDR2 memory modules at speeds of 400/533/667/800 in dual channel configuration. It supports up to a maximum of 8GB of memory. Underneath the DIMM slots, we have the 24-pin power connector, which is nicely placed at the edge of the board. Right next to it, to the left, is the first of two IDE connectors, also, nicely placed at the edge of the board.
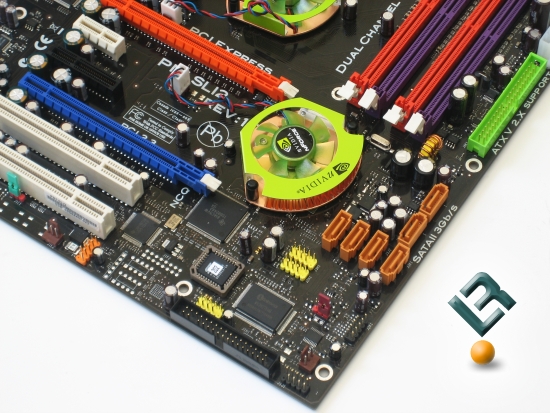
The bottom right of the board hosts our SATA connectors. As you can
see, there are six SATA connectors that are SATA2 compliant. These
connectors are powered by the NV chipset, and are capable of running in
a RAID configuration. Just to the left of the SATA connectors, we see
our active fan that is placed on the southbridge. We’ll look a little
closer at the fans later. Underneath the SATA connectors, we have our
Clear_CMOS jumper. We used this quite often on this board as we tried
to reach our maximum overclock. At the very bottom of the board, we
have our second IDE connector. Once again, ECS has placed this right
at the edge of the board, which is the optimal position for this
connection.

The bottom left of the board is the location of our pci and pcie slots. The PN1 SLI2 has two pci slots at the very bottom. With all the onboard devices, this should not be a problem. The board also sports two x1 pcie slots, a single x4 pcie slot and two x16 pcie slots that you can use to run two Nvidia cards in an SLI configuration. This is also the area of the board that you can find the audio and Lan chips on the board.
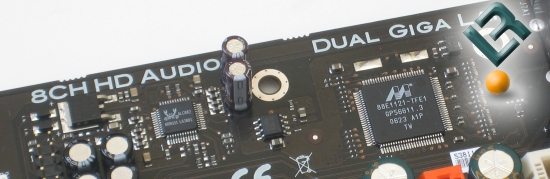
The audio on the board is powered by the Realtek ALC 882, which is able to provide 7.1+2 Channel High Definition Audio. We also have dual gig-lan on this board, which is powered by two Marvell GIGA-LAN PHY chips.
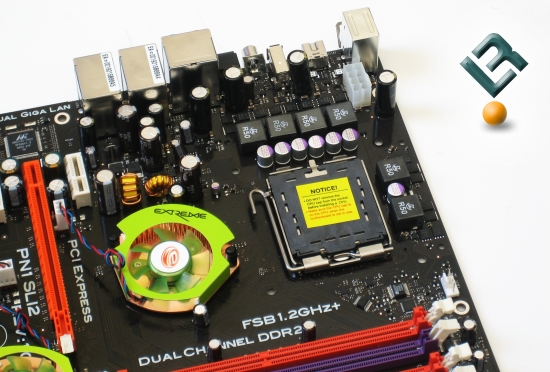
The top left part of the board is very clean and neat. There were absolutely no issues at all using our Corsair Nautilus water cooling system. At the top left of the board, you can see the 8-pin power connector, which is in a wonderful position at the edge of the board. Let’s take a close look at just a few things before we move on to the testing.
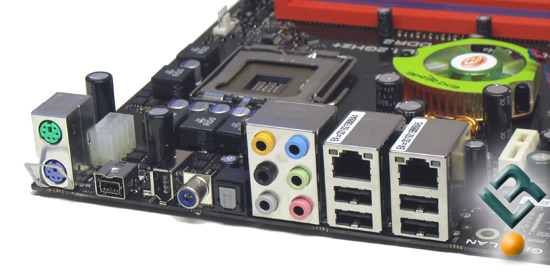
Here we have our back I/O connections. ECS went with your typical ps/2 keyboard and mouse connections. They also have included firewire, usb and audioconnections (including digital connections). Lastly, we see four USB ports, and our two GIGA-LAN connections.
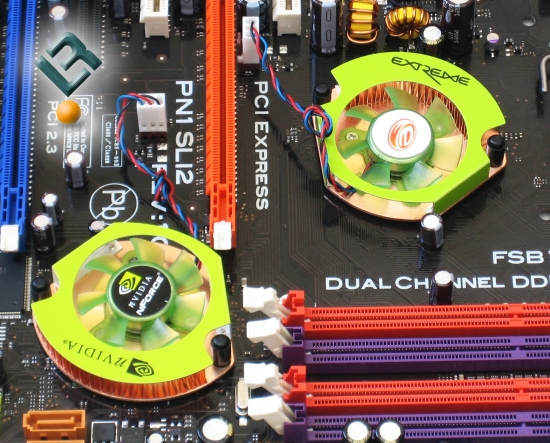
ECS has chosen to use an active cooling solution for the chipsets. As you can see in the picture, there fans are brightly colored, and add the cooling that many will find helpful when overclocking. The fan over the southbridge is a little troublesome once you have a video card and your ram installed.
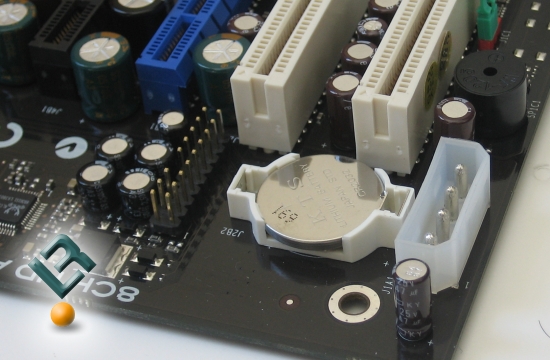
Remember, this is an SLI board, so ECS has decided that you may need a little more power to run two video cards, and have included a four-pin molex power connection point on the board that they suggest that you use when running SLI. We did not have two Nvidia cards to run this board in SLI, so we did not need to use this connection.
Let’s move on to the bundle and bios!
Comments are closed.