Corsair ML140 Pro RGB Fan Kit Review
Corsair ML140 Pro RGB – Installation and Corsair Link
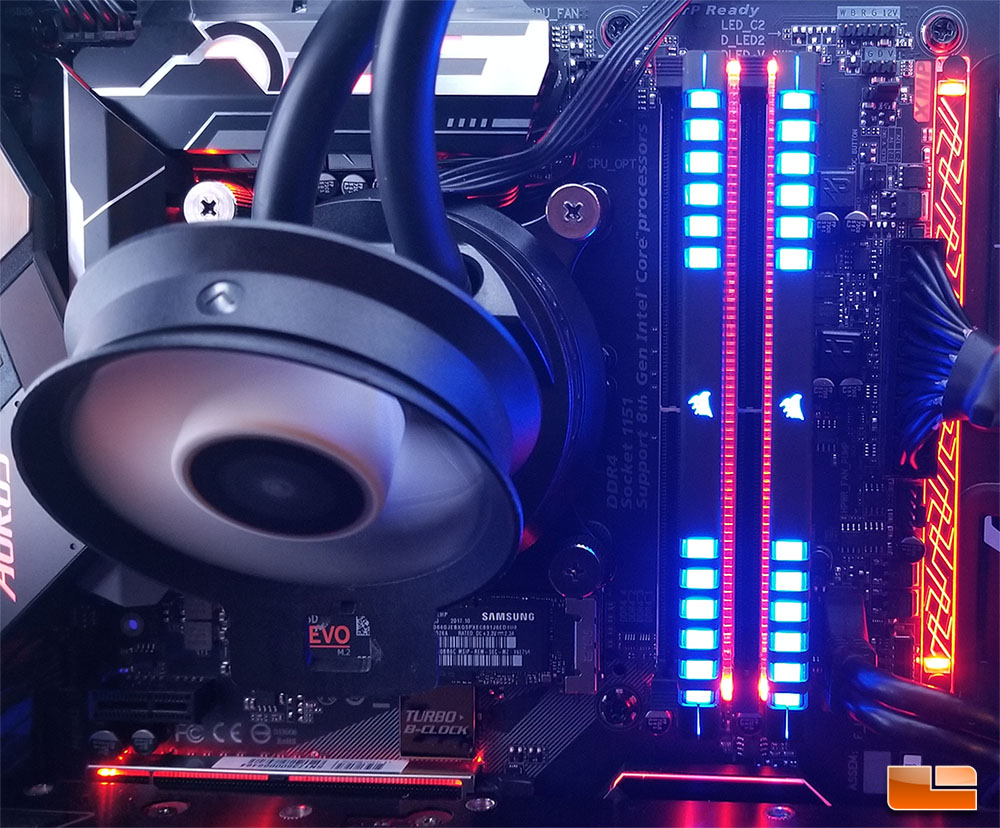
For testing of the ML140 Pro RGB, I used a CoolerMaster MasterCase 5 Pro Tempered Glass Edition case and installed one ML140 Pro RGB fans as an intake and two of them as pull-mode fans for my CryoRig A80 AIO cooler. Installation was a breeze and since I had already installed the Lighting Node Pro and Corsair Fan Hub on the rear of my motherboard tray during the installation of the Corsair LL RGB fans, it was really simple to just add the ML Pro fans to the mix by running cables to the hub, which was very simple. The ML140 Pro RGB fan power and lighting cables are twice as long as the cable on the CryoRig QF140 fans that shipped with my AIO, which made installation easy, since I didn’t have to worry about the cable run not being long enough.
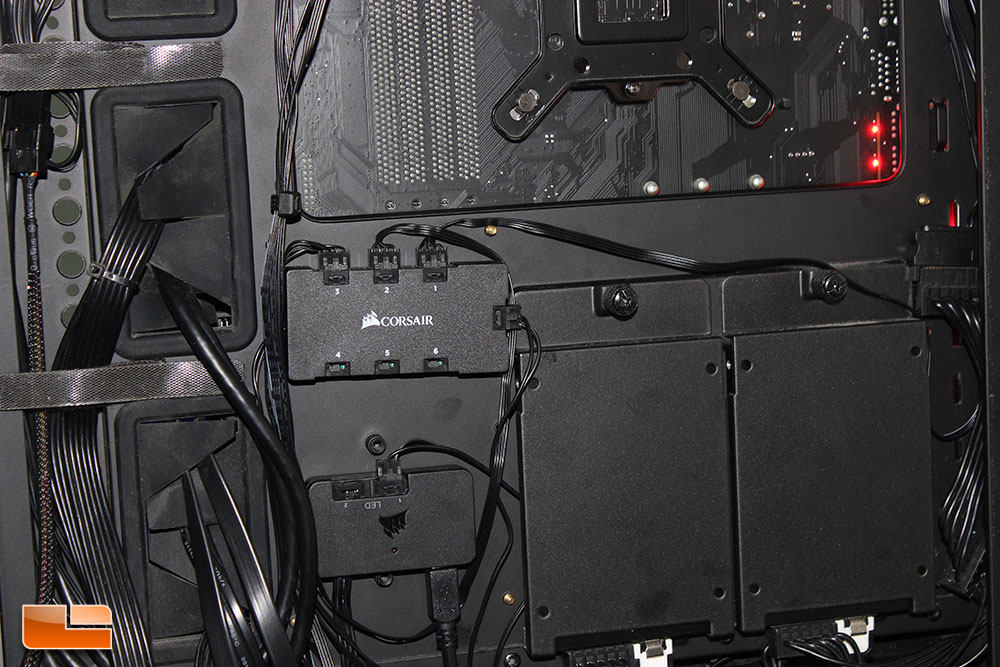
The Corsair ML Pro RGB fans do present a unique wiring situation, as each fan has to be wired to the Fan Hub, which has a single cable connection to the Lighting Node Pro. The fan power and LED lighting cables on the ML Pro RGB fans are thin and easy to route, with a solid two feet of cable per connection, which should allow for routing pretty much anywhere in a standard ATX case. While not quite the hassle that NZXT presents with their daisy-chain method of connecting each RGB fan to each other, Corsairs solution does require a bit of planning, as it should be placed in a location central to every fan, where it will allow for the fan cables to be routed in a clean, presentable manner. I do like Corsair’s solution, as it allows for easy addition of new fans to the chain without having to mess with previously installed fan cables.
When you first power on the system with the ML Pro RGB fans installed, you might be surprised that there is no active lighting mode. Until the fans are toggled on using the Lighting Node Pro, they won’t brighten up your day. This is actually something that I wish Corsair would change, but that would just lead to hordes of people complaining that you can’t change the lighting mode until you install software, which can take quite some time on a new build. Basically, just like with anything in life, you can’t satisfy everybody.
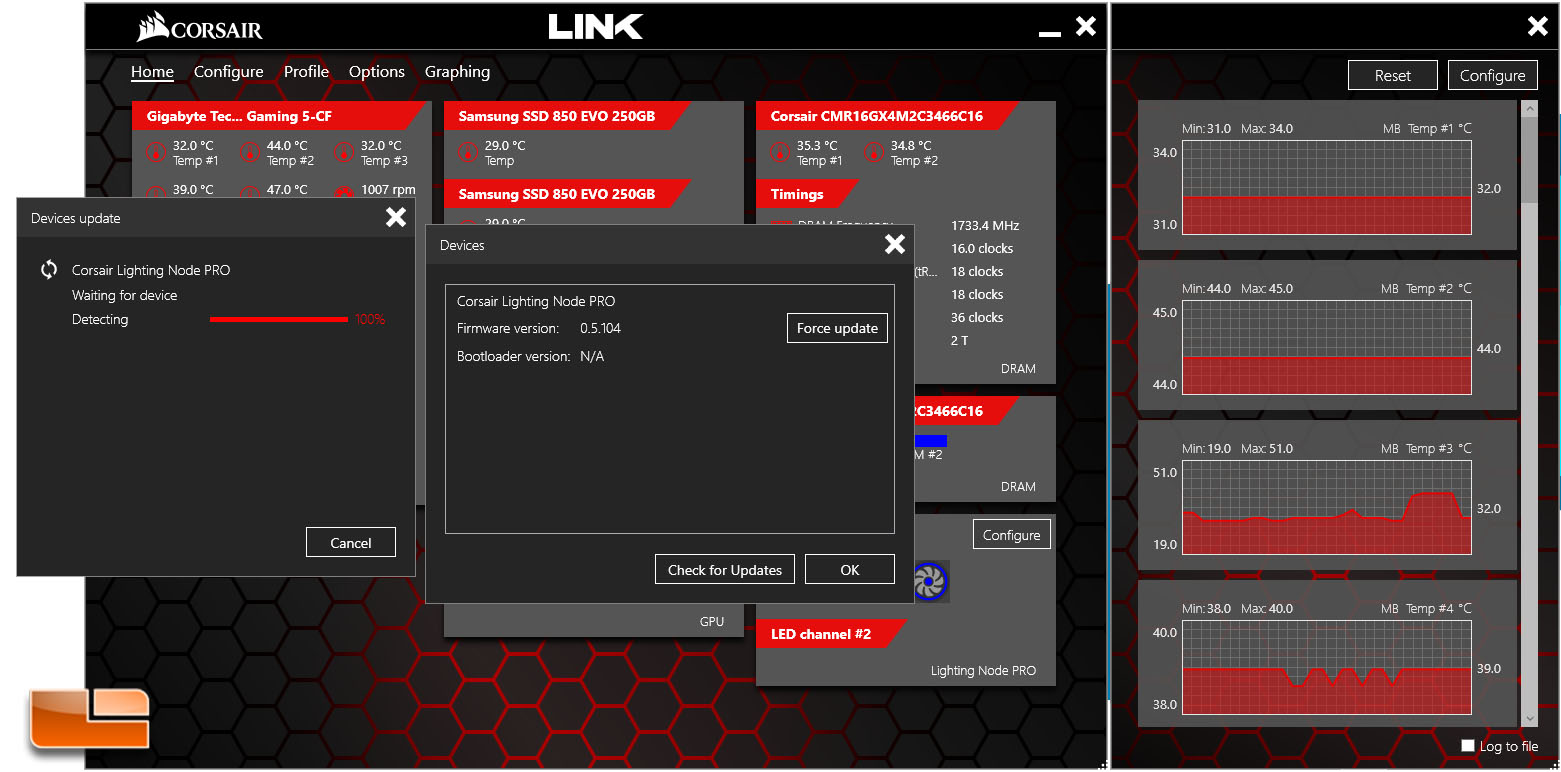
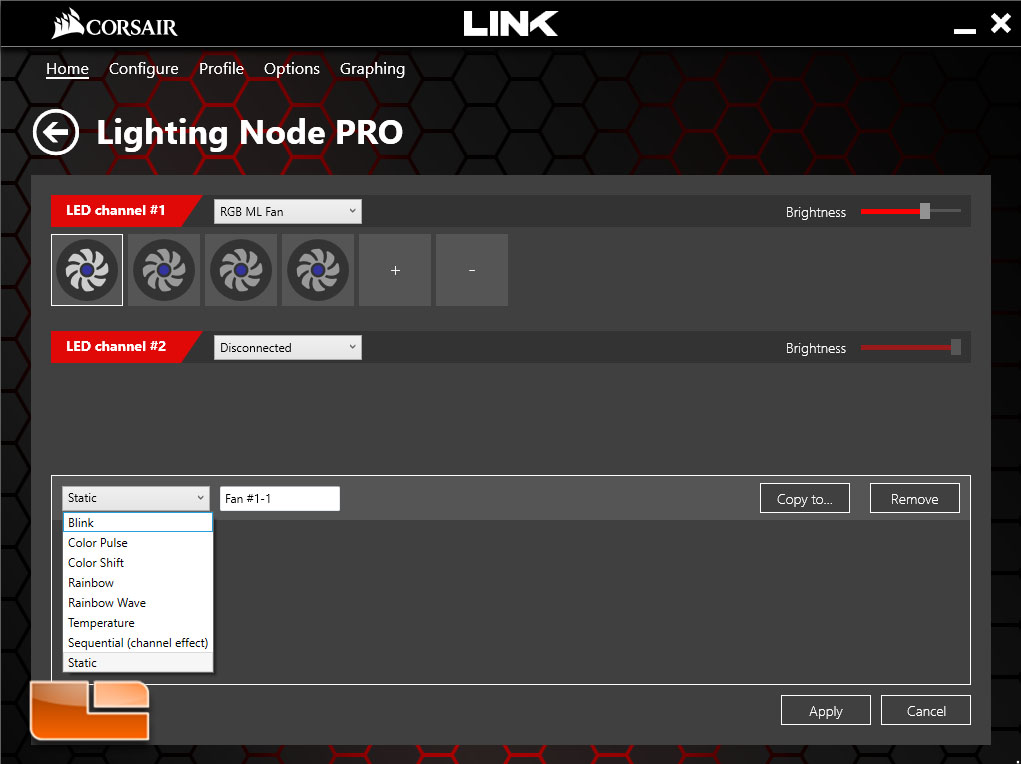
Before I could get to doing any testing, Corsair Link informed me that firmware for my Lighting Node Pro needed to be updated. I clicked okay to the update and everything went through without a hitch, with Corsair Link alerting me that the process had been completed.
Corsair released version 4.9.2.27 of their Link Software on November 15, 2017, just a day prior to this review posting.

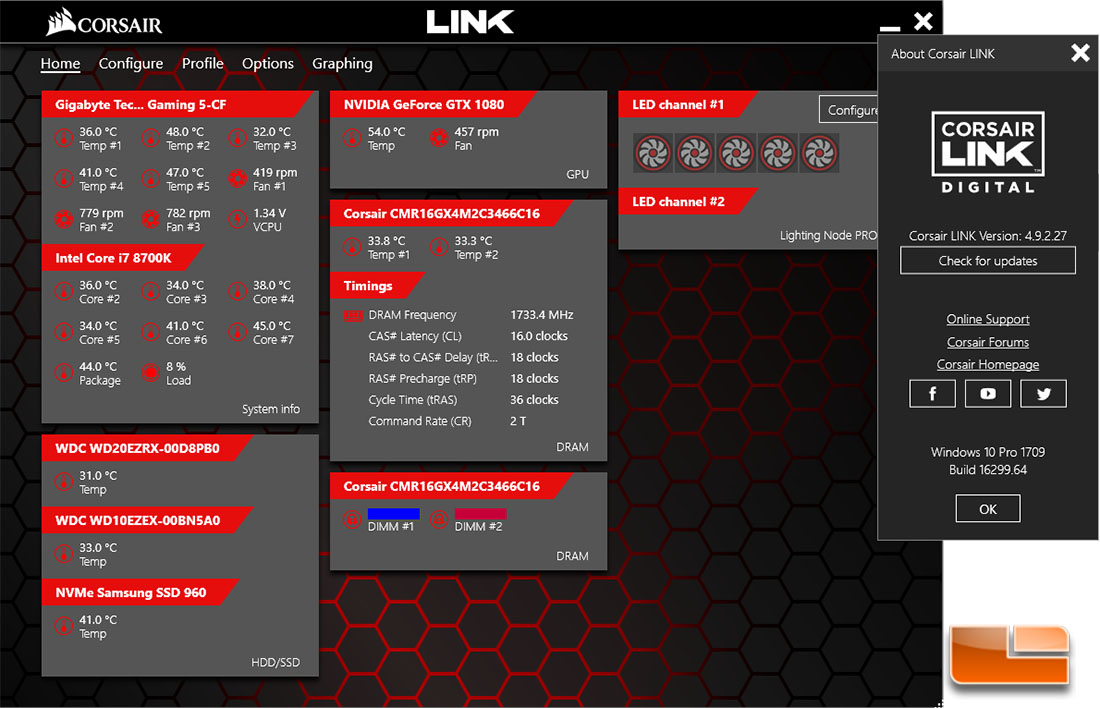
The main section of Corsair Link is full of useful system information, including temperature readouts for your CPU, motherboard, system drives and GPU. The ability to see your memory timings is also provided, which is a pretty handy feature and considerate of Corsair’s role as a big player in the high performance DDR industry. DRAM support actually goes even further in Corsair Link if you own a set of Corsair Vengeance DDR4 RGB DRAM, as well.
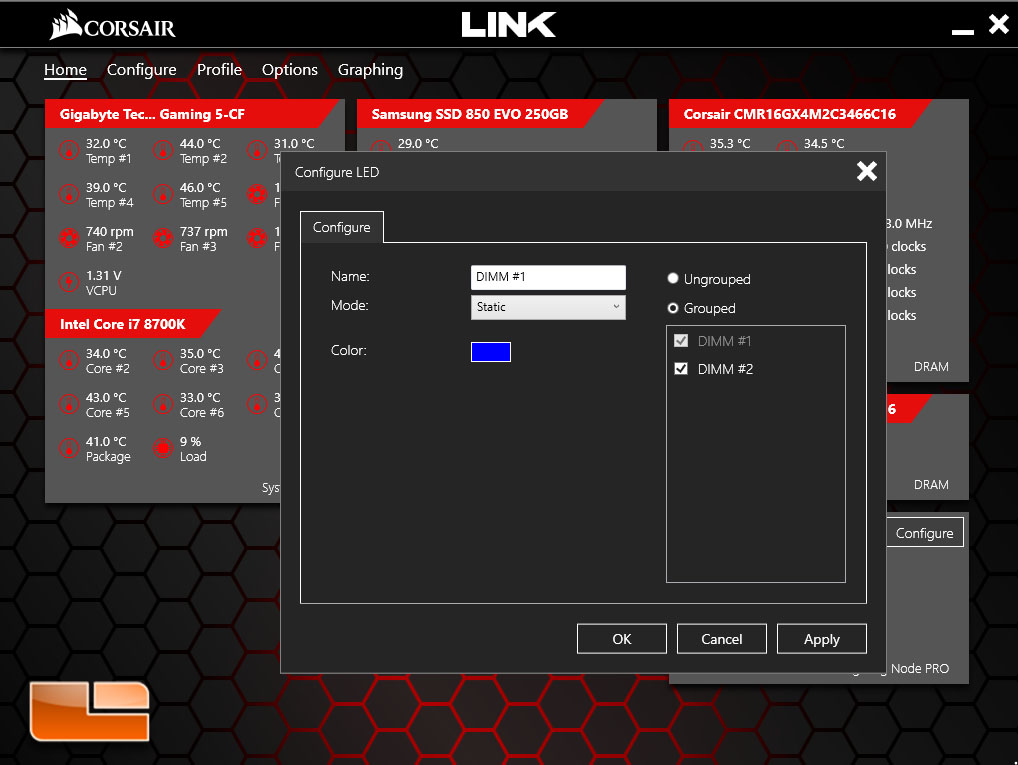

Corsair Link lets users of the Vengeance DDR4 RGB DRAM set their memory to specific colors and lighting effects, including Color Shift, which lets you specify colors to shift between. Rainbow mode is also provided, which flows through the spectrum of RGB, but I typically use RGB lighting to set to a couple of static colors that play well together for a nice, coordinated look once my initial phase of amazement at the spectrum of effects has worn out after a short while. I was disappointed to find out that there is no way to connect the DRAM RGB lighting to the Lighting Node Pro RGB effects in Corsair Link, since some of the effects, like Static, Color Shift and Rainbow Mode are available on both the Vengeance DDR4 RGB DRAM and the ML Pro RGB fans.
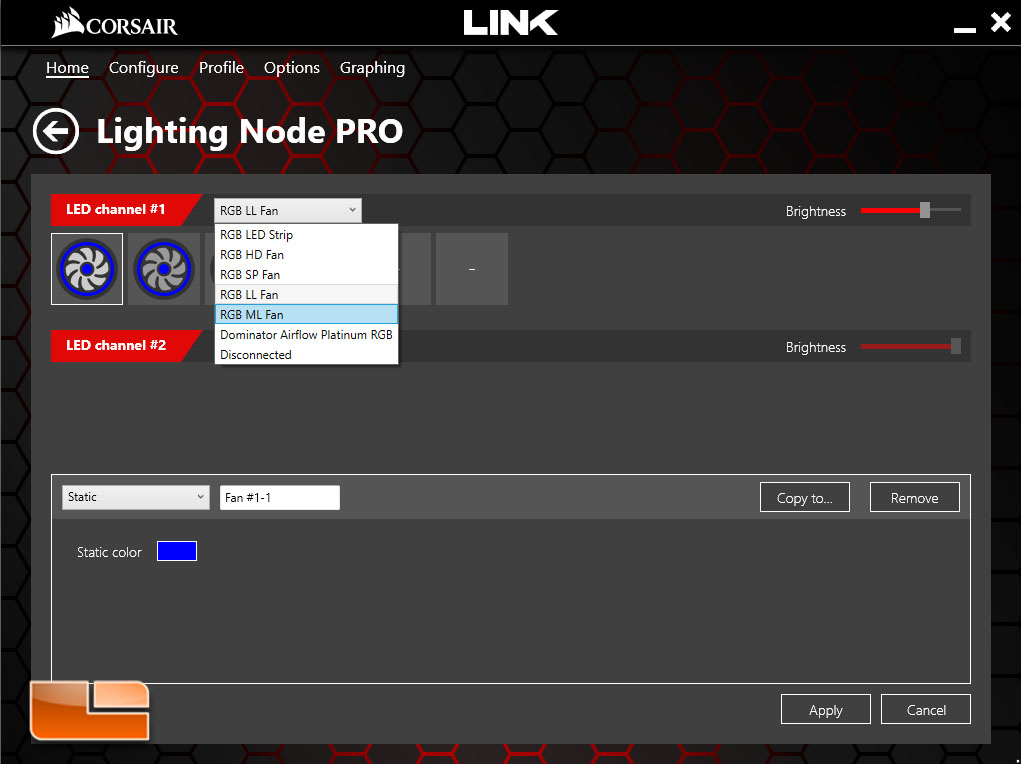
I found out the hard way that the ML Pro RGB and LL RGB fans aren’t going to work correctly if they are on the same channel. Once I got the version of Link that officially supports the ML Pro RGB fans, I found that setting the chain the ML Pro RGB would cause most of my fans to stop working, with only the first two LL fans in the chain lighting up. However, things continued to work okay with the chain set to RGB LL if I wanted to use static mode or Rainbow settings, but individual control over the fans wasn’t possible and the limitation of mixing fans on Corsair Link really showed its head.
To get true, full RGB lighting functionality from both the LL RGB and ML Pro RGB fans while they were installed in the same system, I would have to run them on separate channels with their own fan hubs, which would eliminate my ability to run LED strips on the secondary channel of the Lighting Node Pro. For now, I really have to recommend against mixing Corsair RGB fans in the same system if you want to utilize all of the Lighting modes with potential issues, which is a shame, because the different models of Corsair RGB fans may have usage scenarios in the same system, such as HD RGB fans on the radiators and ML Pro RGB fans as intake and exhaust. You could install a second Lighting Node Pro, of course, but I feel like there is a better solution to all of this: Corsair needs to allow for different types of fans on the same chain within Corsair Link.
While not quite as effect-rich as the LL series of fans, which have the necessary rings to be fashionable at any RGB party, the ML Pro RGB fans still have a respectable eight lighting effects on their side, including cool ones like Rainbow Wave and Color Shift.

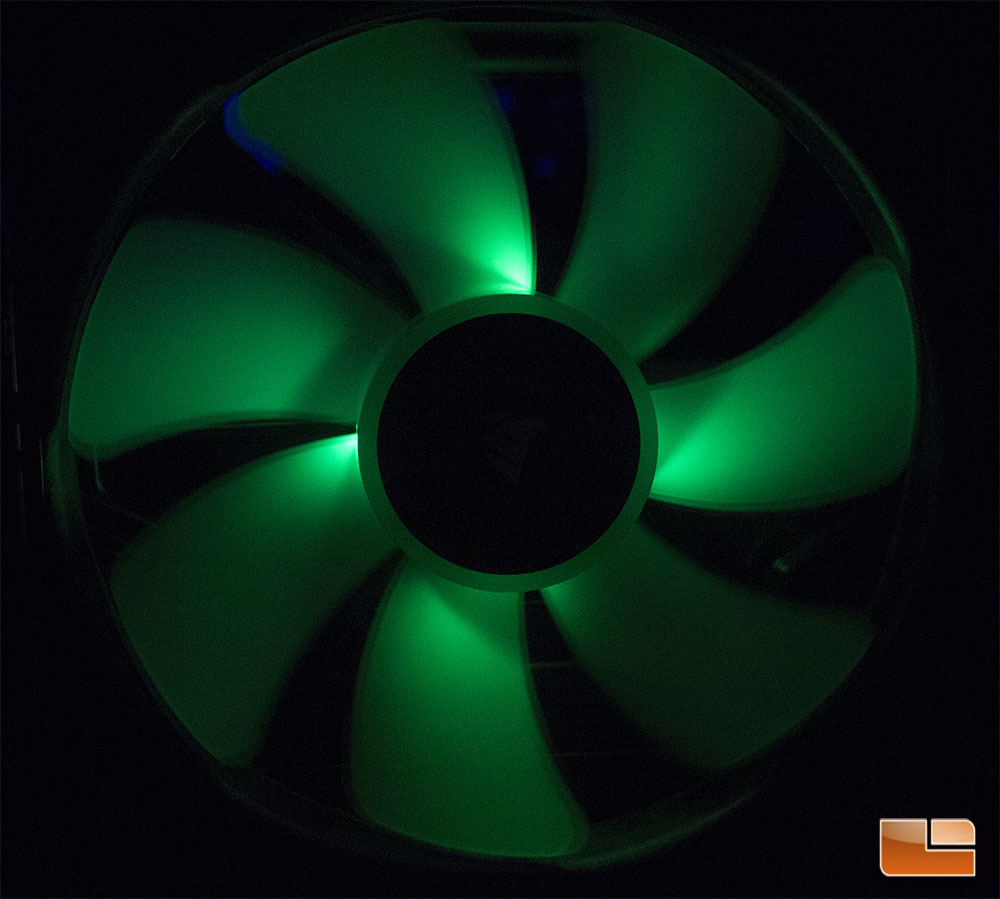
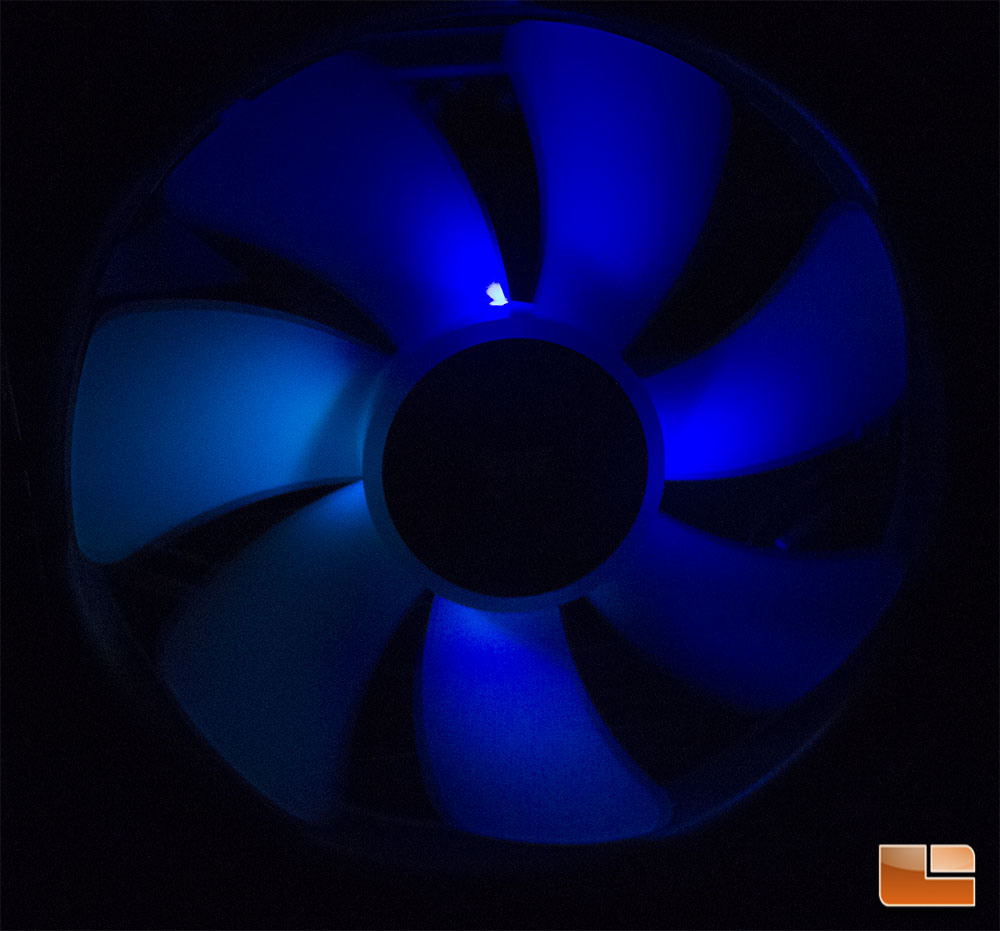
The lighting effects of the ML Pro RGB fans look uniform and clean, with fairly smooth transition effects, which can be limited by just four center-mounted LED’s. While there is a minimal amount of hot spotting, the lighting here closely resembles the center ring lighting seen on the LL series fans, but isn’t diffused as well because the LED’s don’t actually sit under a diffused plastic housing as they do on the LL series fans, but rather they are exposed.
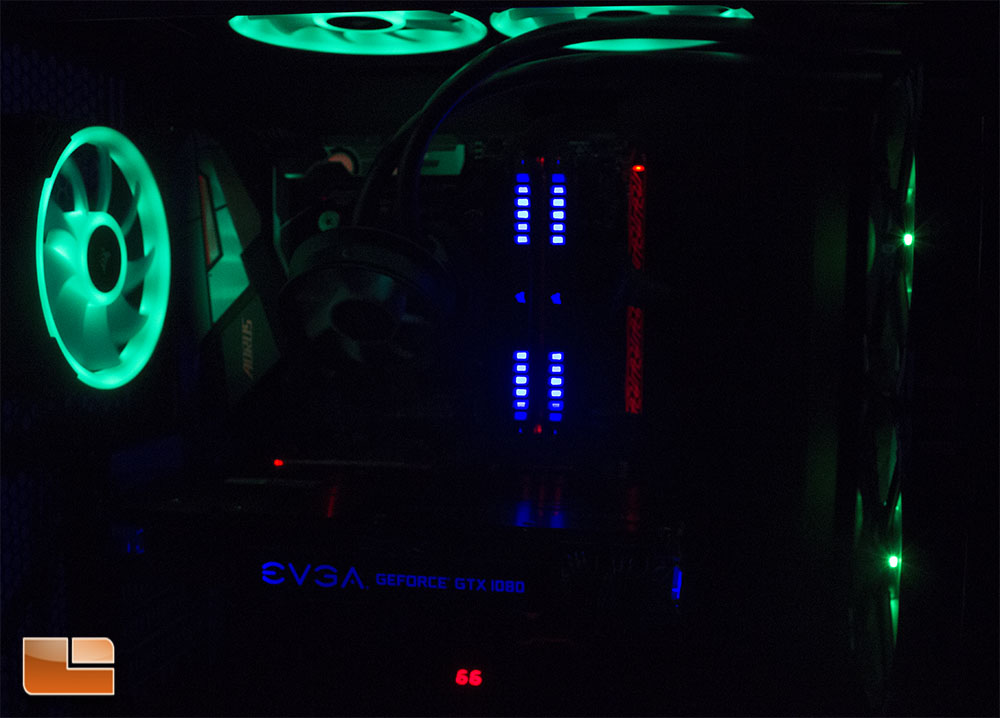
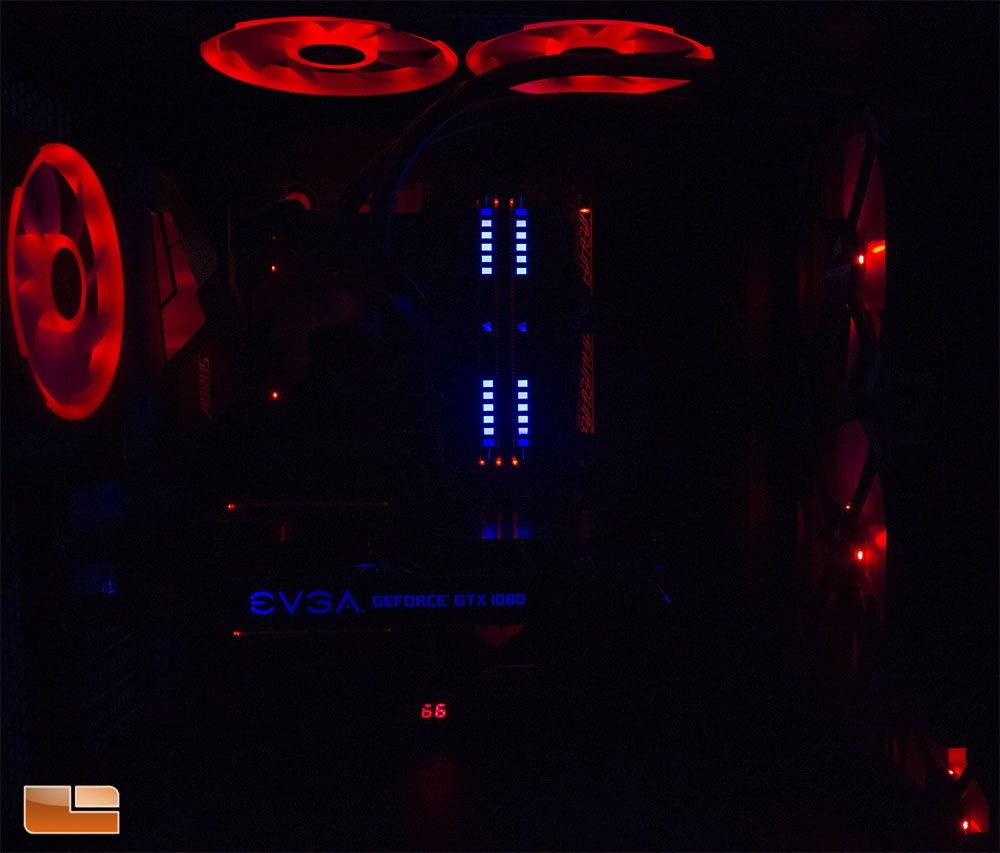
The ML140 Pro RGB worked great as radiator fans, despite my initial reservations. Due to where Corsair places the LED’s on the ML 140 Pro RGB, the LED’s can be seen clearly from the rear if looking from an angle. This isn’t a major issue, since most people are going to be looking forward and to the side at their PC and won’t be looking at the fans from the rear, but something to keep in mind. Corsair RGB fans are really best seen from the front and most other manufacturers are designing their fans to have the best aesthetics from a front-view, which leaves radiator installations a bit to be desired. I am sure we’ll see a solution for this soon from one of the major RGB players, with uniform RGB on both sides of the fan.
The ML140 Pro RGB worked great and I had a lot of fun getting them installed and running. My system is running quieter than ever, without a drop in cooling performance. The Corsair ML140 Pro RGB have helped deliver some great aesthetic and function to my new I7 8700K Coffee Lake system and Corsair has once again delivered some amazing RGB fans to the market. While I still consider the Corsair LL RGB fans to the best looking RGB fans on the market, the Corsair ML Pro RGB fans are the best low-noise, high airflow RGB fans on the market. I only wish that the ML and LL fans could get along together on the same RGB chain, as sacrificing the effects and not having completely accurate control over the lighting was a bit of a bummer.
Let’s conclude this review of the Corsair ML140 RGB with my final thoughts on where the fans fit into the current landscape and whether or not they are worth a purchase.