Corsair 2GB DOMINATOR DDR3 2133MHz Memory Kit
Installing The Modules
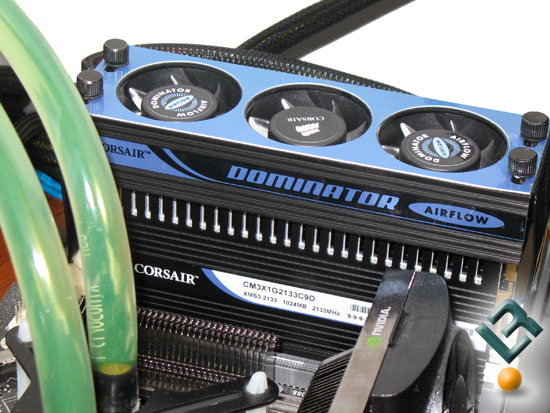
When installing the Corsair TW3X4G2133C9DF be sure to use the black DIMM slots ONLY, which are the the farthest set away from the processor socket. If you use the grey DIMM slots it will most likely result in unstable system / BSOD during OS boot up or even lock-up the system during POST routine! The Corsair TW3X4G2133C9DF memory kit pictured above is installed in the block sockets and you can make out part of the grey DIMM slot that is not being used closest to the CPU socket.

Since this memory kit has EPP 2.0 memory profiles and is NVIDIA SLI Certified the easiest way to get them up and running correctly is to enable the EPP 2.0 memory. Corsair also suggest enabled P1 and P2 to help improve performance and stability on the NVIDIA nForce 790i SLU Ultra motherboard. If your nForce 790i SLI Ultra motherboard doesn’t have these settings be sure to update the BIOS as only the later BIOS versions have the P1 and P2 settings. Enabling the EPP 2.0 Memory profile does not enabled the P1 and P2 setting, so if the system is not stable and has a long system beep when you try to boot this is the problem. I’m not sure what the P1 and P2 settings do, but it seems that no one does.
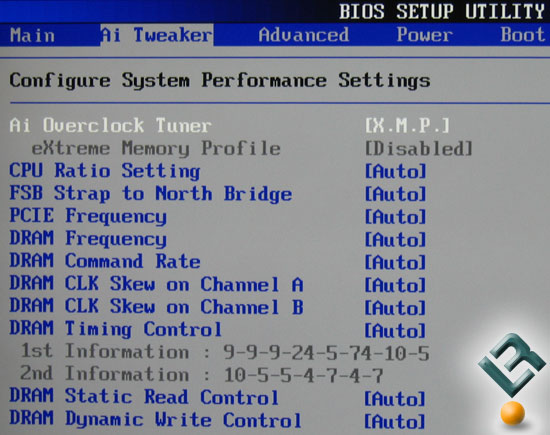
If you don’t plan on enabling the EPP 2.0 memory profile you’ll need to manually set the memory settings for peak performance. Corsair informed us that the TW3X4G2133C9DF memory kit has been developed and tested on eVGA 790i SLI Ultra and confirmed to be compatible with Asus Striker Ii Extreme with the BIOS settings below. These are the settings Corsair used for an eVGA 790i SLI Ultra / Intel Core 2 Duo processor platform that you can use as a reference:
x FSB – Memory Ratio – Auto
FSB (QDR), MHz – [1600]
Actual FSB (QDR), MHz 1600.0
MEM (DDR), MHz – [2000]
Actual MEM (QDR), MHz 2133.0
P1 [Enabled]
P2 [Enabled]
Memory timing Setting [Expert]
tCL (CAS Latency) – [9]
tRCD – [9]
tRP – [9]
tRAS – [24]
Command Per Clock (CMD) – [2T]
tRRD – [Auto]
tRC -[Auto]
tWR – [Auto]
tWTR – [Auto]
tFAW – [Auto]
tREF – [Auto]
CPU Core – [1.35000V]
CPU FSB – [Auto]
Memory – [1.90V]
nForce SPP – [1.50V]
nForce MCP – [Auto]
GTLVREF Lane 0 – [Auto]
GTLVREF Lane 1 – [Auto]
GTLVREF Lane 2 – [Auto]
GTLVREF Lane 3 – [Auto]
Installing the memory kit in the black slots and correctly setting up the BIOS is only half the battle when it comes to using this memory kit. Even with the EPP 2.0 Memory profile loaded in the BIOS and the P1 and P2 BIOS settings enabled our EVGA nForce 790i SLI Ultra motherboard would have a long system beep and finally boot saying that overclocking had failed. A quick restart of the system, with no setting changes, and then it would boot just fine. This is what many would call ‘cold booting’ issues and it seems pushing this platform to this extreme causes a few here and there. Not a big deal breaker by any means, but if you plan on running memory this fast expect it!
If you want to know how this kit does on other chipsets you are out of luck in this article as all of my testing was completed on the nForce 790i SLI Ultra chipset. The kit will run on Intel X38 and X48 chipsets with ease, but it doesn’t support Intel XMP memory profiles. This means that you will have to set everything manually, which will take a few seconds to reach speeds this high. The best I have ever managed on an Intel X38 Express chipset board was 2080MHz, which was with this memory kit. This doesn’t mean the memory kit was to blame as it was a limitation of that specific platform. If you want to take a look at what settings need to be changed to run this kit on an ASUS P5E3 deluxe/platinum then check out this thread in the forums.
Comments are closed.