Azza Inferno 310 Mid Tower Case Review
Azza Inferno 310 Exterior
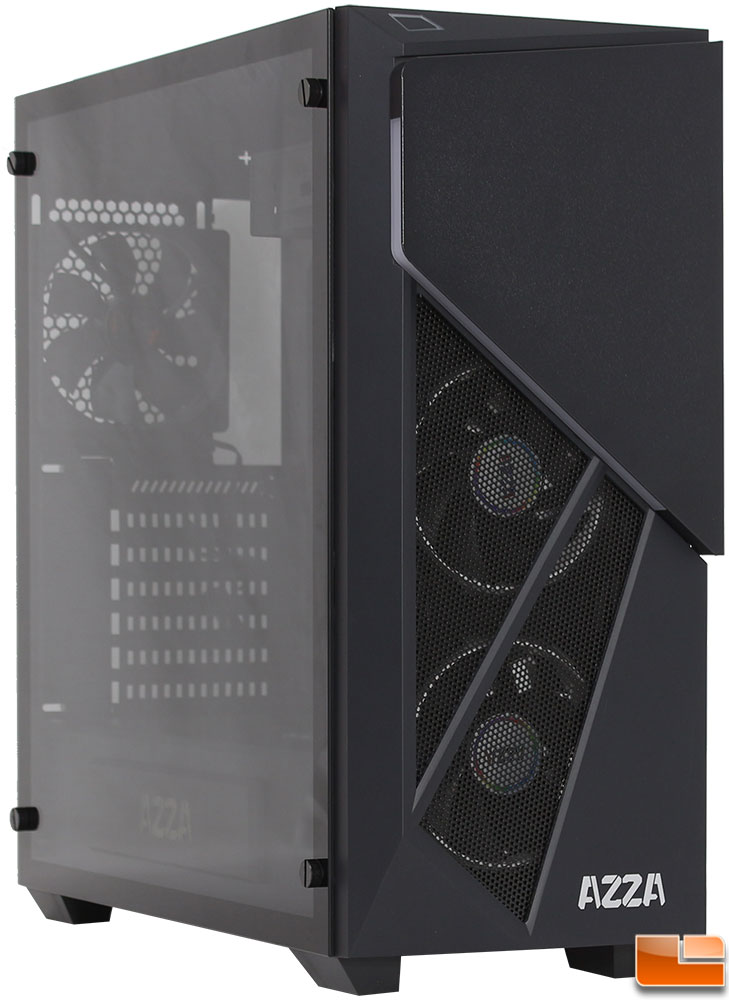
The Azza Inferno 310 is only offered in the one configuration, solid black with the tempered glass side panel. However the RGB accents and fans will allow you to easily customize the case to your specific color needs. Taking a quick look at the case, we find the finish to be flawless. The front of the case is pretty plain, there is a door on the front that covers the hidden 5.25″ device bay, and rather than it being a plain rectangle door, Azza has given it a bit of a different shape to enhance the RGB accent bar built into the door. Beneath the door we can see the two intake 120mm RGB Hurricane fans, behind a metal mesh. At the very bottom of the front panel, Azza has placed their name on the case in big bright white letters.
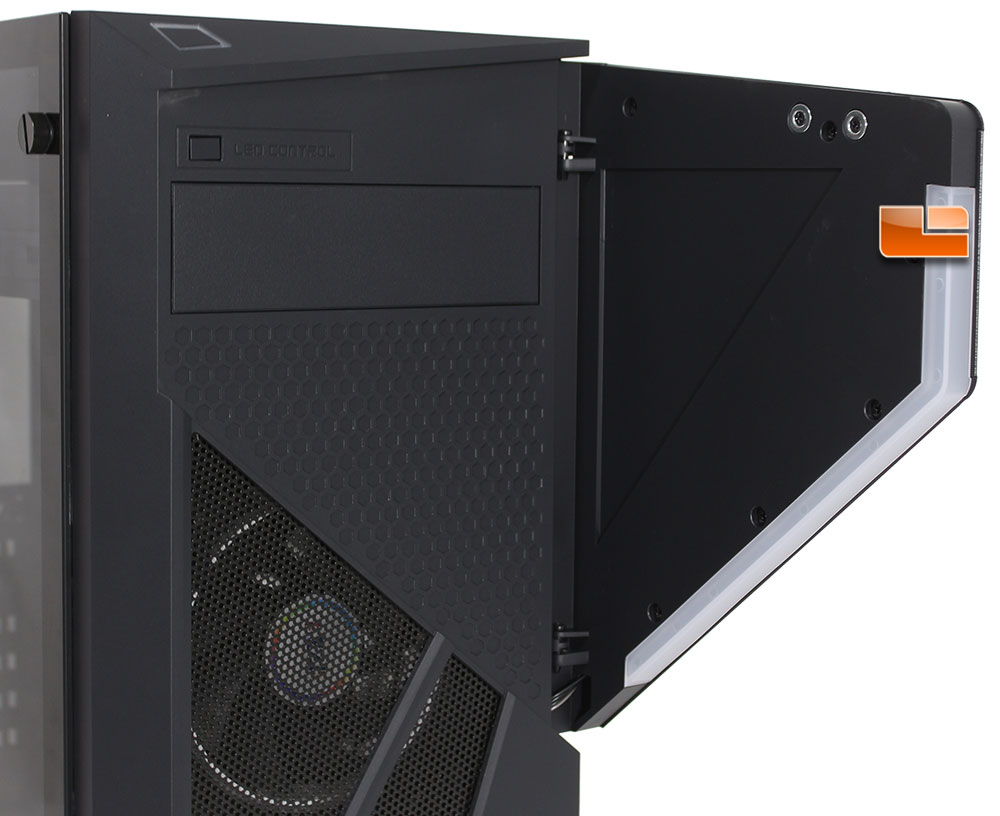
One current trend is to get rid of all 5.25″ drive bays, there are many reasons people still want 5.25″ bays. Azza has placed one 5.25″ device bay on the Inferno 310; it is located behind a large door that also houses some RGB accent LEDs. This door is held closed by a couple of magnets. Right above the 5.25″ device bay, is the RGB LED controller button (we’ll take a closer look at it’s functions later).
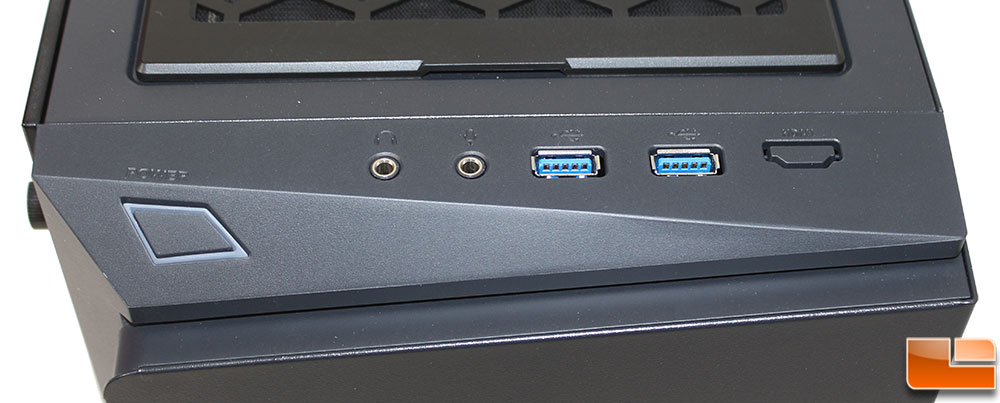
On some cases the front I/O cluster is located on the side of the case, or the top panel on the sides; which can make placement of the case very important in order to have easy access to these ports. Azza has placed the front I/O cluster on the top panel, but at the front of the case. Making it nearly universally easy to get to the ports. The front I/O cluster includes the common headphone/microphone jack, two SuperSpeed USB 3.1 Gen 1 ports, and an HDMI port cutout (not populated though). If you are not familiar with the current VR systems, you need the HDMI port. The power button is on the left side of the top cluster, placing it right above the front door. There is one common item missing from the I/O cluster, a reset button.
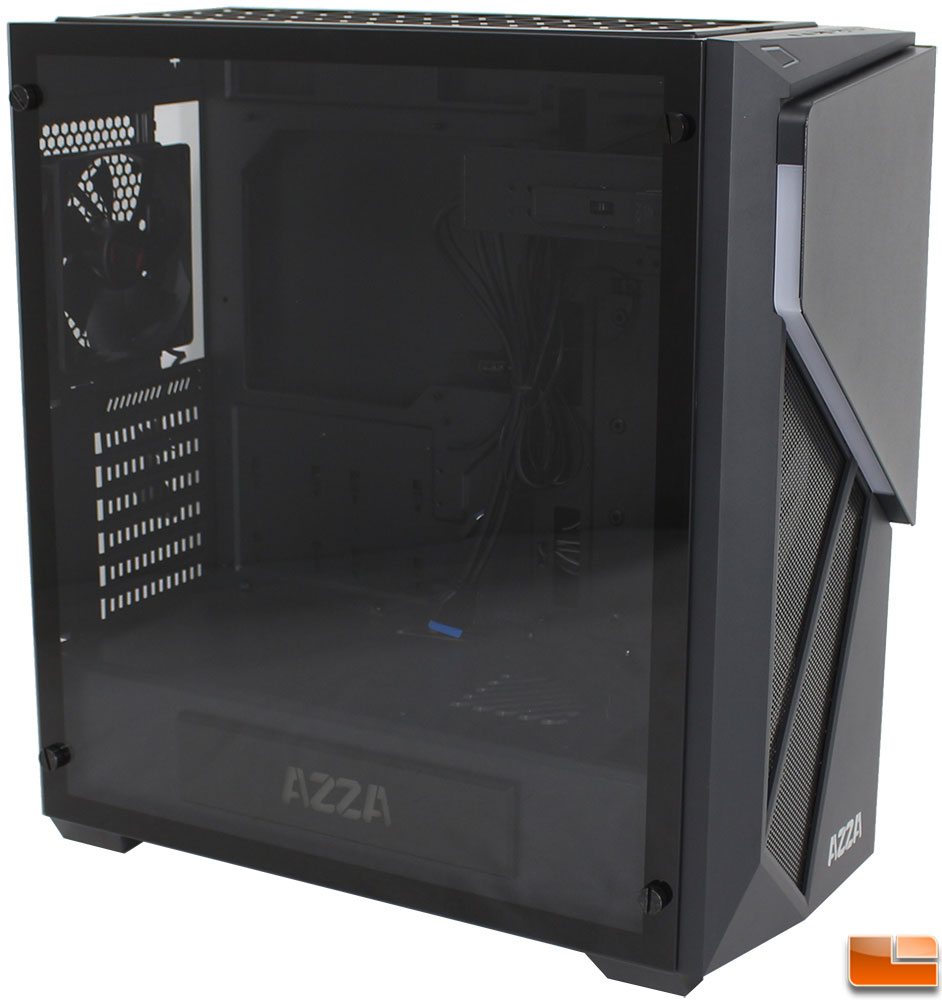
The tempered glass side panel is held in place with four large thumbscrews, and rests on four rubber coated posts. The rubber coating on the screw posts helps to protect the tempered glass, but also reduce vibration noise that might occur if the rubber coating wasn’t there. While the entire side panel is tempered glass, there is a black edging on it that extends in approximately 3/4 inch.
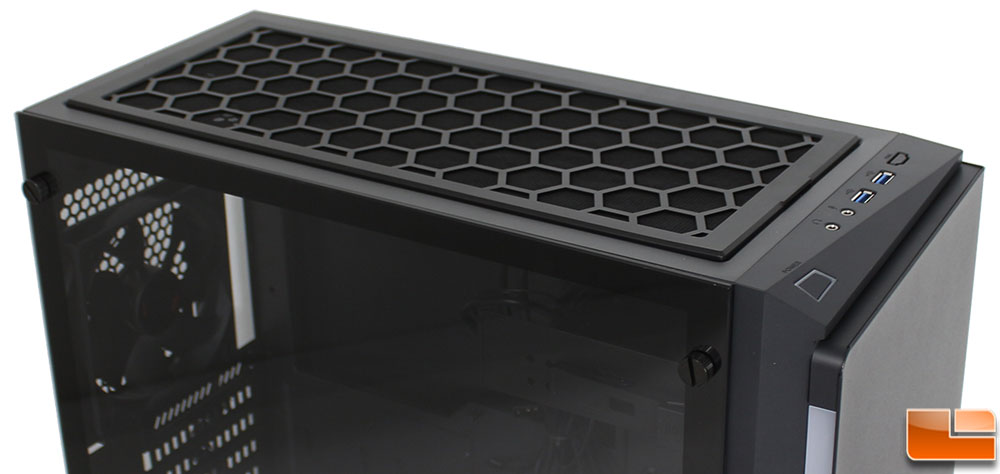
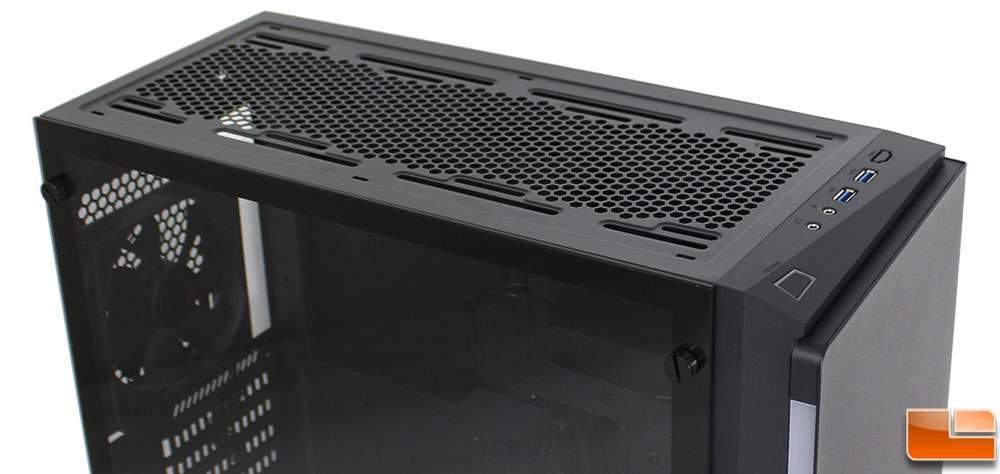
The majority of the top panel is open, allowing for up to additional cooling options. Instead of just having the wire mesh, Azza has installed a removable filter that snaps into place. This is easily removed, revealing the mounting slots for either a 3x120mm or 2x140mm fan solution, or up to a 360mm radiator.
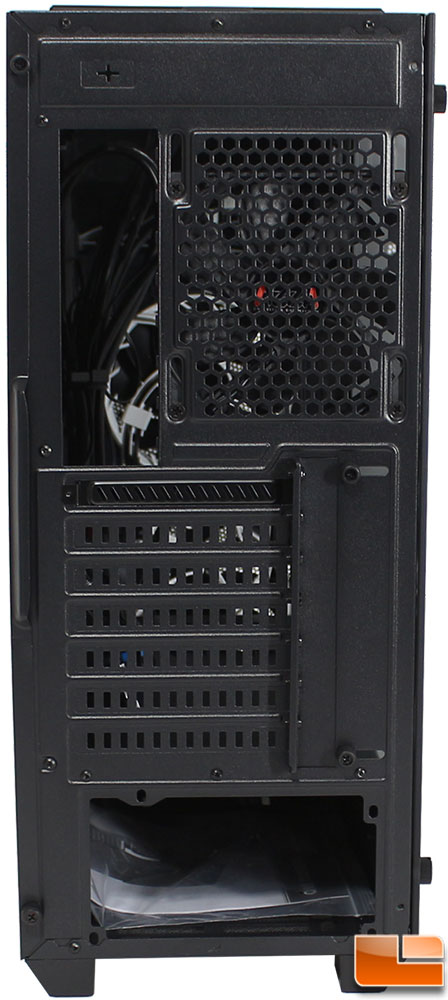
Turning to the back panel, we see the features we expect to find. There is a fan exhaust that supports either a 120mm or 140mm fan, the motherboard rear I/O port slot, seven PCI expansion slots, and at the bottom the power supply. There are two additional items to point out. At the very top of the case is a rectangle punch out hole, which to be honest I don’t know what it could be used for. Above the PCI expansion slots is a cover that makes it a bit more difficult to remove the expansion cards; however, it does have one additional use, by covering up a bit of a gap it allows the expansion slots to be flush with the rest of the case, rather than being indented a little like we usually find. I noticed two different types of expansion slot covers in use here, the first one is a removable cover, the others are attached to the case and need to be punched out before using the slot. One downside is if you remove the wrong ones you do not have any additional covers.

Laying the case down, we can take a quick look at the bottom panel. Here we find four feet that raise the case approximately 1 inch, allowing for the power supply to get plenty of fresh air. Each of the four feet has a rubber base so the case shouldn’t slide around once it’s loaded up. The bottom mounted power supply does have a simple wire mesh filter in place, however it is not easily removable. Many cases are making the bottom intake filter removable from the back of the case. This makes it extremely convenient to keep it clean. Keeping in mind that Azza does everything possible to keep the cost of the case down, this is an easy way to cut a little of the cost while still providing the basic functionality.
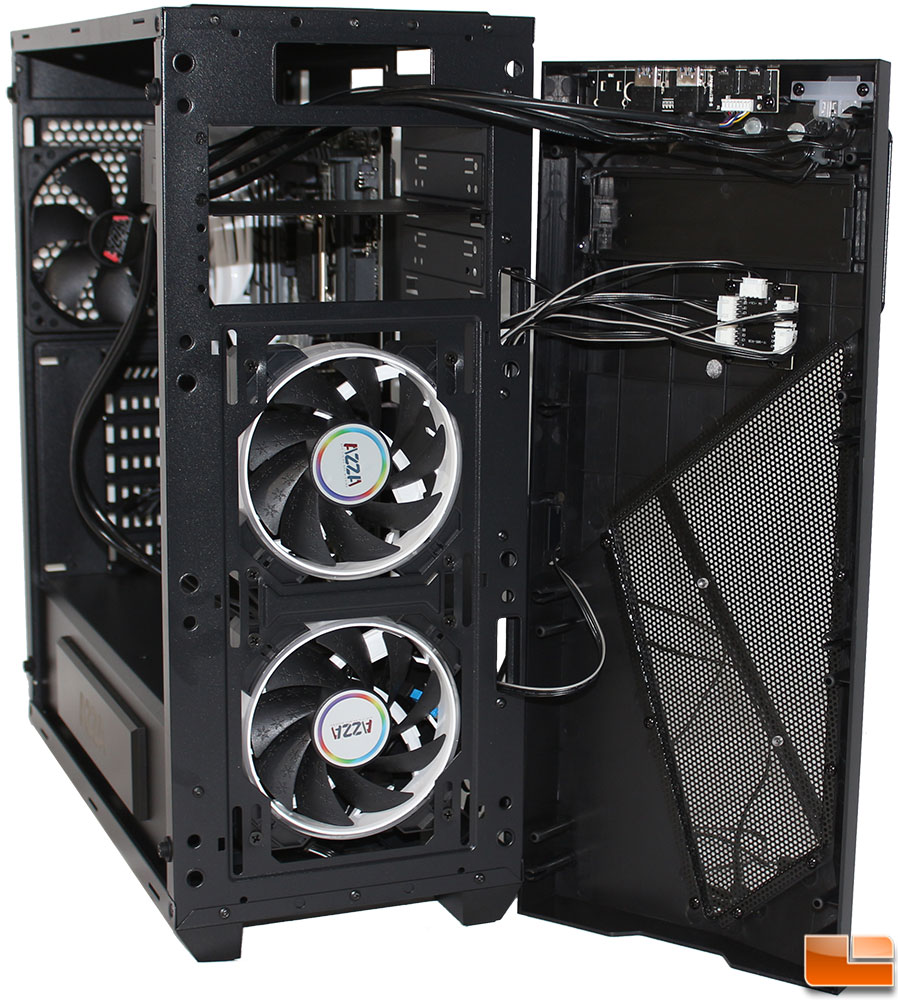
The front panel removed with a slight pull from the bottom of the case; becareful not to pull too hard as there are three sets of wires attached to the front panel. With the paenl removed, we can see the two 120mm RGB Hurricane fans which are capable of up to 1,800RPM with a maximum airflow of 56.12CFM @ 29.8dB(A). On the front panel, we can see there is no fine filter between the fans and wire mesh. The RGB button we saw behind the outside door, connects to the little controller beneath the 5.25 inch bay cover on the front panel. Speaking of the 5.25 inch bay cover, it is a very simple snap in cover; the 5.25 inch bay itself is ready to go there are no steel covers to remove. At the very top we have all the wires for the front panel I/O cluster.