ASUS P7P55D Premium Motherboard Review
BIOS and AI Tweaker
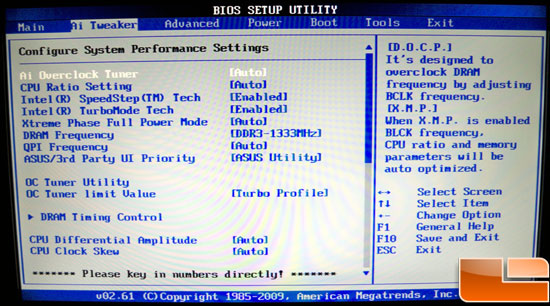
ASUS has long used the AWARD BIOS on their motherboards, so there isnt a much new to see here. Were focusing on the overclocking settings contained within the AI Tweaker menu. The picture above is the initial screen of the Ai Tweaker. You can adjust the Overclock Tuner from Auto to Manual and have a go at cranking things up on your own!
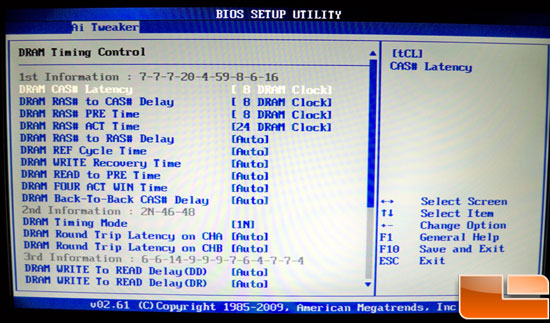
Here we are looking that the DRAM Timing Control menu. The primary timings listed on most RAM will be the first 4 options that youll adjust here. Under 2nd Information I would highly recommend setting DRAM Timing Mode to 1N. There are plenty of tweaking options available here for anyone willing to go through it all!
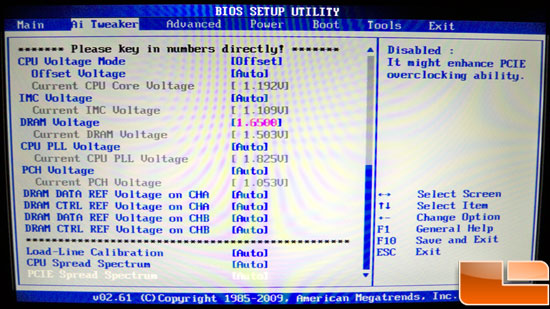
Back in the main Tweaker menu, we see the different voltage options for the various components. ASUS has done a great job here, showing the standard, minimum, maximum, and increment on the right of each selection. I also really like that they color code things when youre starting to push the voltage, the color coding is based on specs provided by Intel for longevity of your CPU. Ill leave out photos of each and every setting and range here as there is plenty of adjustment available.
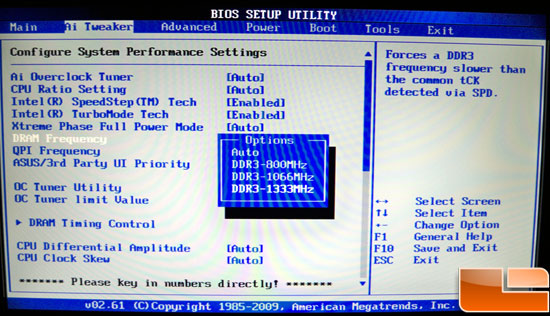
In this shot, you can see the available memory speeds when using the default BCLK setting.
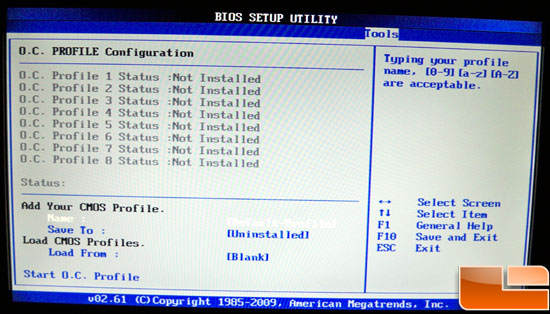
Finally, we have a shot from the “Tools” menu, under the OC Profile. Here you can store your the variations on your overclock, so that you don’t have to reconfigure everything in case you need to reset the CMOS. This is a very handy tool to have. It’s also nice to store your final overclock profile so that later on should you need to update your BIOS and forgot what your settings were, you can go right back to them.
OC Tuner Utility

From the main Ai Tweaker menu, you can see the OC Tuner Utility. By highlighting this and pressing ENTER, the ASUS motherboard will restart itself and run through some brief tests to determine an overclock. It took about 5 minutes for the testing to complete, and when finished the system booted into the operating system.
The percentage increase of the overclock depends on what you choose for the OC Tuner limit Value. The three choices are Good Performance, Better Performance, and Turbo Performance. With Better the motherboard set our i5 750 CPU to 1.28v, cranked the BCLK speed to 195, and set a multiplier of 17. This resulted in a clock speed of 3.3GHz. Turbo resulted in 1.35v, BCLK of 195, and the multiplier up to 19, for 3.7GHz. For someone who knows nothing about overclocking a Nehalem based processor, this is a decent place to start. The system was completely stable with the settings the motherboard set for us. However, anyone with some seat time will want to play with the settings manually, with the reward almost always being higher clock speeds. Well get to our manual overclock settings later in the review.

Comments are closed.