ASUS P6T Deluxe OC Palm Motherboard Review
Bundle and BIOS
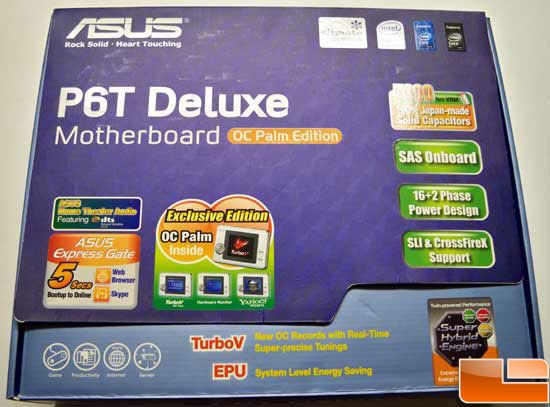
The retail box could leave you reading for a bit, displaying quite a few of the features that the motherboard supports.

In this photo, you can see the Palm OC device. Utilizing a USB connection, you can make on the fly adjustments to your overclock. Check out the Overclocking Results page for more on the Palm device.
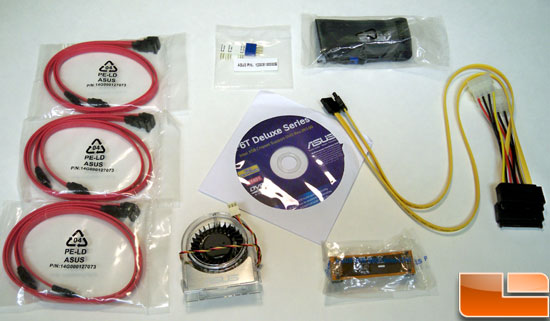
Here we see the bundle. On the right you see the two yellow SAS cables, at the bottom an SLI adapter and the chipset fan for those of you who watercool your CPU. 6 SATA cables are included as well.
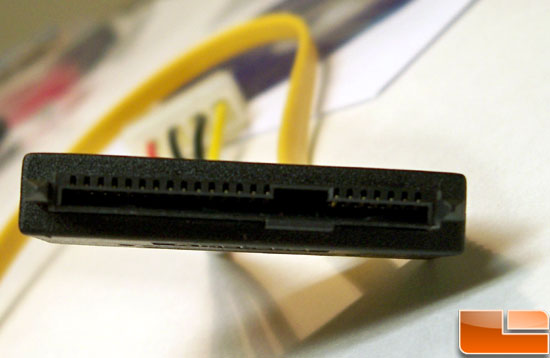
We have included a close up of the SAS cable so that you can get an idea of the difference between it and a SATA cable. Notice that the power and data pins are not separate like SATA.
BIOS:
Instead of seeing the default BIOS settings in our photos, we’ve left our settings for getting to 3.6GHz with low voltage and great stability. These shots should give you a good reference point to start your overclock. Some voltages like QPI and CPU may work at a lower setting than what we have displayed.
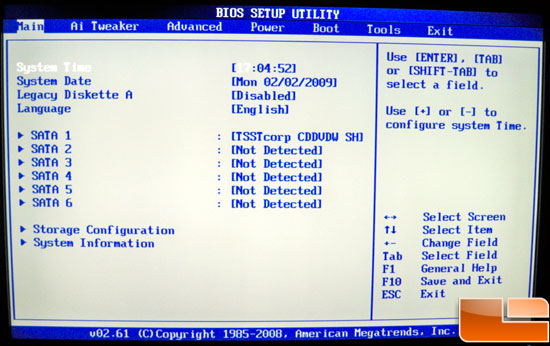
In this photo we can see the primary screen of the BIOS.
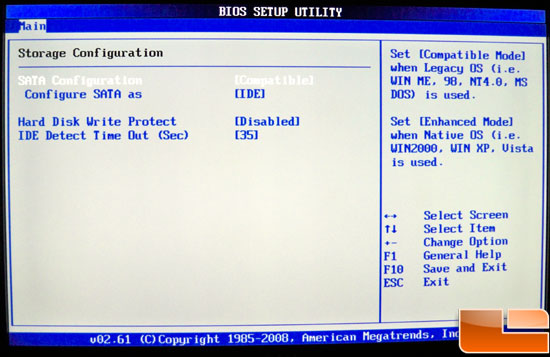
Within the primary screen is Storage Configuration. If you decide to boot from SAS you’ll need to set the drives on this screen to compatible.
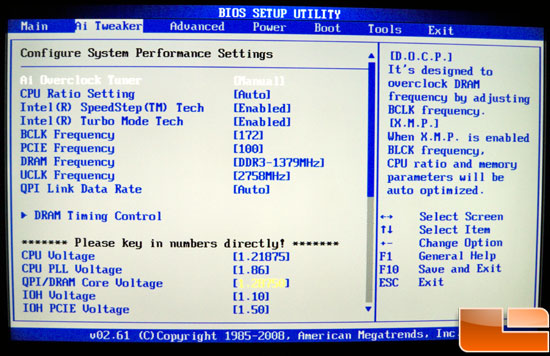
Here, we have the AI Tweak screen. The top setting has the options of Auto, Manual, DOCP, and XMP.
If you have memory with XMP profiles it will automatically set the QPI/Dram voltage, DRAM voltage, and DRAM timings to a known and tested value.
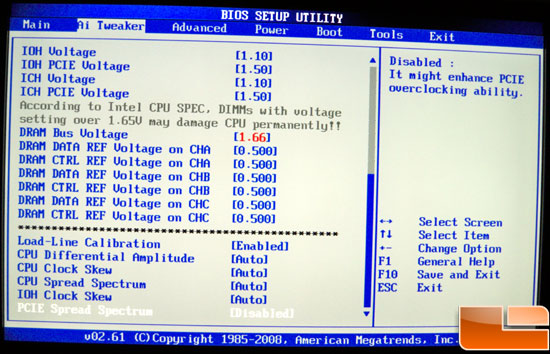
This photo shows the other options at the bottom of the AI Tweaker screen. You can see that we have the Memory voltage set to 1.66v here.
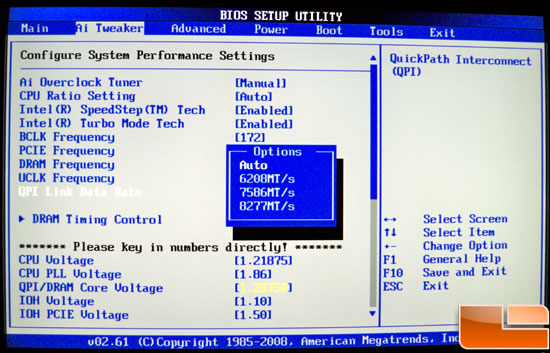
In this photo we’ve highlighted the QPI Link Speed. As you change the BCLK this number will change.
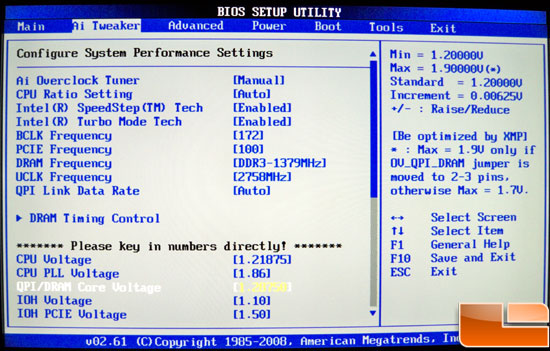
Here, we have the QPI voltage. On the right you can see the values that can be used here.
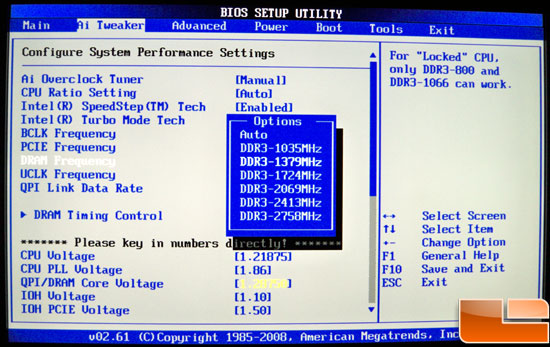
Here, we have the DDR multipliers; the speed also changes with the BCLK. Since our BCLK is 172 we don’t see familiar numbers like 1066/1333/1600/2000 as you would with a BCLK of 133.
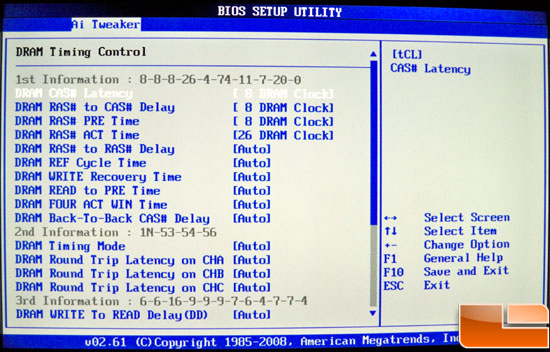
The DRAM timings offer a great number of options to tune. For now, we’re just going to stick with adjusting the 4 primary timings.
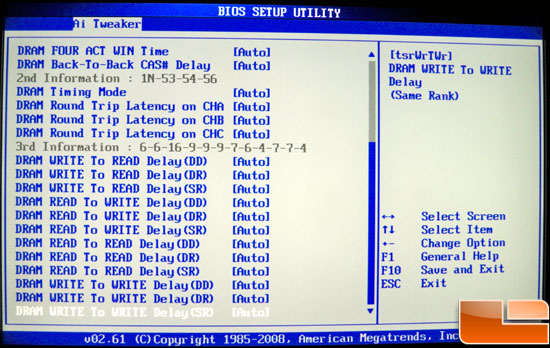
These are the additional timing options that can be adjusted.
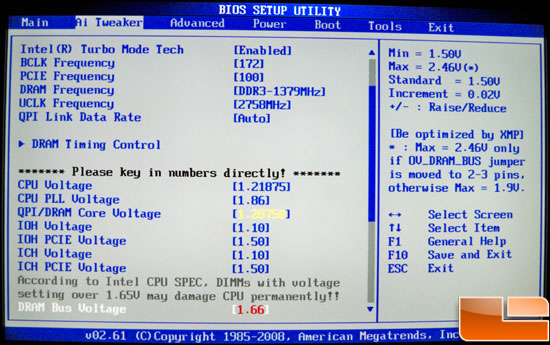
We’ve highlighted the DRAM voltage here. You can see that once you go above 1.65v that a warning is displayed. On the right you can see the maximum voltage setting that can be applied.
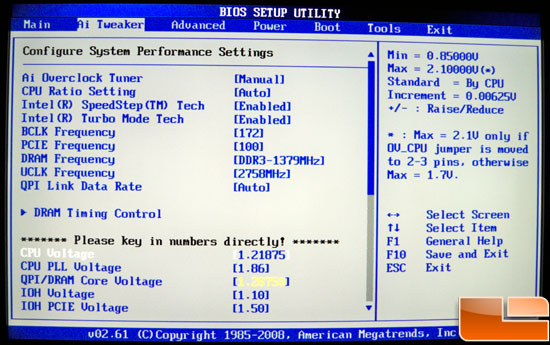
On the right side of this photo you can see the range of CPU voltage that can be applied, and the increment that it changes.
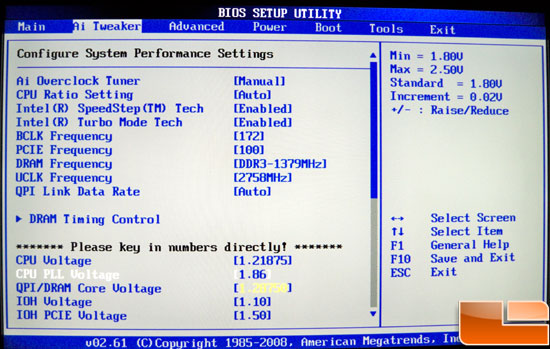
Here, we have the CPU PLL voltage, with the range and increment on the right.
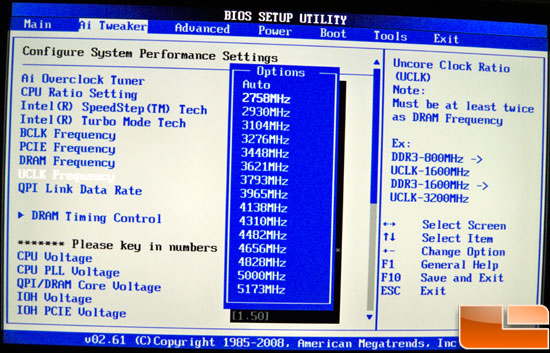
This setting is what is known as the Uncore frequency. You can see that there are quite a few different multipliers here, but generally you want to stay at double your memory speed when possible. Once you get close to 4GHz here you may start running into stability issues.
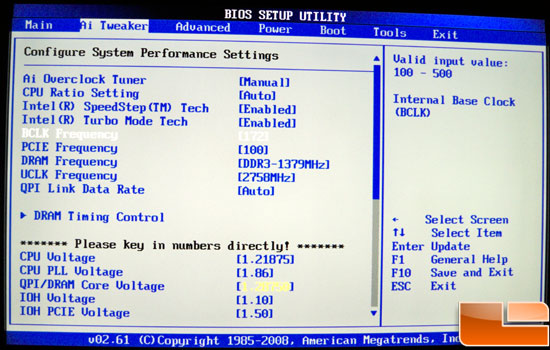
Finally, we have the BCLK or base clock. You start at 133 and can ramp all the way to 500, though once you get over 200 you’d better cross your fingers.
Comments are closed.