ASUS P5WD2 Premium 955X Motherboard Review
BIOS
I wish motherboard makers would put more time into explaining different settings within their BIOS’! Although there are great sites around the web (Adrian Rojaks Pot is a great example) that help users get the most out of their BIOS, with so many different explanations and customizations available, its hard for a user to actually get the most out of their board, an easier than you might think to damage or ruin a component.
All I ask is for a more in depth description than ” enables or disables the setting”….what setting? Please, either have a section on your website, or in the users manual that describes exactly what each setting affects!
Now that I’m done griping, lets move on. We’ll focus on the most important BIOS screens and skip the ones most everyone has seen and knows.
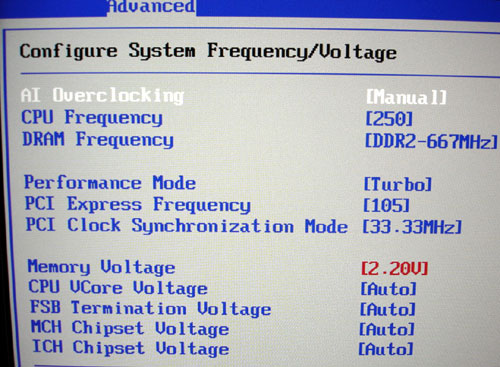
Of course the first screen any overclocker is going to visit is the ADVANCED screen. Here you will find the most important setting to include your CPU and RAM frequencies, PCI and PCI-E frequencies, and your voltages.
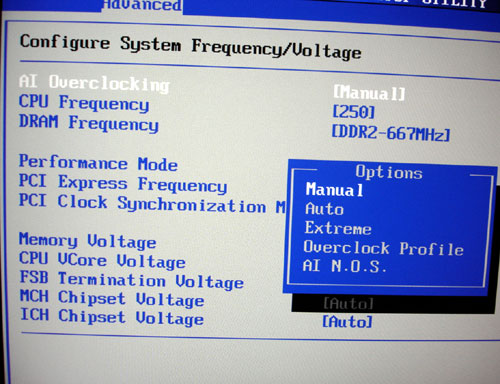
The P5WD2 Premium includes a wide variety of choices for overclocking to include AUTO, MANUAL, EXTREME, AI NOS, and PROFILE.
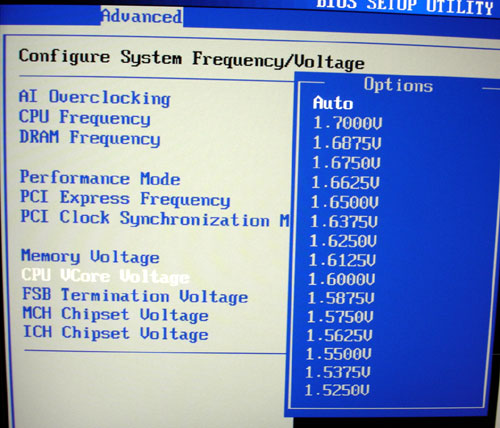
When it comes to voltages, the P5WD2 Premium has a wide variety. With the CPU you have the ability to use AUTO, or define your own voltage. I tried the AUTO setting and found most moderate overclocking experiences to be hassle free, and the voltages were more than fine. By selecting manual, you have the ability to go anywhere between 1.225 and 1.700V, more than plenty for any current CPU. One word of warning, make sure you monitor your voltages closely. Using ASUS’s Probe (their system monitoring program) my voltages fluctuated a bit, sometimes as much as .5 more than what I set them to.
Next on the voltage tour is the RAM voltage. Here some boards really skimp, and this is what seperates the decent boards from the great boards, as DRAM voltage usually affects the board greatly during overclocking. With manual settings between 1.800V and 2.20V, the P5WD2 Premium should be more than adequate regardless of what memory you use. I chose to use Corsair’s excellent XMS 5400UL memory with this board, with timings up to 3-2-2-8 at 667MHz, the 5400UL needs every bit of the 2.3V this board allows.
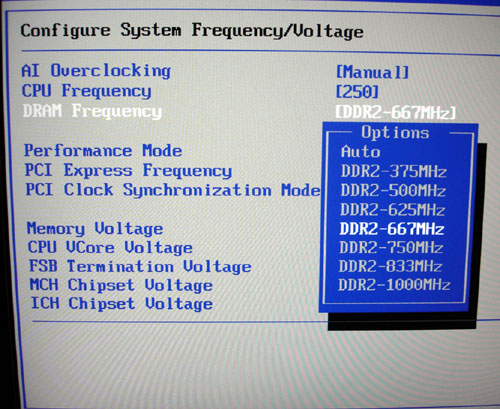
Much has been made of the memory frequencies on this board. I had a few issues when overclocking my corsair memory. A some points the memory frequencies are right on using CPU-Z 1.29, but other show the wrong frequencies. My board was correct up to about 900MHz, after that, it continued showing the proper increase, only the tactual timings in CPU-Z were much lower, and strangely they would clock to different speeds at different times.

As far as the memory timings went, ASUS’ system is much simpler thann that of companies like DFI, here you only have to worry about the main memory settings, the board itselfd controls the rest through its “Hyper Path 3” setting and of course the “PAT” found under the main “Advanced” menu.
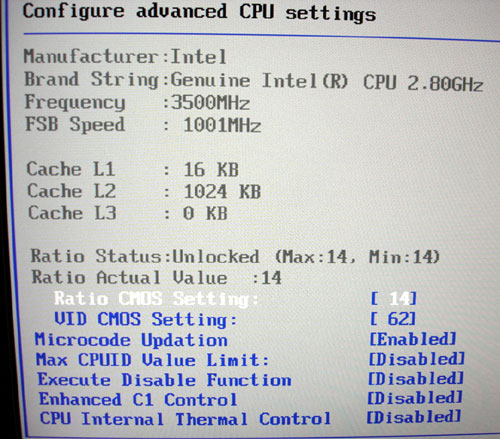
Within the CPU screen you will find a bevy of customizations available. If you have an unlocked CPU you are able to adjust the CPU ratio to maximize your systems overclock. Here you can also set your advanced features like EIST, and No Execute, found on the 6XX series and newer processors.
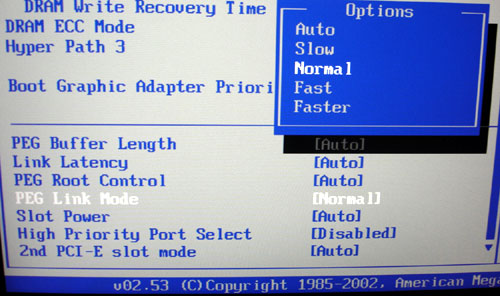
One thing that baffled me was after installing ATITool, I noticed my card would freeze up during games or my screen would go black, after using ATITool, I realized my card was being aggressively overclocked on its own. The culprit? The “PEG Link Mode” has a series of settings from Auto to Slow, to Faster, the board adjusts the cards frequency. Auto tended to set my card to Faster, while Normal set my cards frequencies to the default levels…. make sure you check this out and adjust it accordingly before playing any games.
Comments are closed.