ASUS A8R32-MVP Deluxe Motherboard Review
The Bios
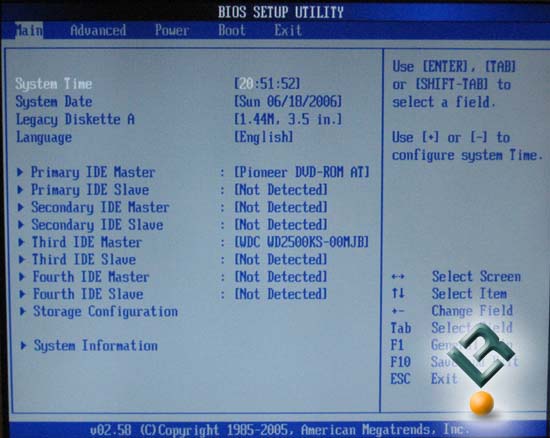
Asus has chosen the AMI bios for this board, and though I am not the fondest of this bios, it was fairly simple to navigate and use.
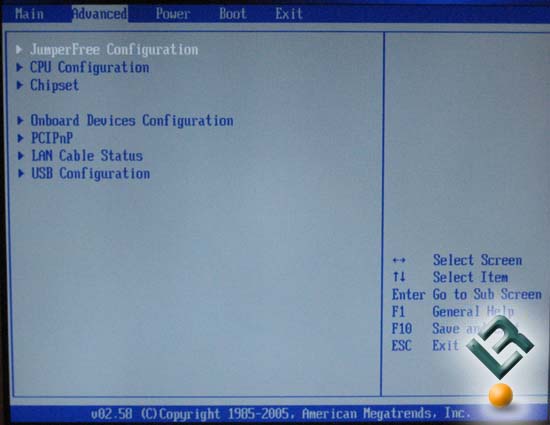
The first thing you see under the advanced tab is the jumperfree configuration. Obviousley this will be where overclockers will spend most of their time as they tweak their systems to top performance.

Under the jumperfree page we see the option of AI overclocking. Your options here are to let the board automatically overclock to a certain set percentage. You have to do absolutely nothing else, the board takes care of it all. Of course, the setting I liked the best in AI was the manual setting so I could choose all the options myself. There are many, many setting that are available for tweaking. It seems that Asus has left nothing out here!
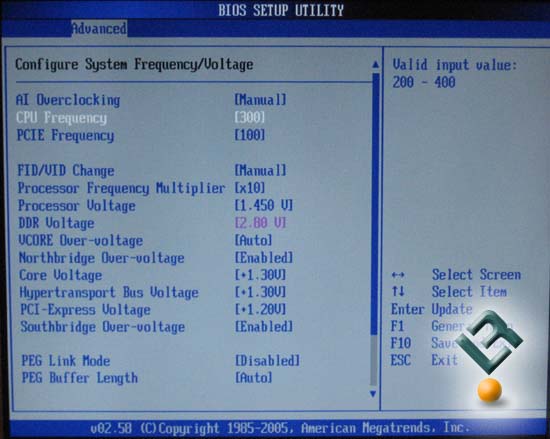
CPU frequency can be set from 200-400htt, which is more than enough for any user.
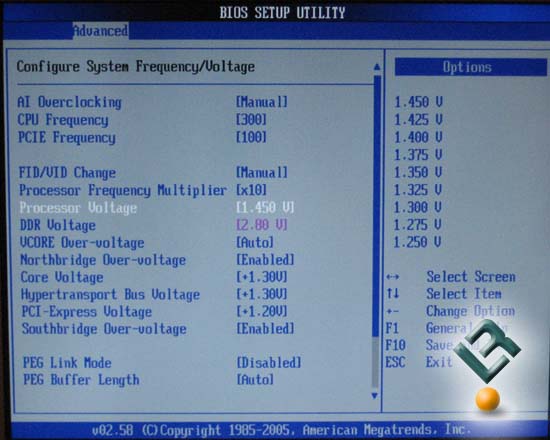
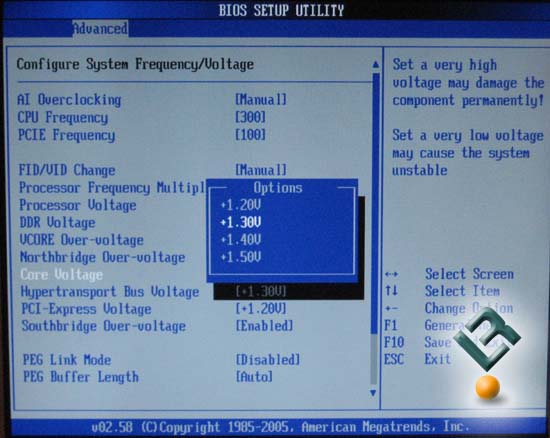
CPU voltage seems to be a little low, as it only goes up to 1.45v with my Opteron 146. I would have to say that I get very little increase in overclocking over that 1.45v on my Opteron chip that we used for our testing. From what I understand, the available vcore is dependant upon the CPU in use, though I did not have another chip for testing. While this seems like a low vcore option, Asus does add something that will help.

Here we see a setting for vcore over-voltage. This allows further tweaking of your processor voltage with three settings available: Auto, +100mV and +200mV. With this available tweak, we could actually take our CPU to a vcore of 1.65v, which is more than most would use unless the CPU is under a phase-change or DI cooler.
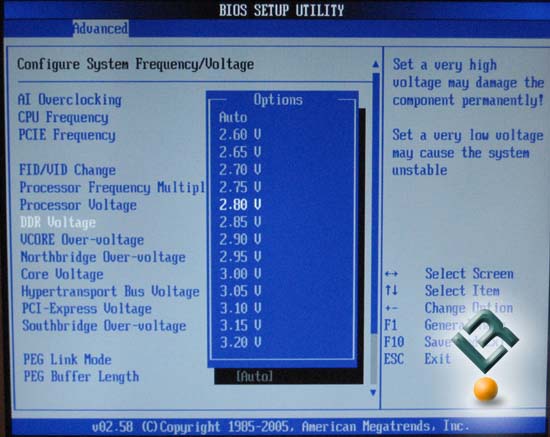
DDR voltage was extremely nice, with options up to and including 3.2v in .05 increments. It is certainly nice to see these options pretty much standard these days in high end boards.
Asus has also included the ability for some other voltage adjustments. As we see here, you can adjust the voltage of the northbridge up to 1.5v.
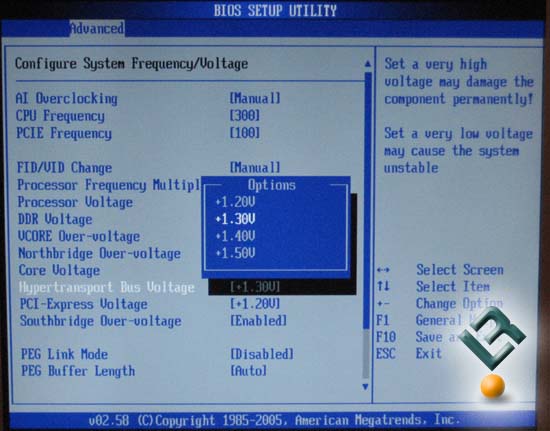
HTT voltage can also be adjusted up to 1.5v.
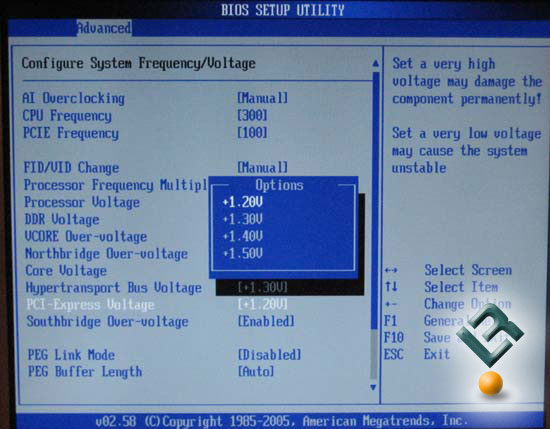
Ditto for the PCIE voltage. Options from 1.2v up to 1.5v.
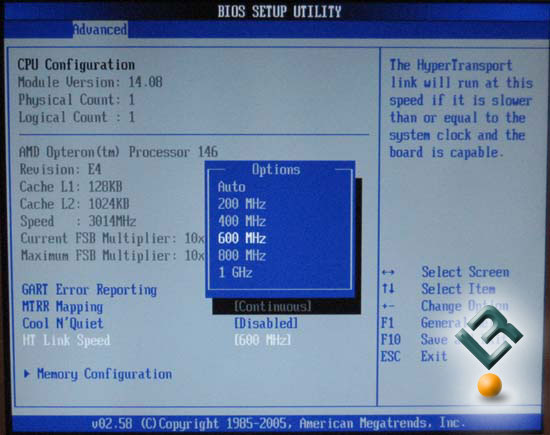
Under the CPU configuration page we can see the HTT dividers that are available. Many boards list these as just numbers 1x-5x, but here Asus lables them at there speeds of 200, 400, 600, 800 and 1000. There are a few other adjustments on this page, such as Cool and Quiet, and a very important page to go to in the Memory Configuration page.
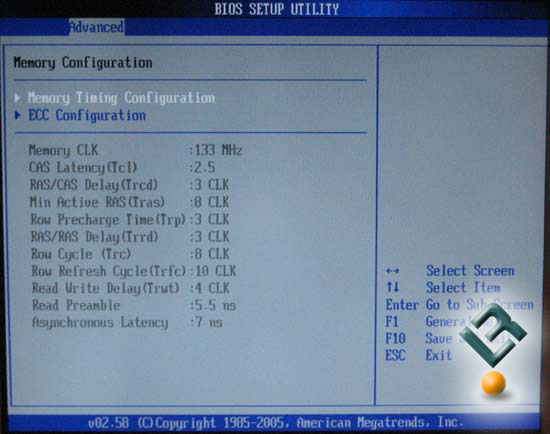
The memory Configuration page is where all of the available settings for your ram are located. The ram dividers are here, and include 100, 133, 166, 183, 200, 216, 233, or 250MHz.
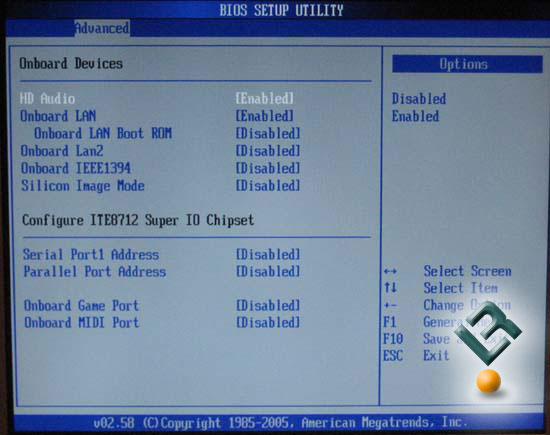
The onboard devices page gives you the opportunity to enable or disable at will the devices you will or will not be using. It is always a good idea to disable the things you will not be using, as they just take up resources that could be better used.
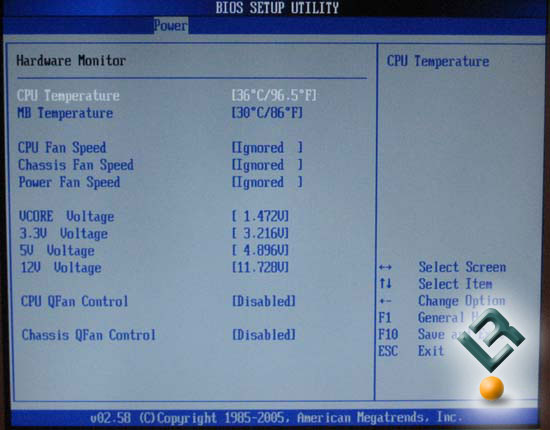
The hardware monitor page gives useful information for your system. Just an interesting note here, as you can see, even with the vcore that we had set at 1.45, the board tended to overvolt just a little.
Well, that is enough of the bios, let’s move on!
Comments are closed.