ASRock 4Core1600P35-WiFi+ Motherboard Review
Board Layout
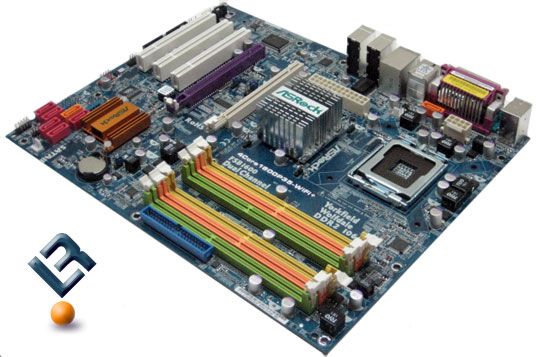
First glance at the ASRock 4Core1600P35-WiFi motherboard shows us a typical ASRock layout. ASRock does not do a lot of changing to their boards when it comes to layout. Some of the things that we have mentioned in the past about ASRock motherboards are still true today, including a couple of minor, yet annoying things which we will see as we take a closer look at the board.
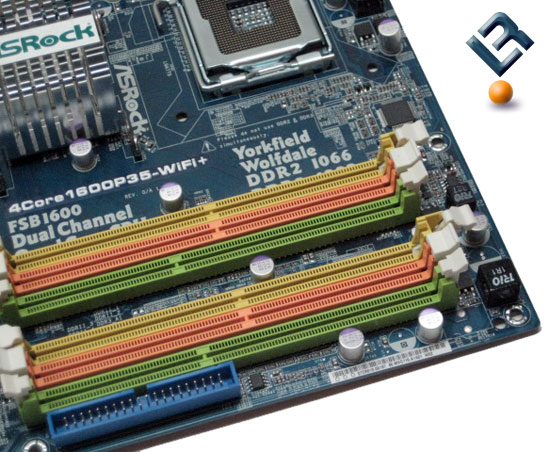
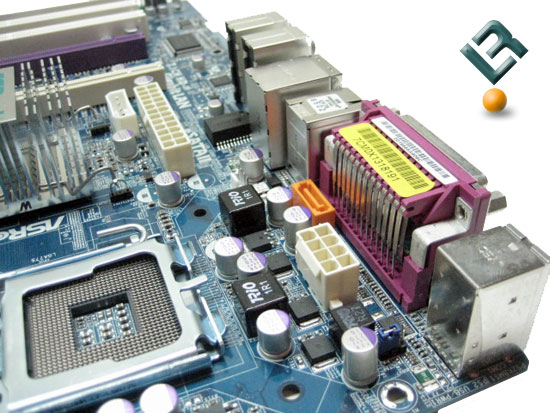
The top right of the board is where we find our lone IDE connector It is smartly placed at the edge of the board, which helps to keep the cable clutter out of the way. One interesting aspect of the board also happens to be located here with the dimm slots.
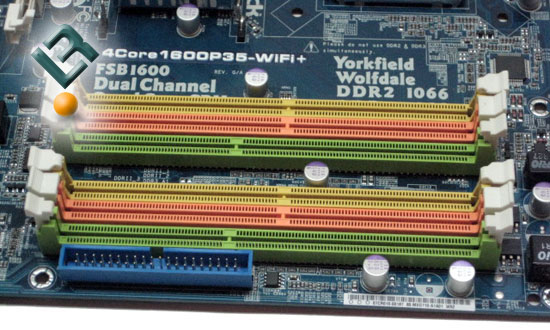
This ASRock board supports both DDR2 and DDR3 memory dimms. There are four DDR2 dimm slots which support up to 8GB at speeds of 1066/800/667. DDR3 support includes up to 4GB in the two dimm slots that are available. DDR3 support is for speeds of 1333/1066 and 800. Just as a note, you cannot use both DDR2 and DDR3 at the same time. This is a pretty nice feature of this board, and makes for a nice upgrade path once the price of DDR3 memory comes down to a reasonable price. Until then, you will have no issues using the DDR2 slots.
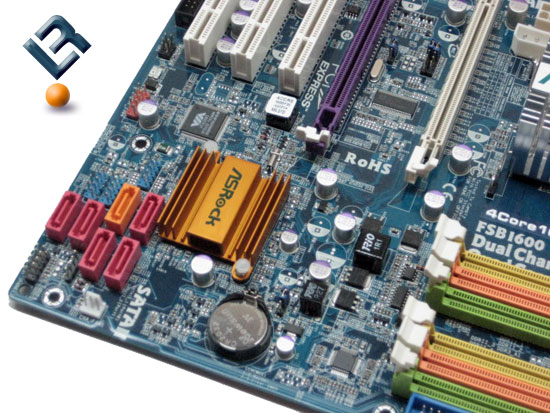
At the bottom right of the board, we find the Intel ICH9R Southbridge. This Southbridge is passively cooled by an aluminum heatsink. We had no heat issues during testing, so we can only assume that this heatsink is adequate for the cooling needs of the Southbridge.
Underneath the Southbridge, we find our six SATA connectors. These are SATAII compliant, and support RAID in 0, 1, 10, 5 and Intel Matrix Storage. This board also supports NCQ, AHCI and Hot Plug functions.
Just under the SATA ports we find out front panel pin connections. There is no color coding or anything to aid in setup, so make sure you have your manual handy as you set the board up.
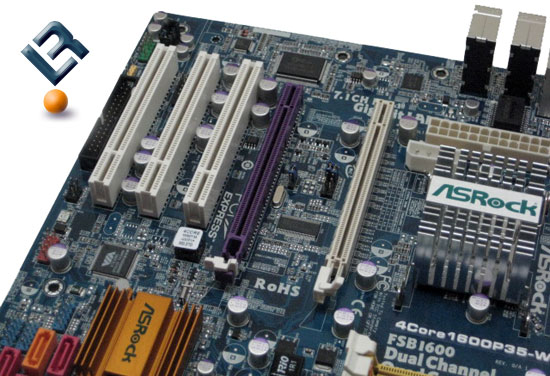
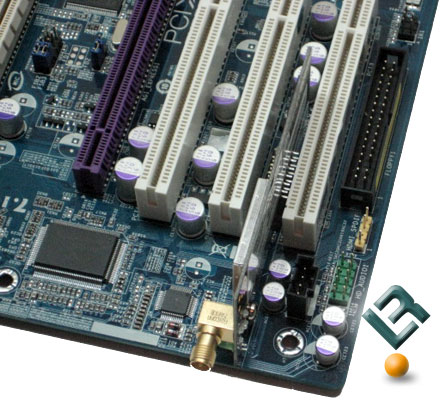
The bottom left of the board is where we find the home of out floppy connector at the bottom edge of the board. Just above that we have our 3 Legacy PCI slots. Right next to the top PCI slot we have our BIOS chip. Just above the PCI slots we have our two PCI-E slots. The ASRock 4Core1600P35-WiFi is capable of running a Crossfire setup with two capable ATI video cards. The white PCI-E slot is x16 capable, while the purple PCI-E slot is x4 capable.

ASRock has fit the board with the Realtek ALC890 audio chip, which provides 7.1 channel HD sound and has DTS support.
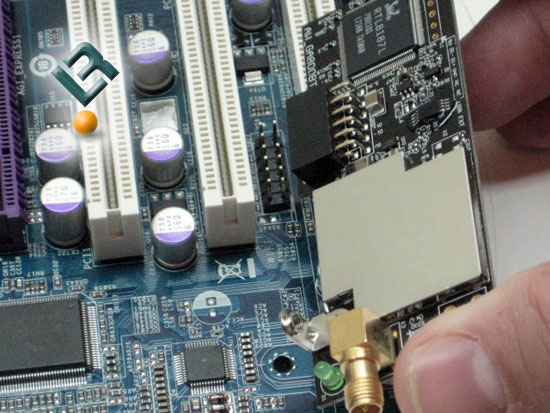
Obviously, with a name like 4Core1600P35-WiFi, there is some type of wireless capability on the board. ASRock has packaged a nice little add-on card that allows for the end user to have wireless capability without having to go out and buy an adaptor. This wireless card is based on a Realtek RTL 8187L chip, and is 802.11g capable. In the above picture, you can see that the wireless card fits right in between the bottom two PCI slots on the board.
Once installed, you can see that there still seems to be room to fill both PCI slots that the wireless card sits between. This wireless device was easy to set up and easy to use! The connector on the card is for the antennae that is needed for operation.
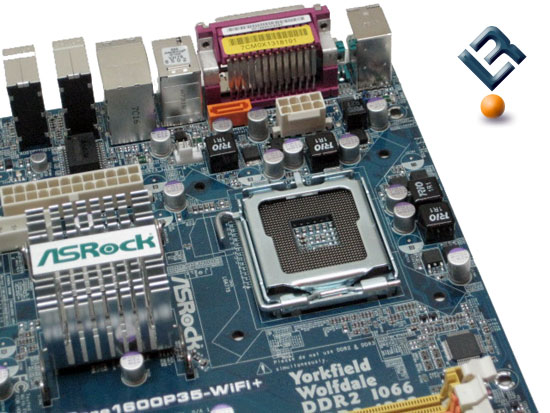
The top left of the board houses our CPU socket, which has plenty of room around it for larger heatsink and fan setups. We can also see the large aluminum heatsink that covers the P35 Northbridge.
To the left of the heatsink, we have the 24-pin power connector and another 4-pin molex connector that is used for a little extra power when running Crossfire. Both of these connectors are poorly placed. ASRock has consistently placed their 24-pin power connector in awkward positions. This makes for a mess when running wiring and trying to keep things neat and not block air flow in the case.
The 8-pin 12v power connector is located just behind the back I/O panel, which is not terrible. It could be a little closer to the edge, but we can live with it here. Under that is another SATA connector which actually is te eSATA connector that is found on the back I/O panel, which we will see shortly.
This picture just gives you a little better view of how crowded this area of the board is. ASRock really has packed a lot of things on to this board, so a little awkwardness should be expected.
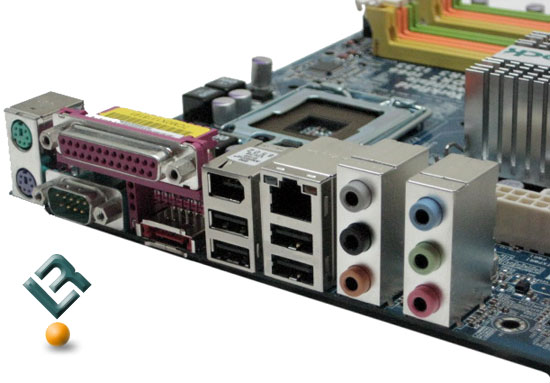
The back I/O panel is quite a site to see, with a great mixture of old and new. We have our old tried and true ps/2 connectors for keyboard and mouse as well as the old serial and parrallel connectors. We also have the eSATA port that we talked about, as well as four USB2 connectors, firewire, Lan and our six audio jacks.
Let’s take a look at the bundle and BIOS!
Comments are closed.